Vent window weatherstripping can be an intimidating task to take on and most don’t want to attempt it. Though it’s not a quick 3-step project, it doesn’t have to take up an entire weekend either. We’ve created a comprehensive guide to walk you through every step so you can confidently tackle this project at home.
This step-by-step tutorial shows you how to successfully replace the window felt, run channel, and vent window weatherstripping on a 1987 Chevrolet R10. This tutorial applies to Chevrolet and GMC K-, C-, & R-series trucks and suburbans from 1981-1991.
Understanding the Components
The 1981-1991 Chevy trucks use three main components to seal the door glass:
- Vent Window Weatherstrip: Covers the entire perimeter of the vent window
- Run Channel: Seals along the outer edges of the door glass
- Window Felts: They sandwich the door glass and keep it from rattling
One-piece vs. Two-piece
There are two different styles of vent window seals that are offered for these trucks: a one-piece and a two-piece. Both styles cover the entire perimeter of the vent window, but they do not interchange, so it’s important to know the difference. Since the vent window must be completely disassembled before you can take off the old weatherstripping, looking at the pivot hinge is the easiest way to identify which style you have.
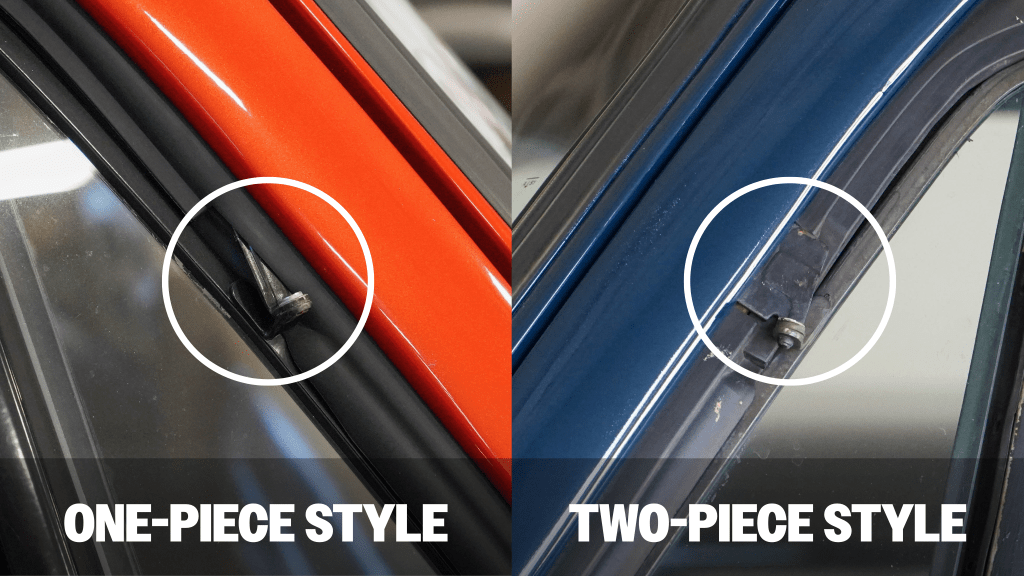
If you have a two-piece style, the pivot bracket will be completely exposed and if you have a one-piece style, that bracket will be covered by rubber.
Installation Steps
Removing the Vent Window
- Remove the door panel – There are different types of door panels. Ours has an arm rest and power locks and windows, yours may be different, but they will all come off similarly. Start with the door lock knob, then remove the screws on the handle bezel and take the bezel out, then remove the two screws in the armrest and the remaining four screws along the bottom of the door panel. Once all the screws are out, lift the panel up and off. Since this truck has power locks and windows, those connectors will need to be removed for the panel to come off. The battery must be disconnected before attempting to take off the power lock and window connectors.
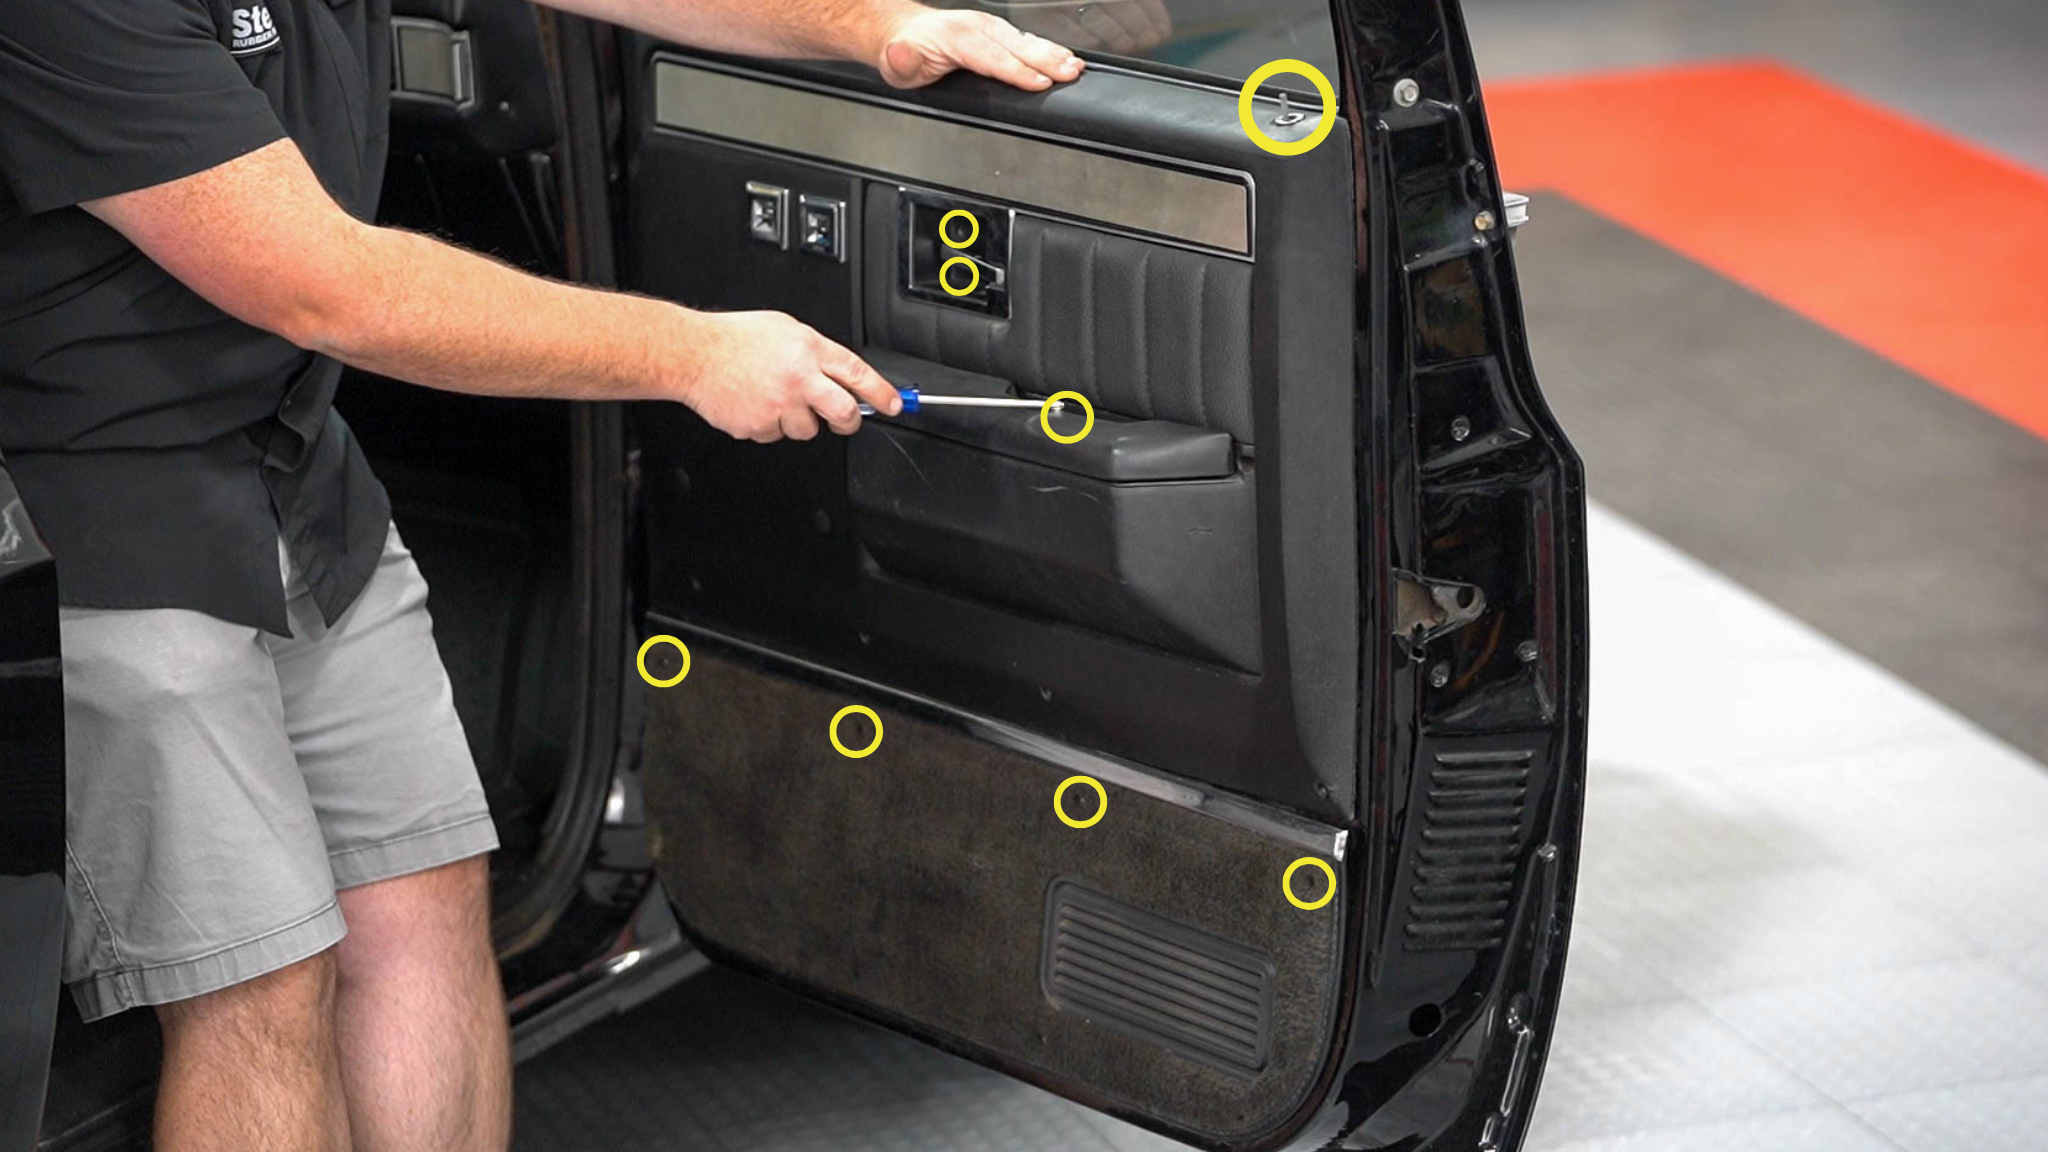
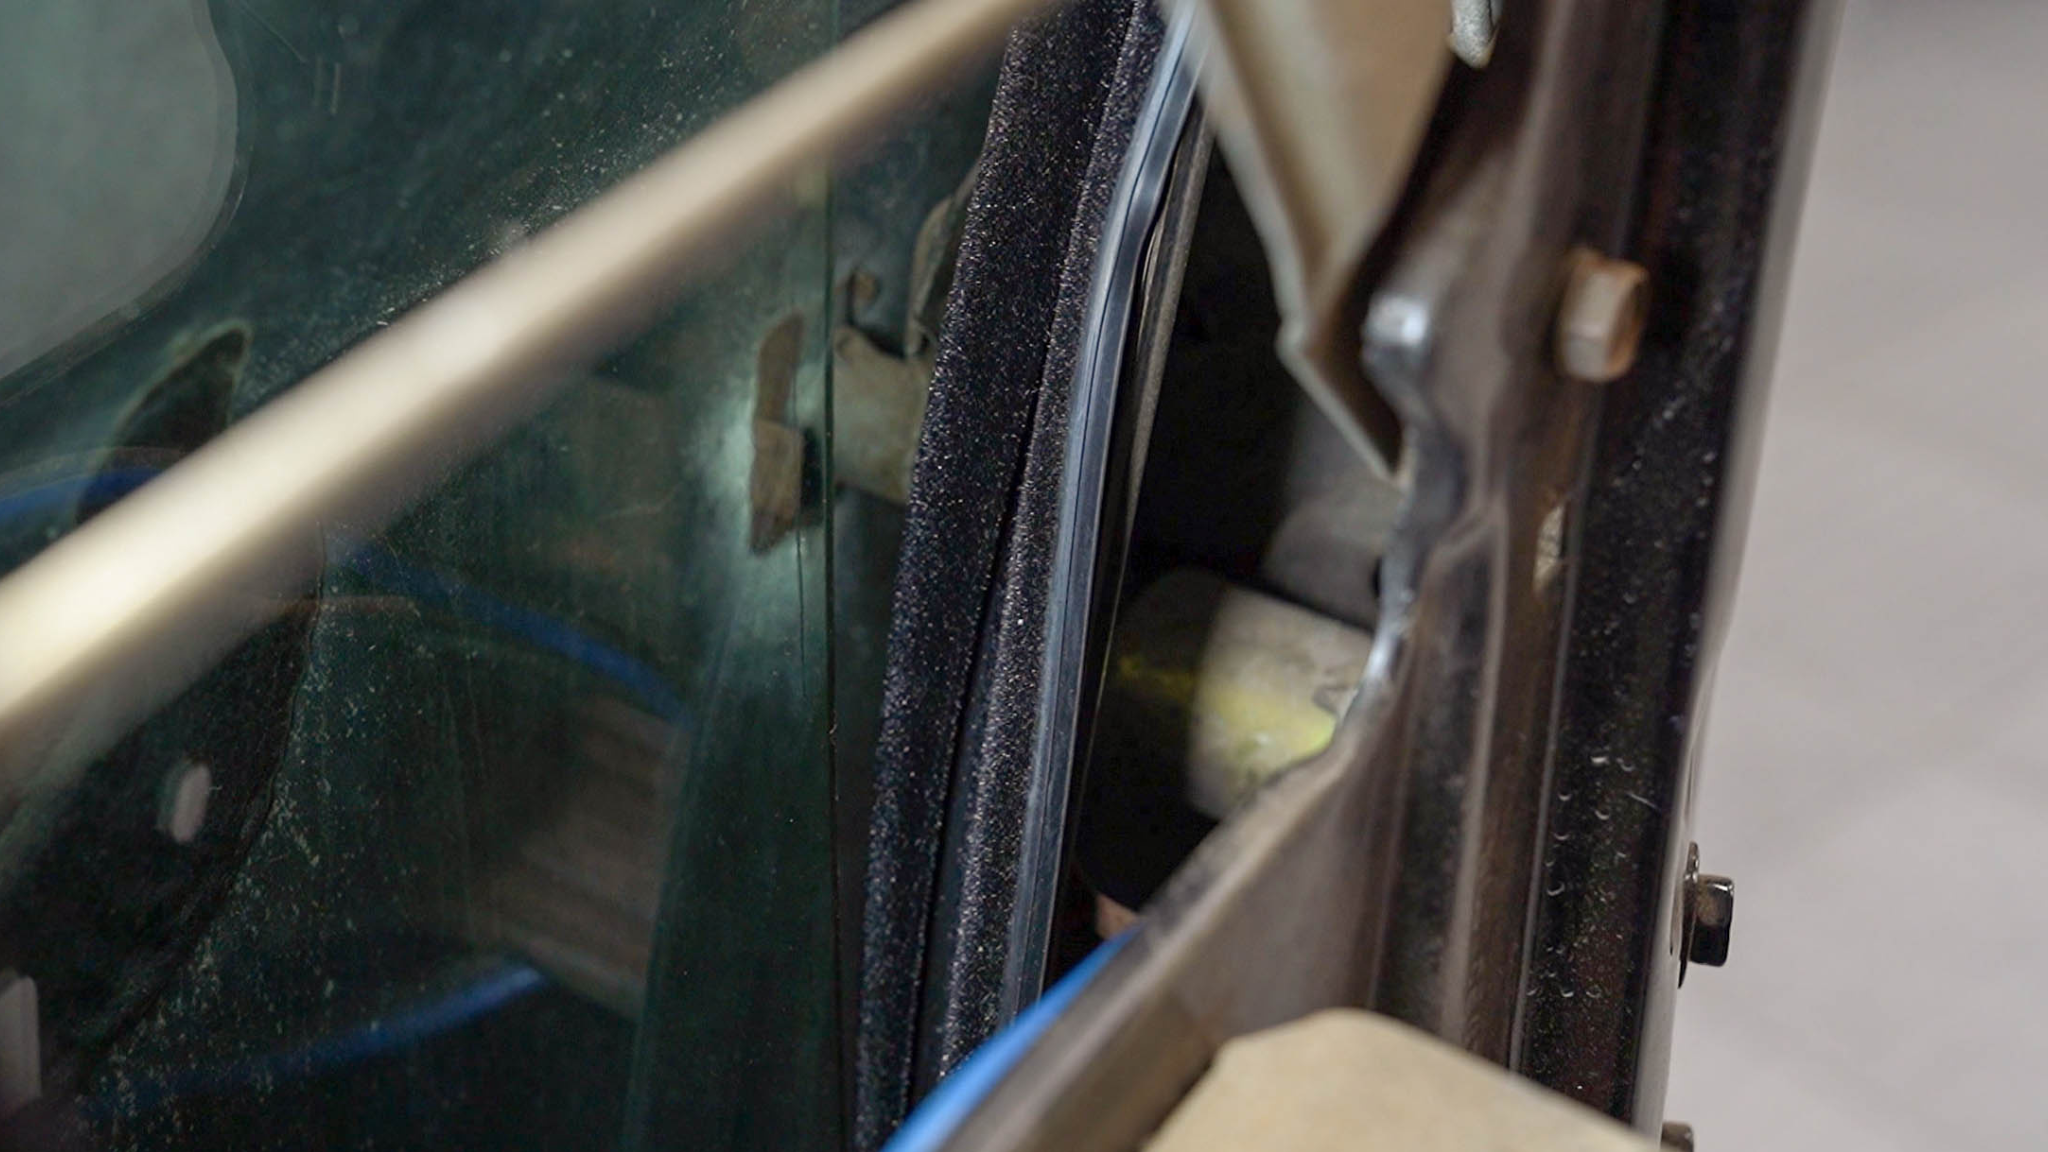
*Note: the inner window felt is attached to the door panel, which you can remove now during this step, or you can set it aside and remove it as one of the last steps. If removing it now, see step #14 for instructions. - Remove the run channel – The run channel is just pressed in place. So, all you need to do is find a spot where you can get a good grip and pull it out until the entire seal is removed.
- Remove the outer window felt – Also referred to as beltline weatherstrip, the outer window felt is just held in with clips, so start at one end and pull upward to pop the clips out.
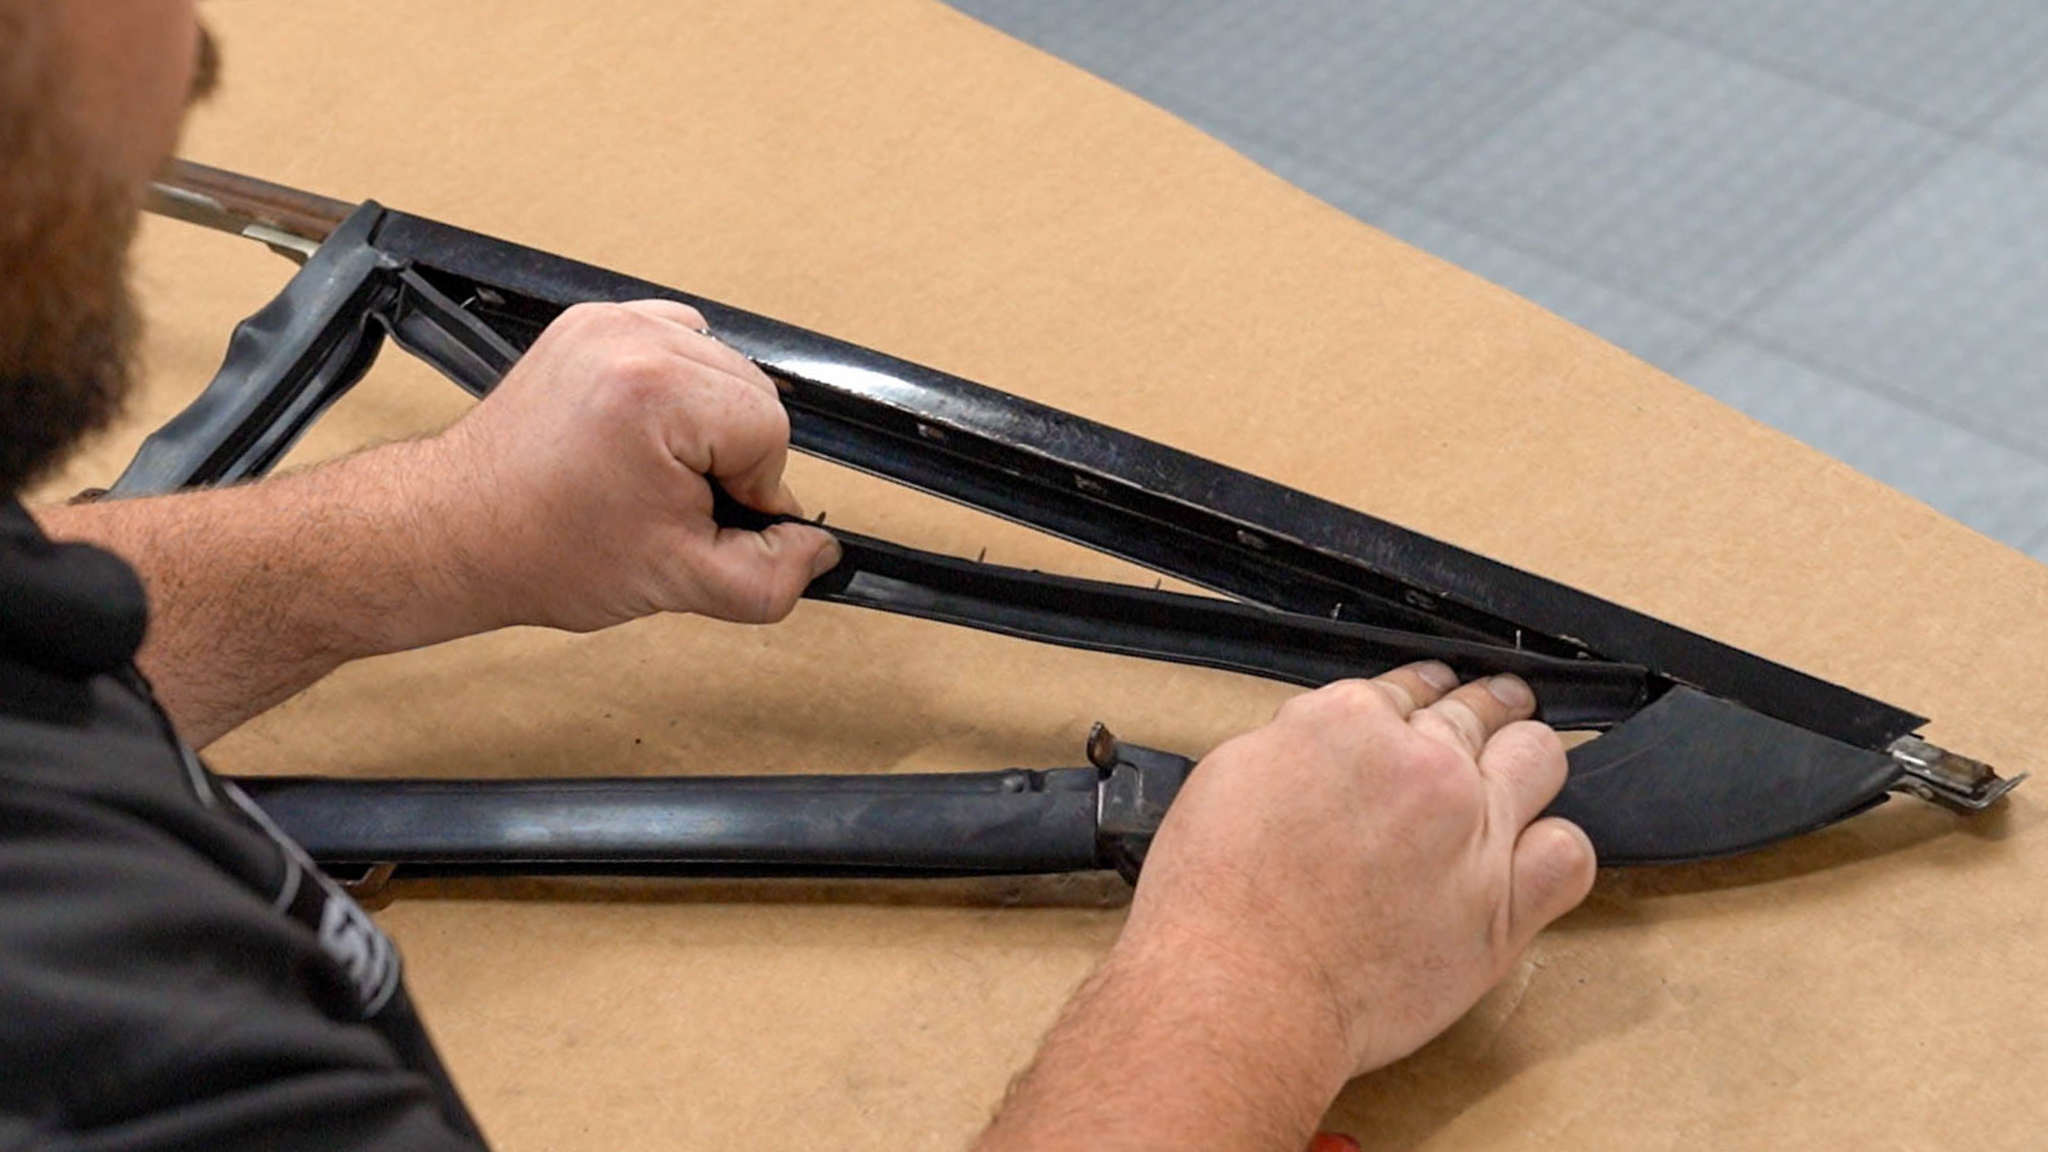
Pro Tip: always organize and label your screws and bolts so you know exactly where they go when you put it back together. - Remove the vent window frame – There are two screws that hold the vent window frame to the door, one at the top of the vent window frame and one on the outside of the vent window glass, as well as one bolt at the bottom that holds the bracket.
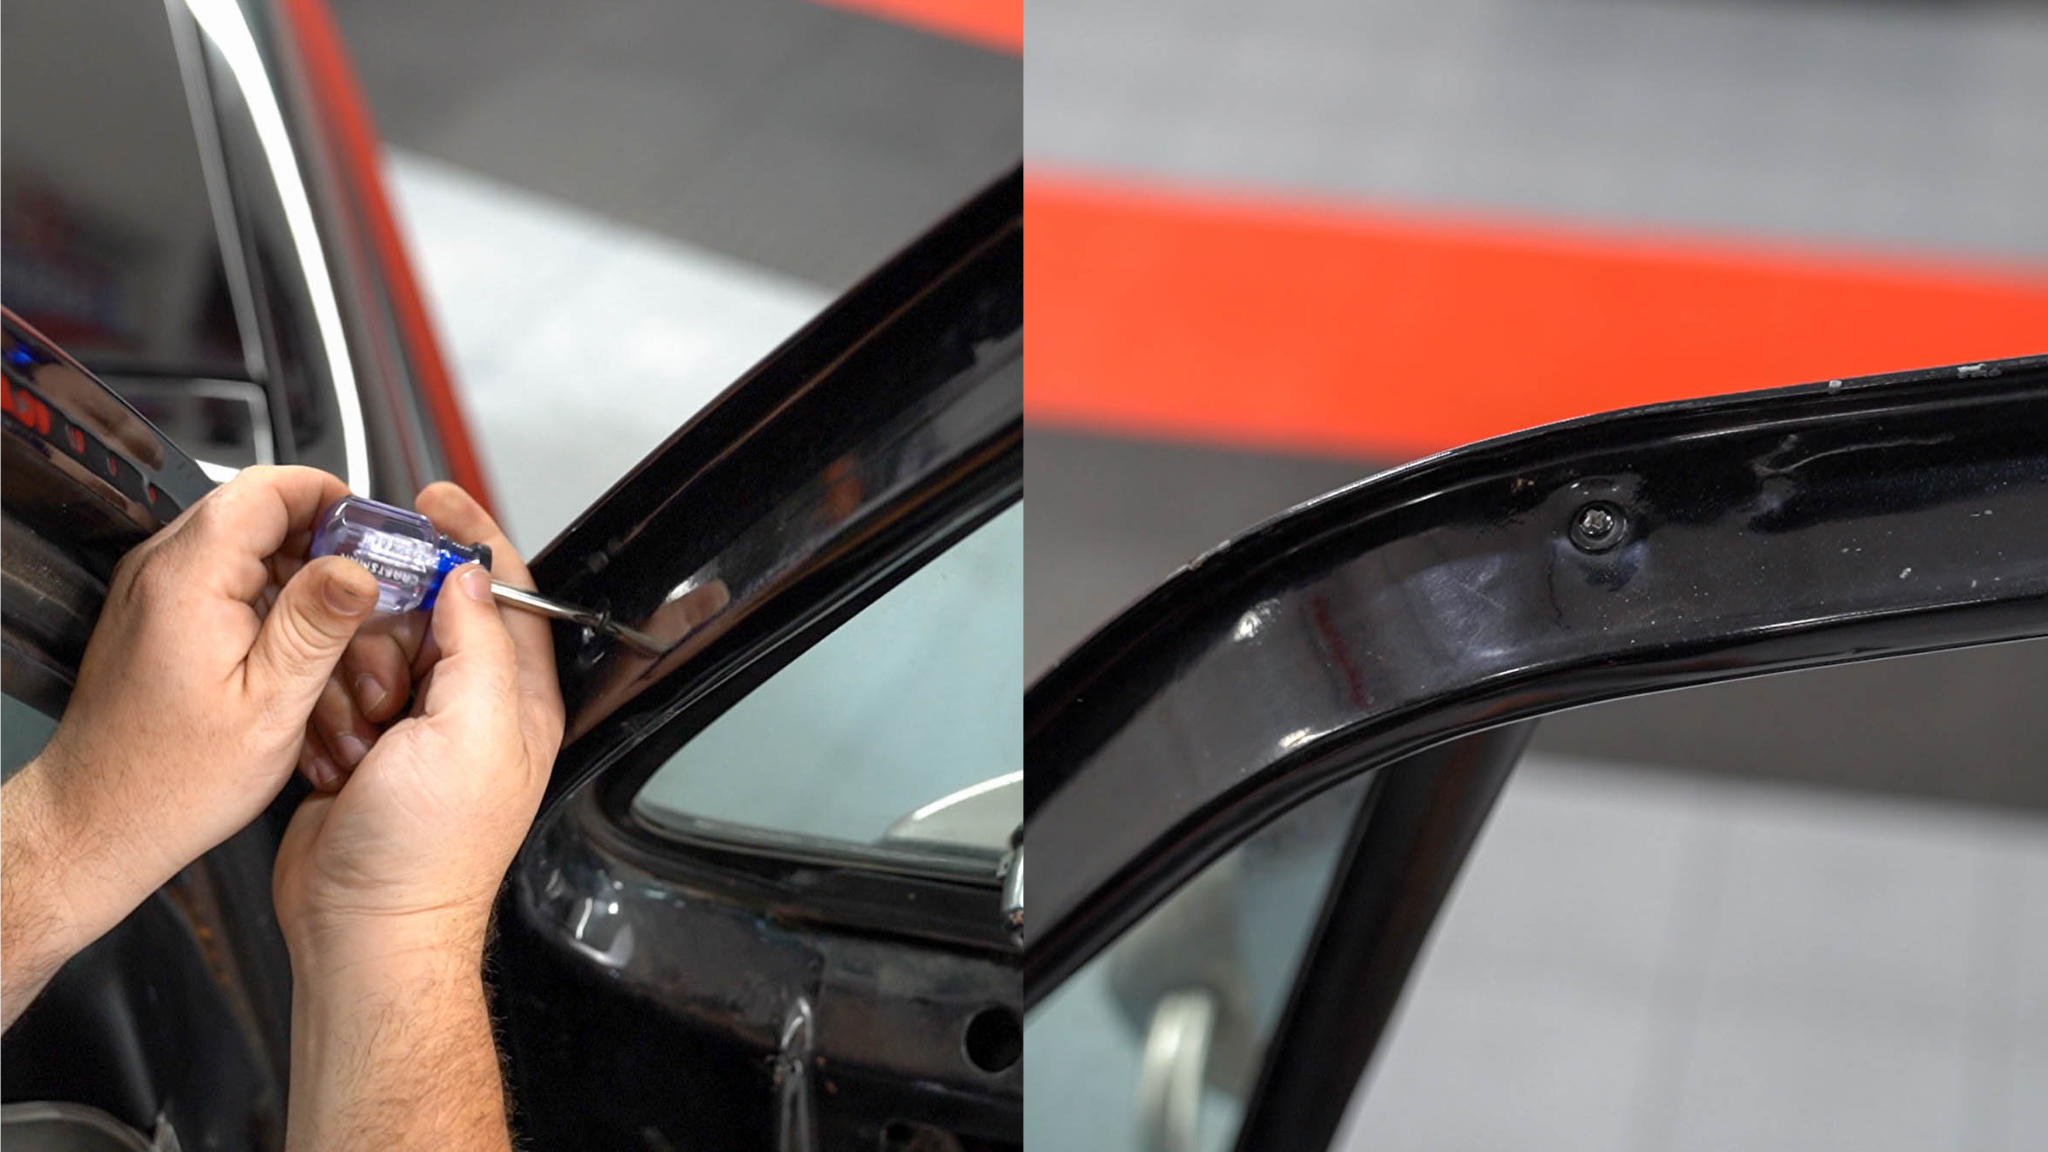
Remove the bolt and screws first, grab the top portion of the vent frame and pull straight back until it comes loose. The vertical divider channel extends deep into the door frame and has a J-shaped bracket attached at the bottom, so pay close attention when pulling the vent frame out because it may require some finagling to avoid damaging the interior components of the door frame.
Disassembling the Vent Window
- Remove the vent window glass – When you get to this step, it’s best to move to a table or work bench. Before you can get the vent glass out, you’ll need to remove the spring assembly. The spring assembly is made up of 1 nut, 1 wing washer, 1 spring, and 4 other washers, all of which go in a specific order. So, we strongly recommend taking a photo before removing anything and laying the parts out in the order they come off to ensure you have the correct order when it’s time to replace them.
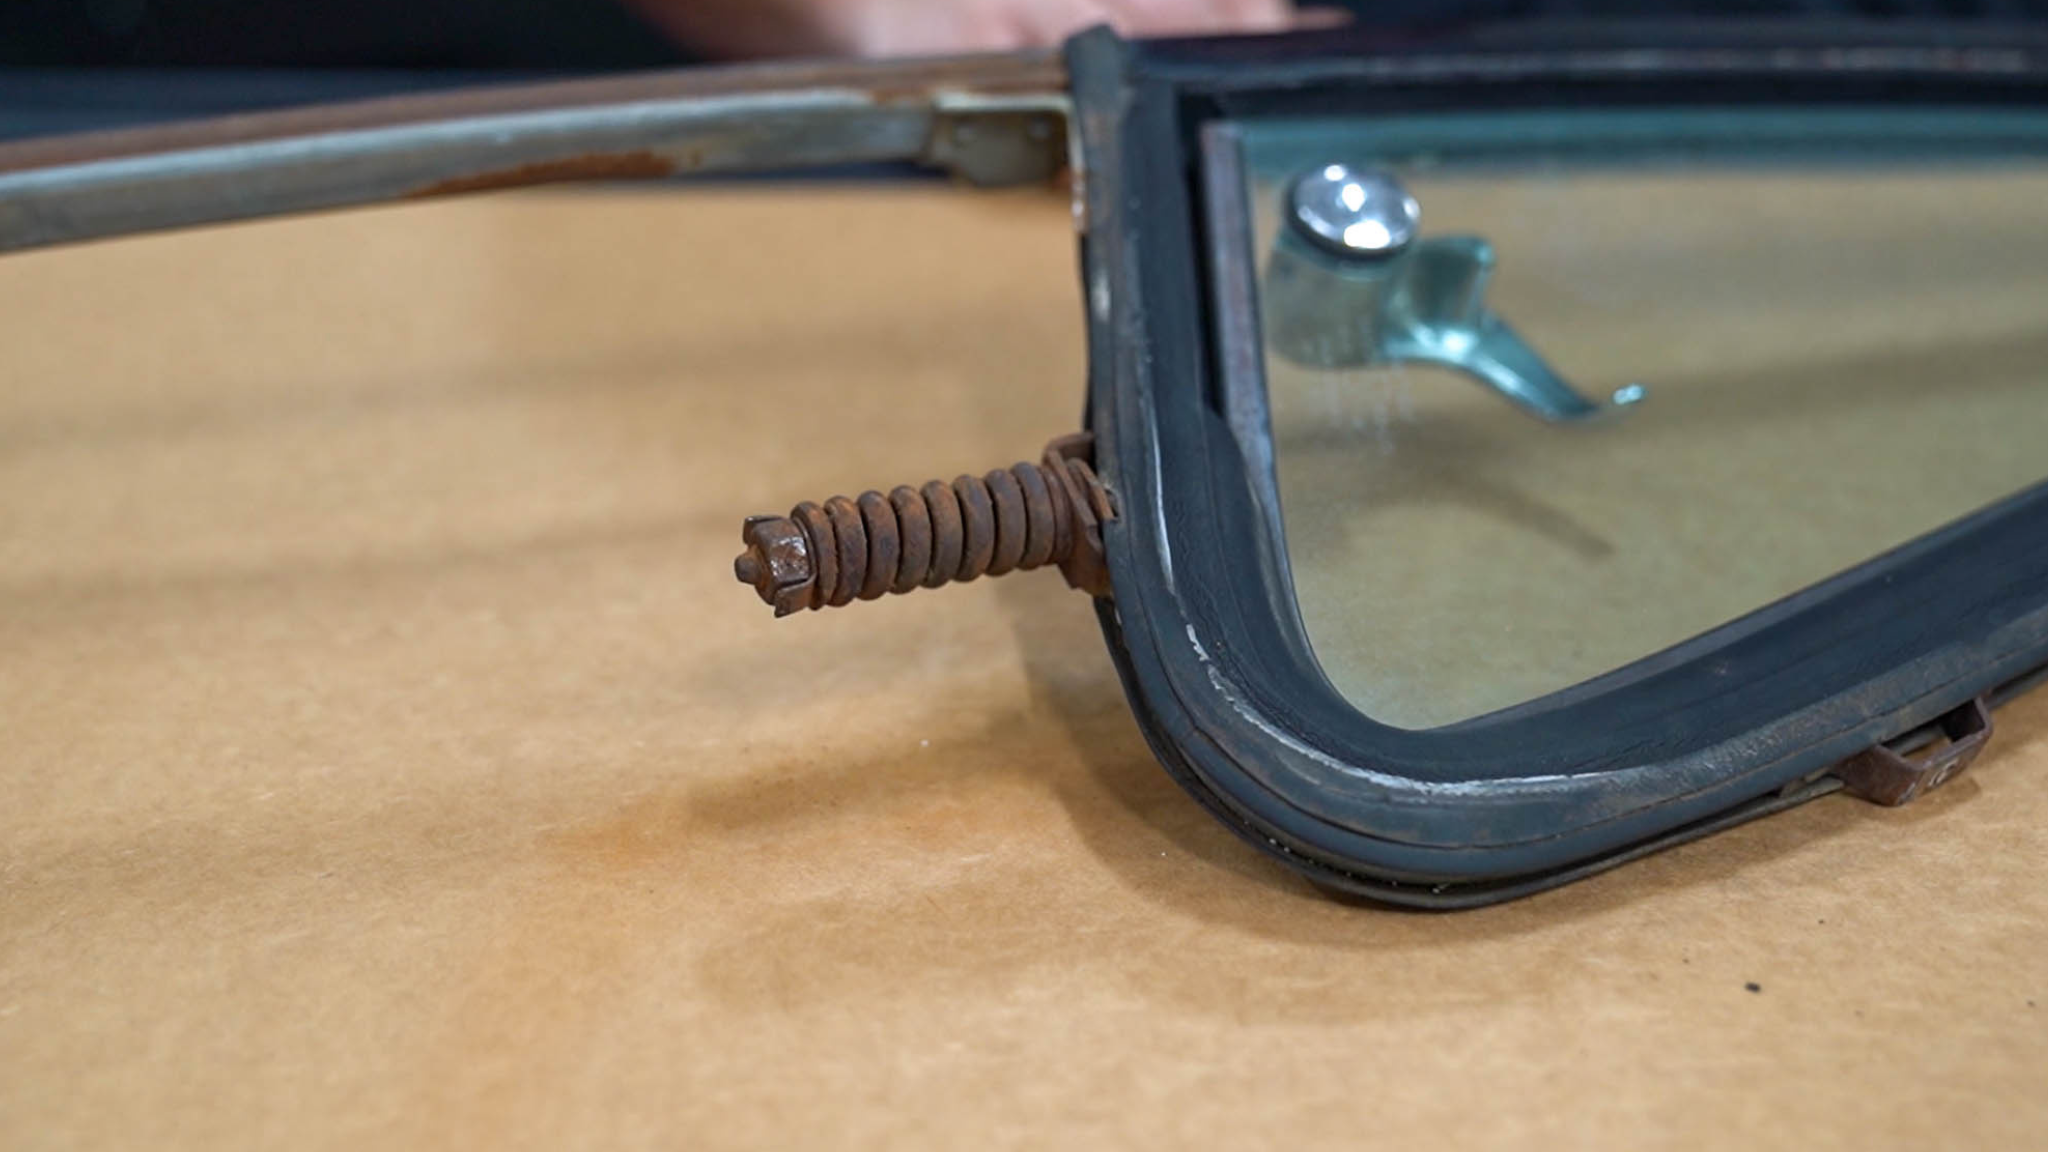
First, you’ll need to release the wing washer so you can remove the nut, then remove the wing washer, then the pivot spring, and then the two washers (one metal and one fabric) behind the spring. Next, you’ll need to drill out the pivot rivet to release the glass. Lastly, rotate the vent glass and begin pulling up until the pivot bar comes out. There are two additional washers on the pivot bar in between the vent frame, so you may need to press down on those while pulling the glass up and out.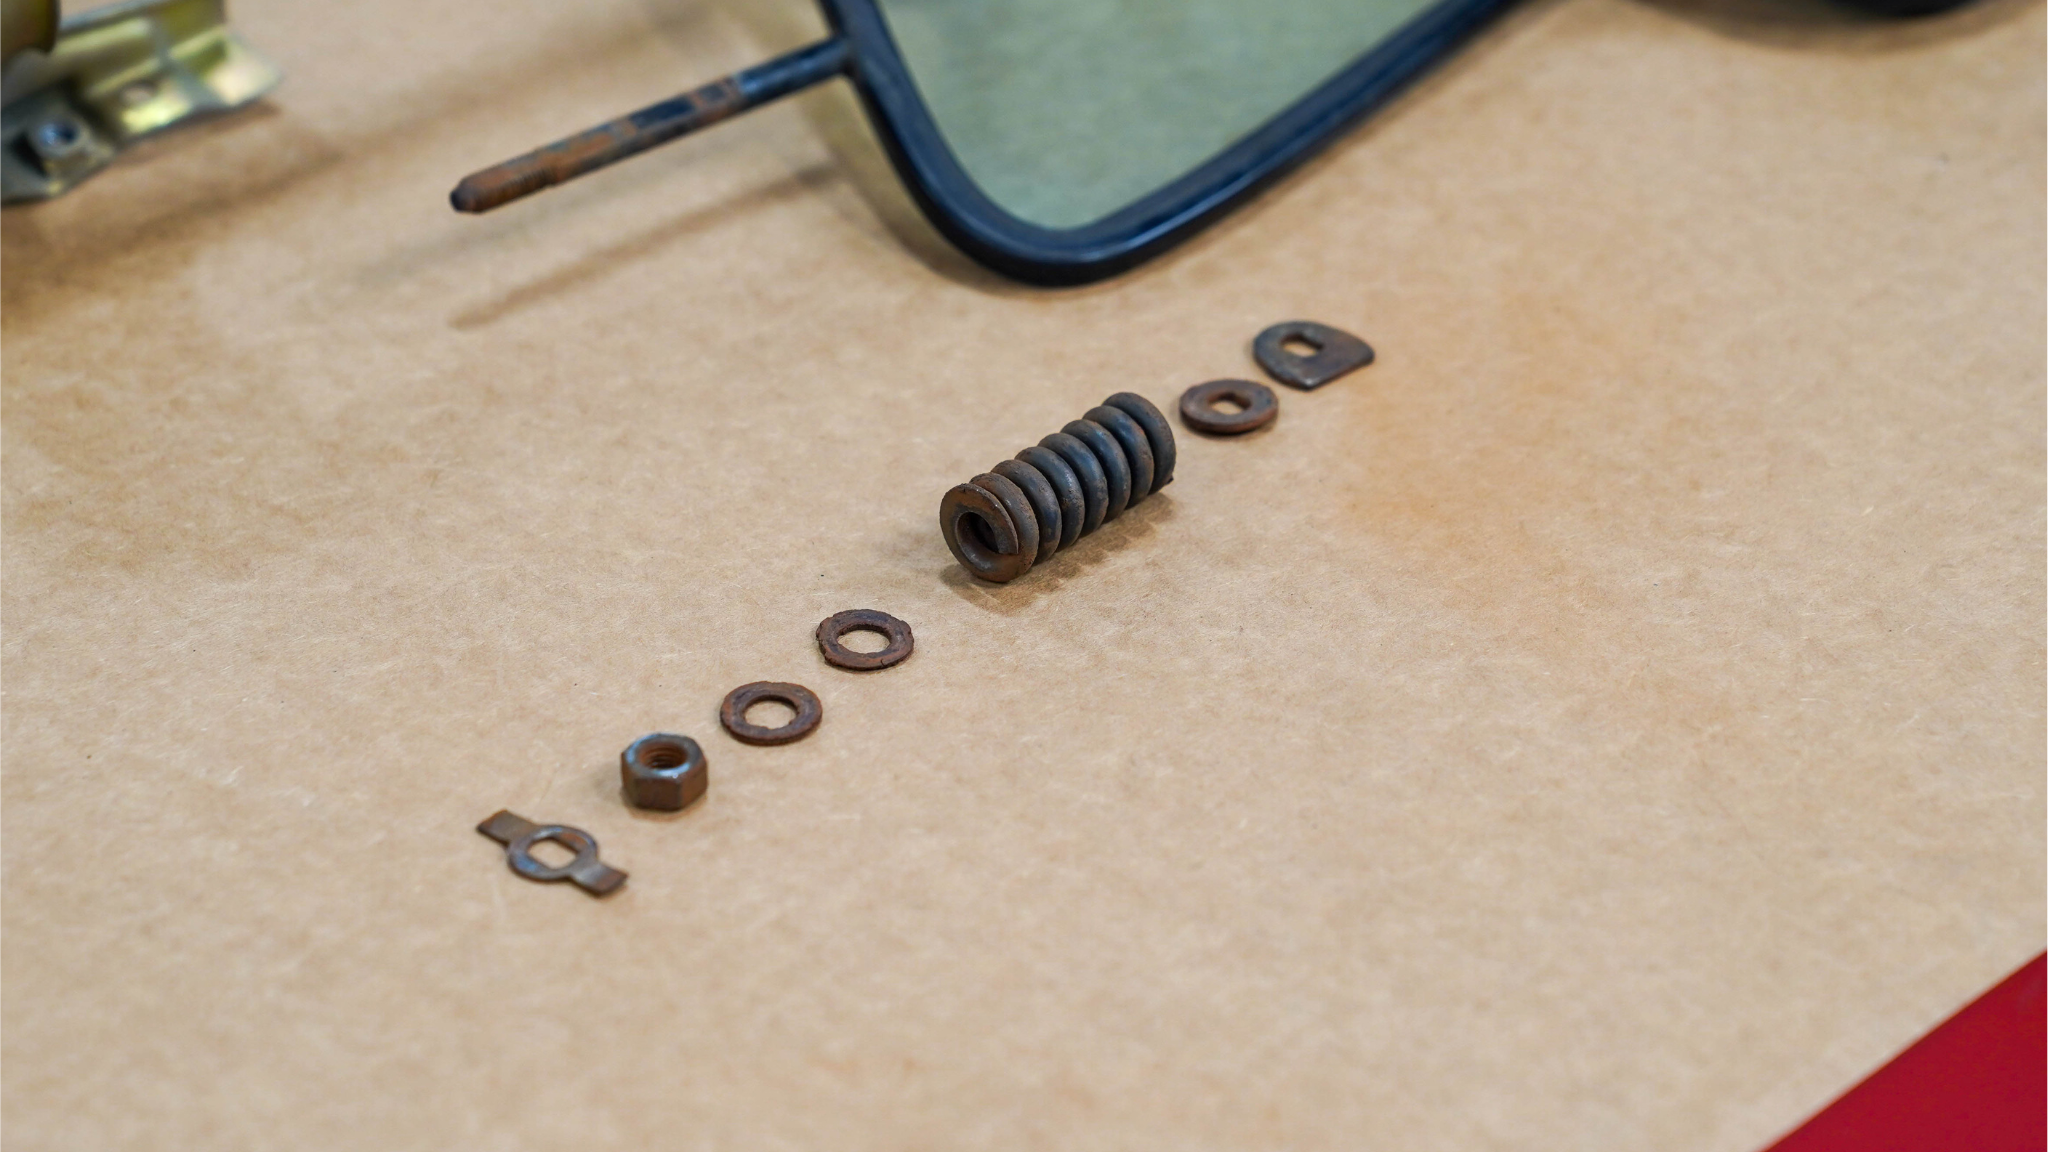
- Remove the old vent window seals – Now that the vent glass is out of the frame, you can remove the old division post weatherstrip. On the inside of the vertical vent frame channel, you should see the tabs holding the division post weatherstrip in place.
With a flat head screwdriver, release each of these tabs and remove the division post weatherstrip. Then, remove the remaining weatherstripping around the frame.
Installing the New Weatherstripping
- Perform a test fit – It’s very important to do a test fit when installing new weatherstripping. Ensure the new vent window seal lines up correctly with the hole at the pivot point, around the hinge bracket, and at both ends.
Important note: During the test fit, we ran into an issue getting the new vent window seal to fit into the top corner of the vent frame. After investigating further, we realized the end of the inner channel at the top of the frame was crushed, which was preventing the new seal from seating properly. With permission from the vehicle owner, we trimmed off the crushed end of the channel so that the seal would install correctly.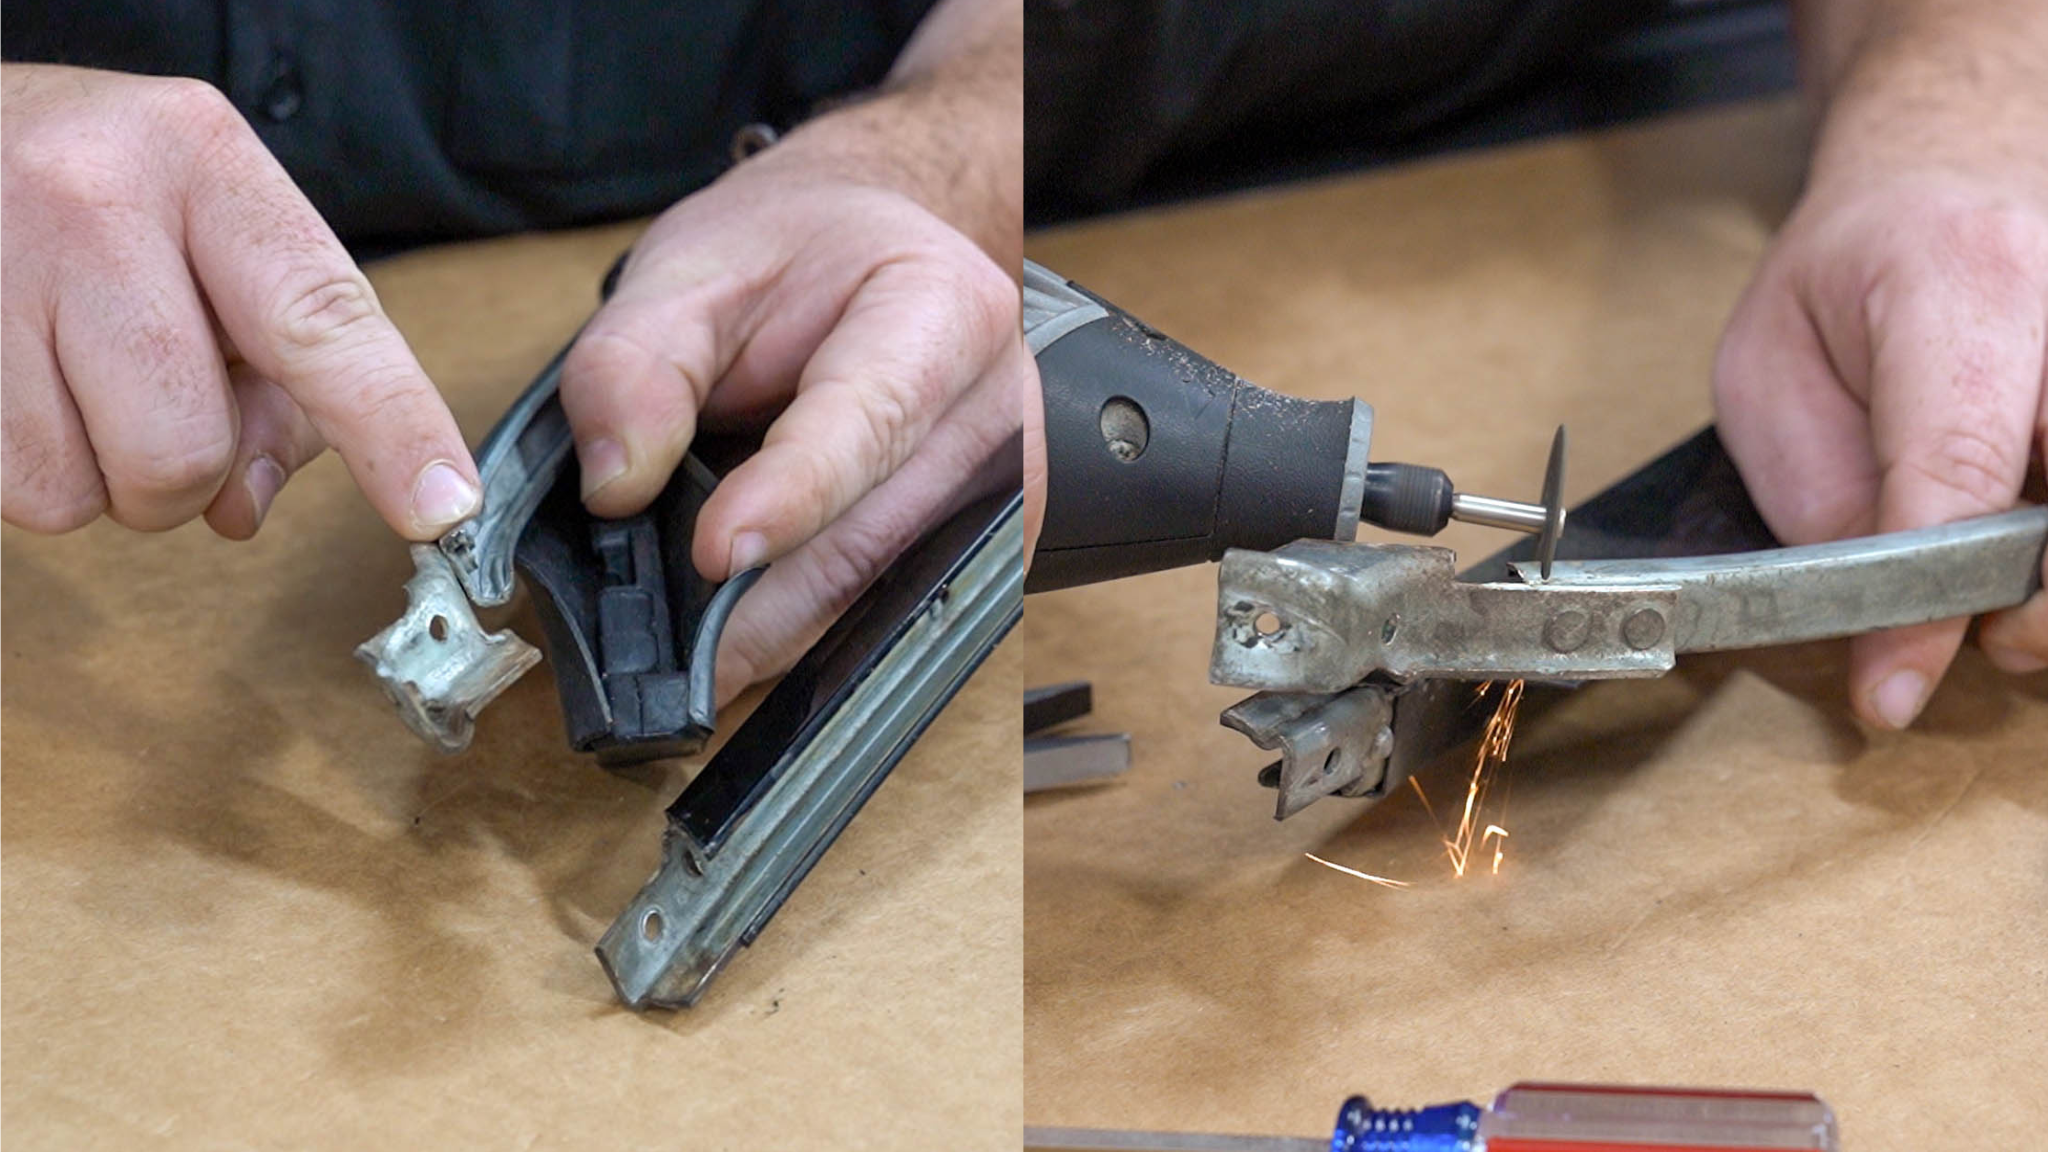
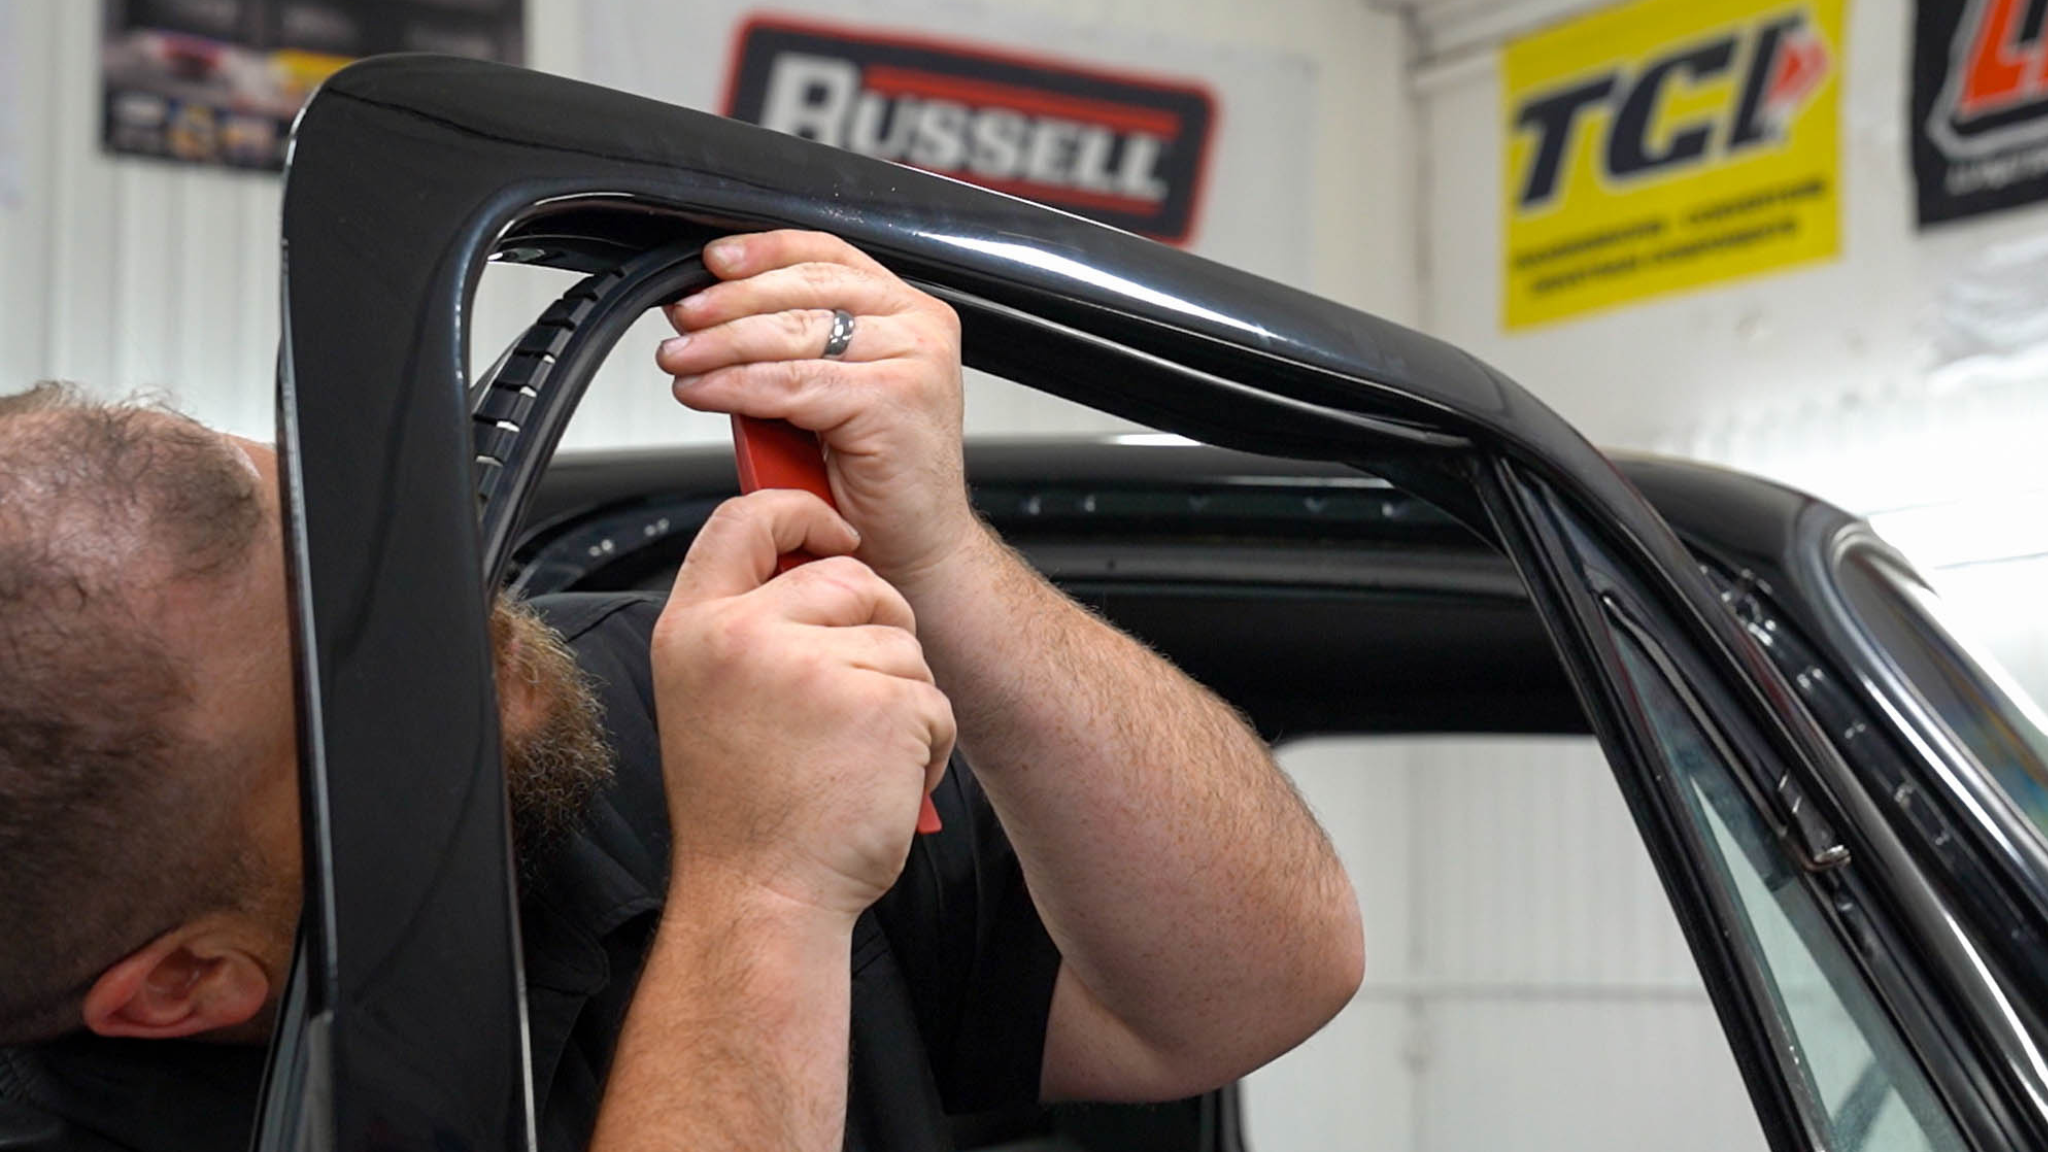
- Install the vent window seal – After a successful test fit, it’s time to start installing the vent window seal. Starting at the hinge bracket, line up the seal and set one side into the frame, then tuck in the other side using a plastic tuck tool. Continue working your way around the vent window frame until the weatherstrip is completely installed and fully seated into the channel.
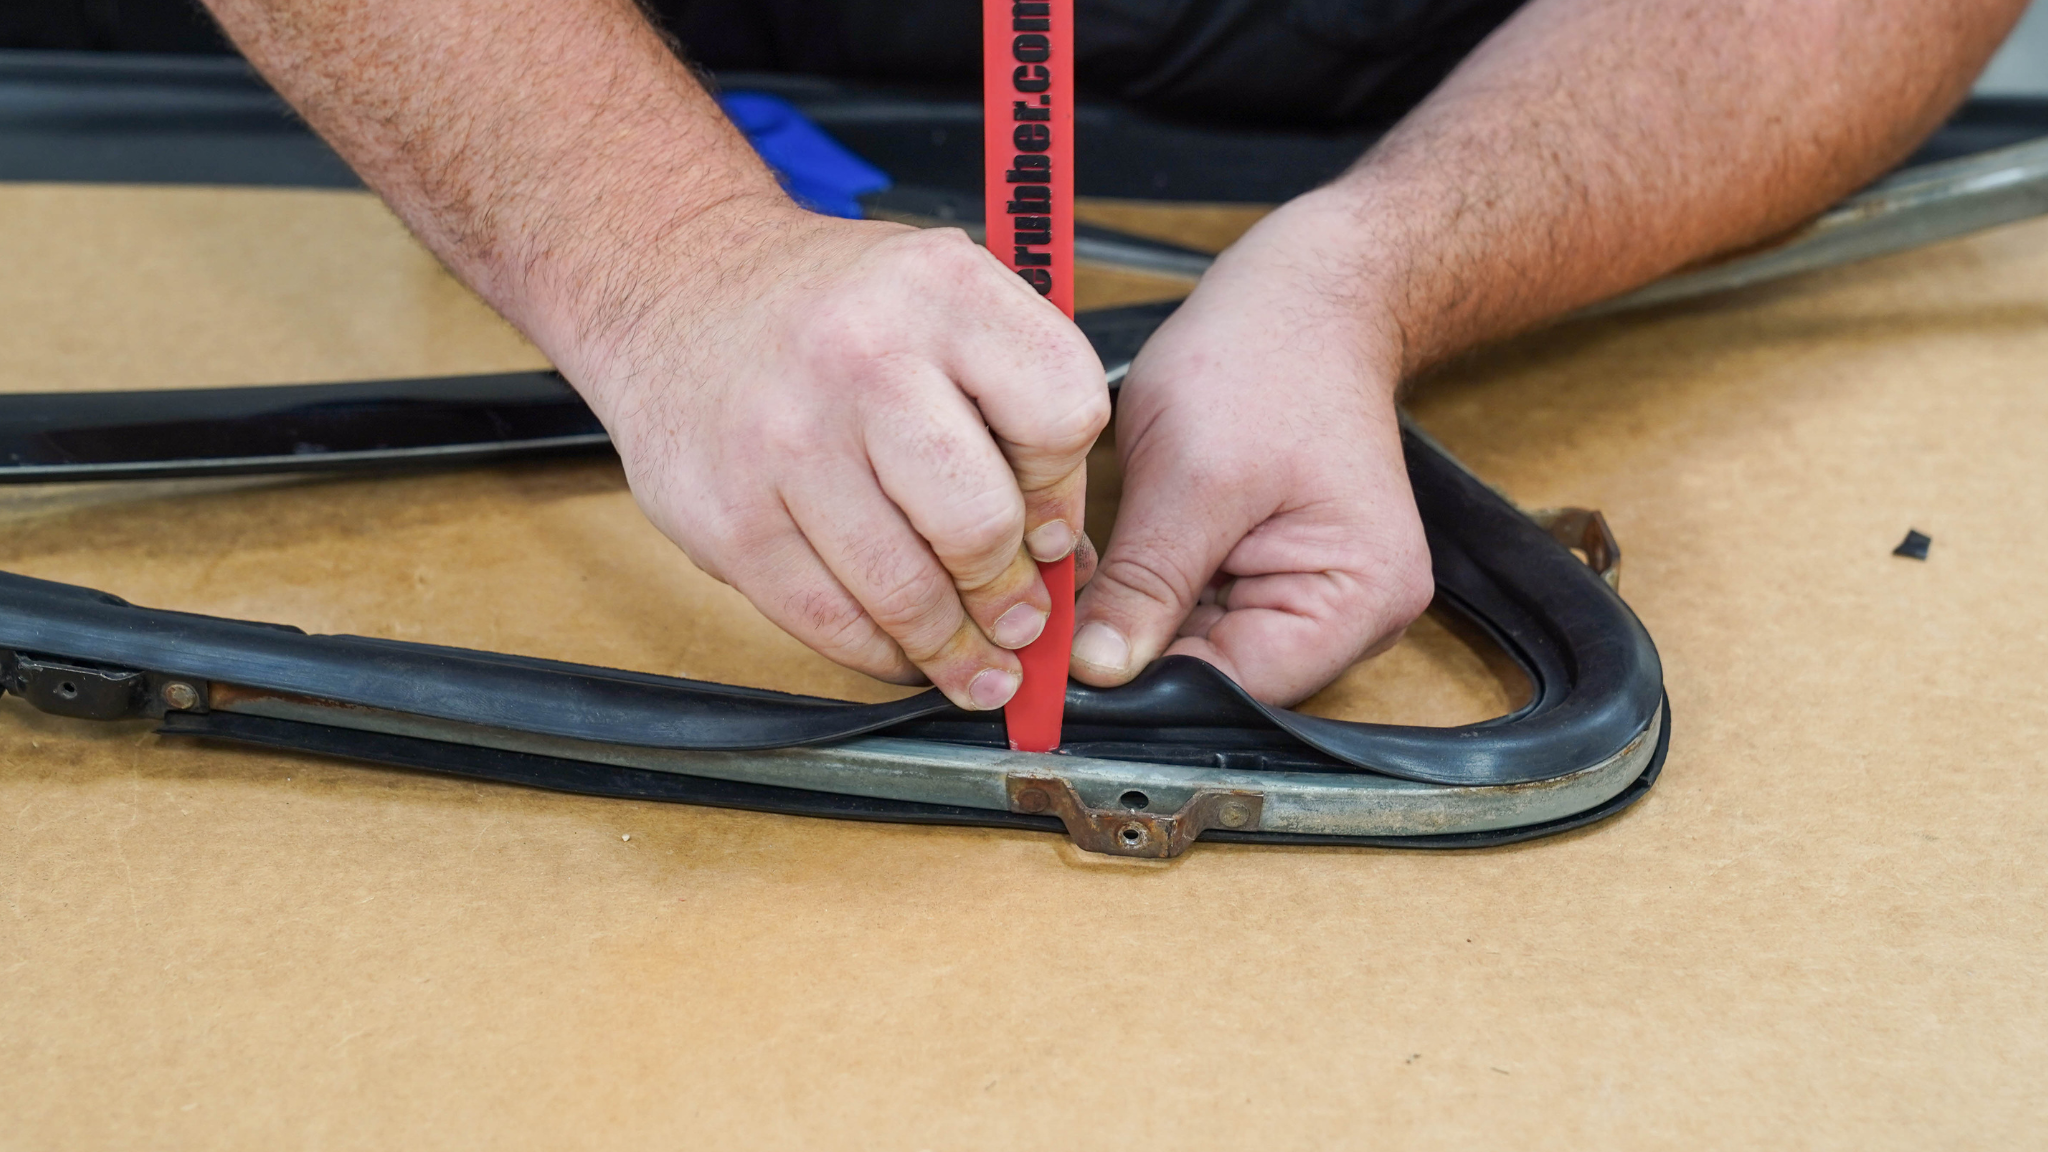
When going around the corner, take some extra time to make sure you have as much of the rubber in the channel corner as possible. Once you have the seal pressed completely into place, ensure the pivot hole is lined up correctly.
This seal is held in by pressure and will be a very snug fit, so if you’re really struggling to press it into place, consider using soapy water as a lubricant. - Install the division post seal – Start with seating one of the L-shaped ends into the notch made in the main weatherstrip, paying close attention that the orientation is correct with the tabs pointing towards the vent frame.
Then, slightly bend the division post in the middle so the other L-shaped end can slide into place and press all along the strip to ensure it’s fully seated. Lastly, locate the tabs inside the vertical channel and bend each tab over to secure the weatherstrip in place.
Reassembling the Vent Window
- Reinstall the vent window glass – Start with the vertical channel lying flat on the surface and the rounded corner of the frame pointing upward. Position the glass how it would be if you were to open the window – horizontally, with the curved end towards the interior of the vehicle.

Then, slide the pivot bar through the weatherstrip and as the bar enters the pivot joint, reattach the two washers you had previously removed. This is when the photo you took will come in handy.
The D-shaped washer (which is really the only unique washer) goes on first with the flat side pointing towards the front of the vehicle, followed by one of the regular flat washers, before pushing the pivot bar all the way through. Now, rotate the vent frame on its side and ensure the pivot hinge lines up correctly by inserting a small screwdriver through the rivet holes.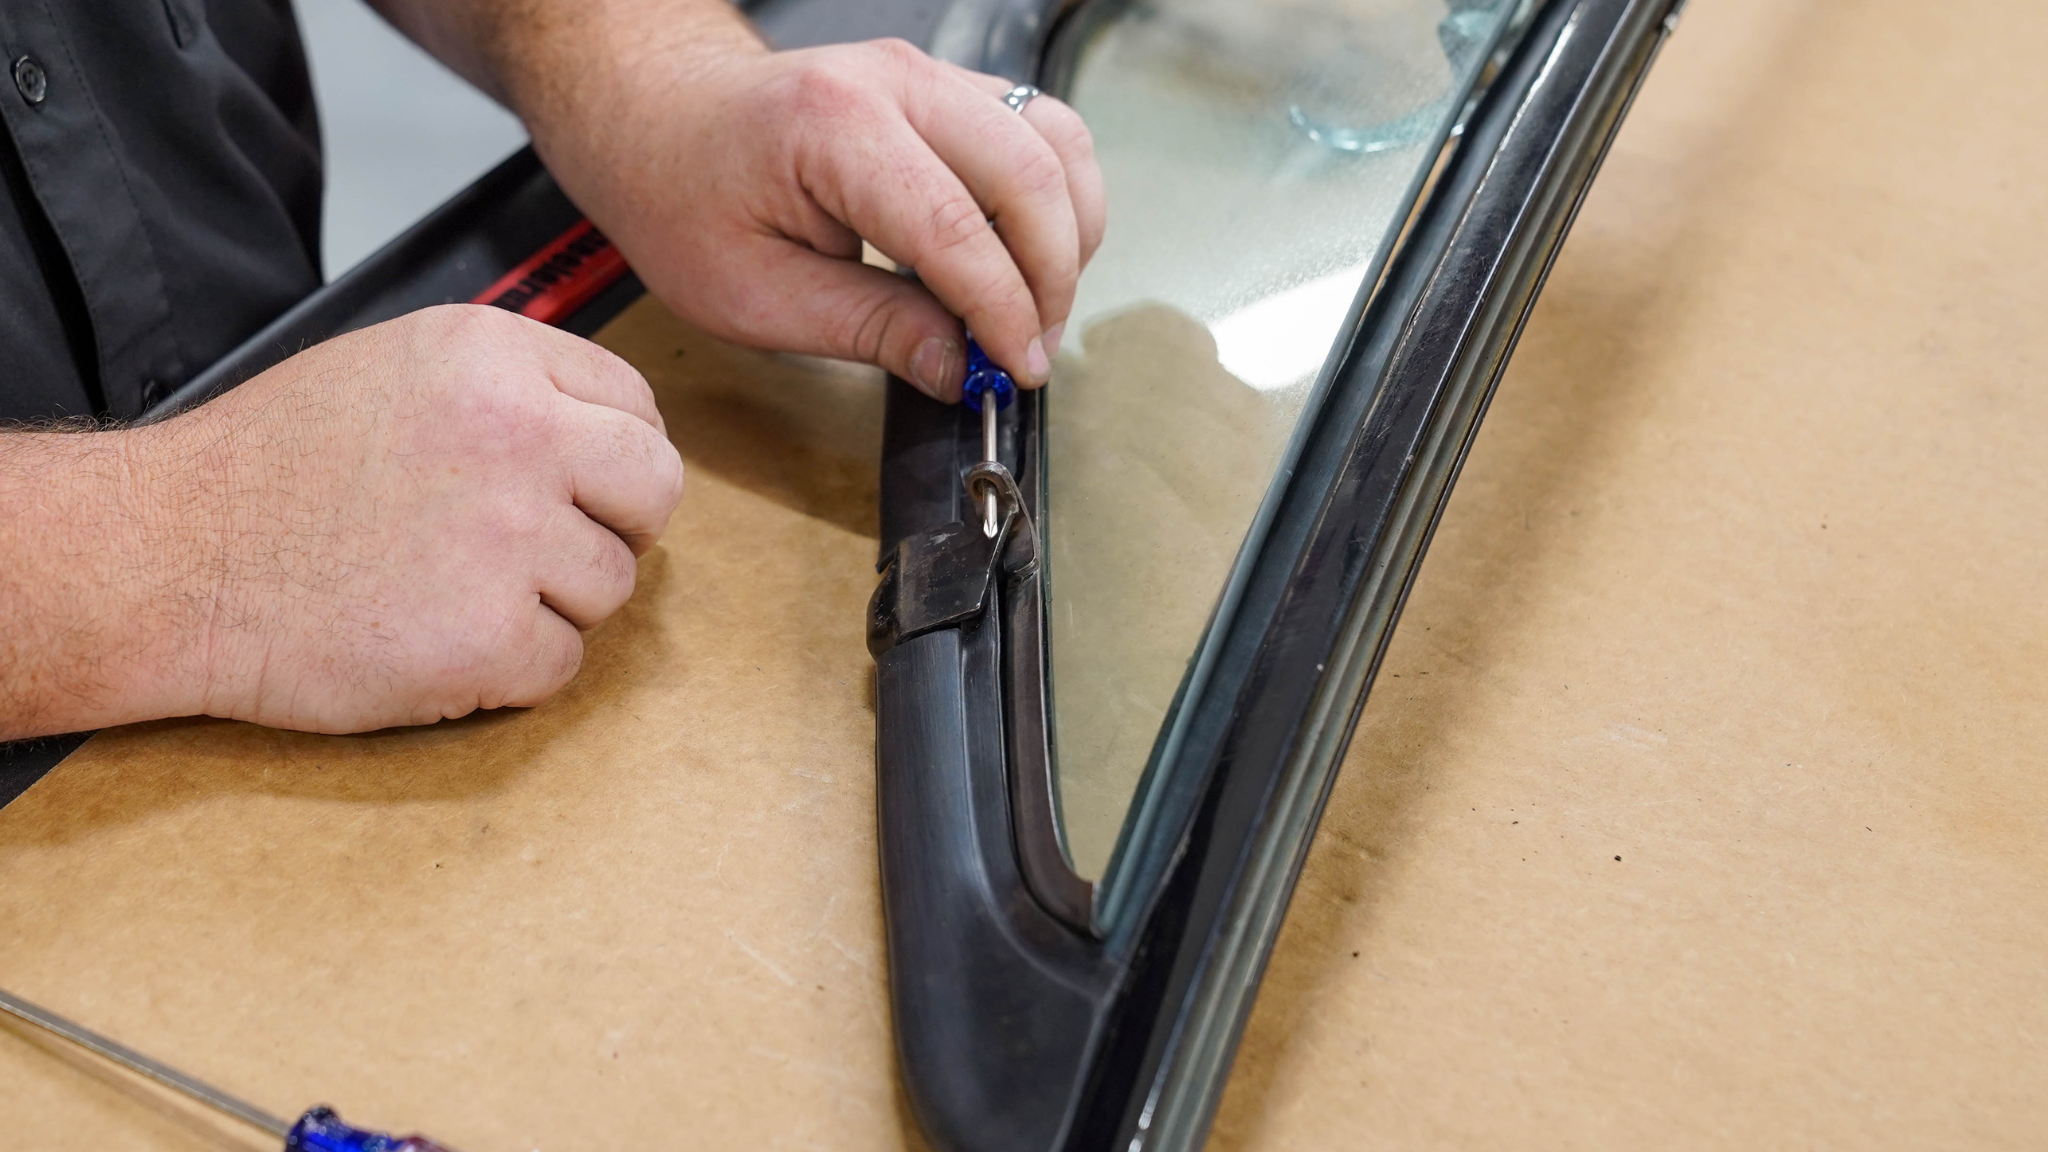
Continuing with the spring assembly, next up is a regular washer, then the washer with the oblong hole, then your spring, then your locking washer, and lastly the nut. Before adjusting the tightness, install your pivot rivet first. Instead of a pop rivet, this will be a spread rivet (AKA smash rivet, solid rivet, buck rivet), which is designed to spread out with compression. For this tutorial, we’ll be installing the spread rivet with the Setting Tool included in our Vent Window Weatherstrip Set and a vise.
Lay the vent window on the vise with the hinge bracket facing downward, put the rivet in place, line up the Setting Tool with the rivet, and tighten the vise until the bottom of the rivet spreads out.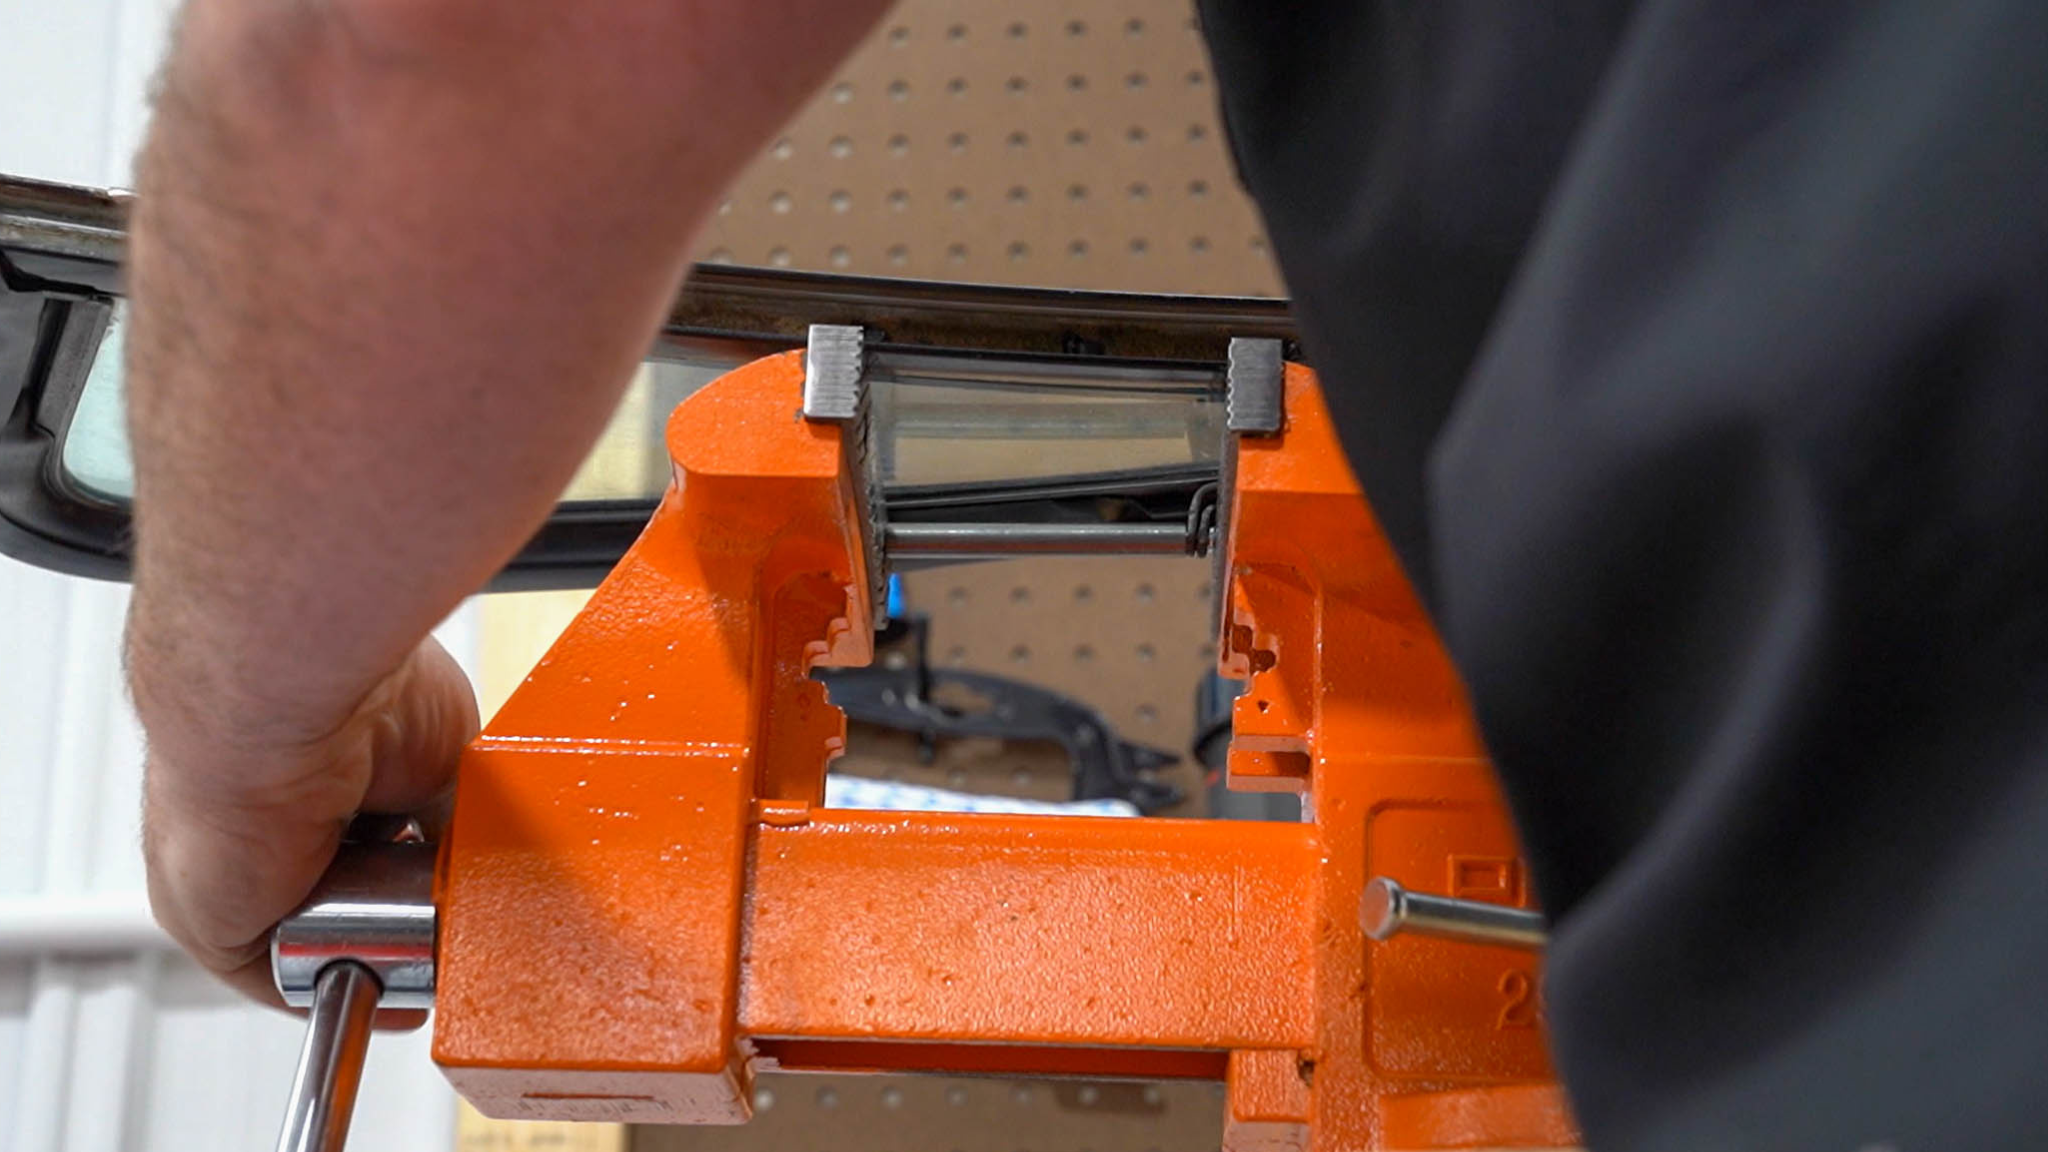
Now that our glass is secured with the pivot rivet, it’s time to adjust the spring tightness. Keep in mind, this is a tension spring, so the harder you tighten the nut at the bottom, the harder it will be to open the window. You want to be able to open and close the window fairly easily, but not have it be too loose of a movement. Once you’re happy with the glass movement, line the flat sides of the nut up with the locking washer and bend the tabs over to secure it in place. - Install the new run channel – Before installing the vent frame back into the door, install the portion of the new run channel that goes into the vertical division post. The run channel weatherstrips are Left and Right specific, so ensure you have the correct one by looking at the direction of the metal tab located at the corner joint.
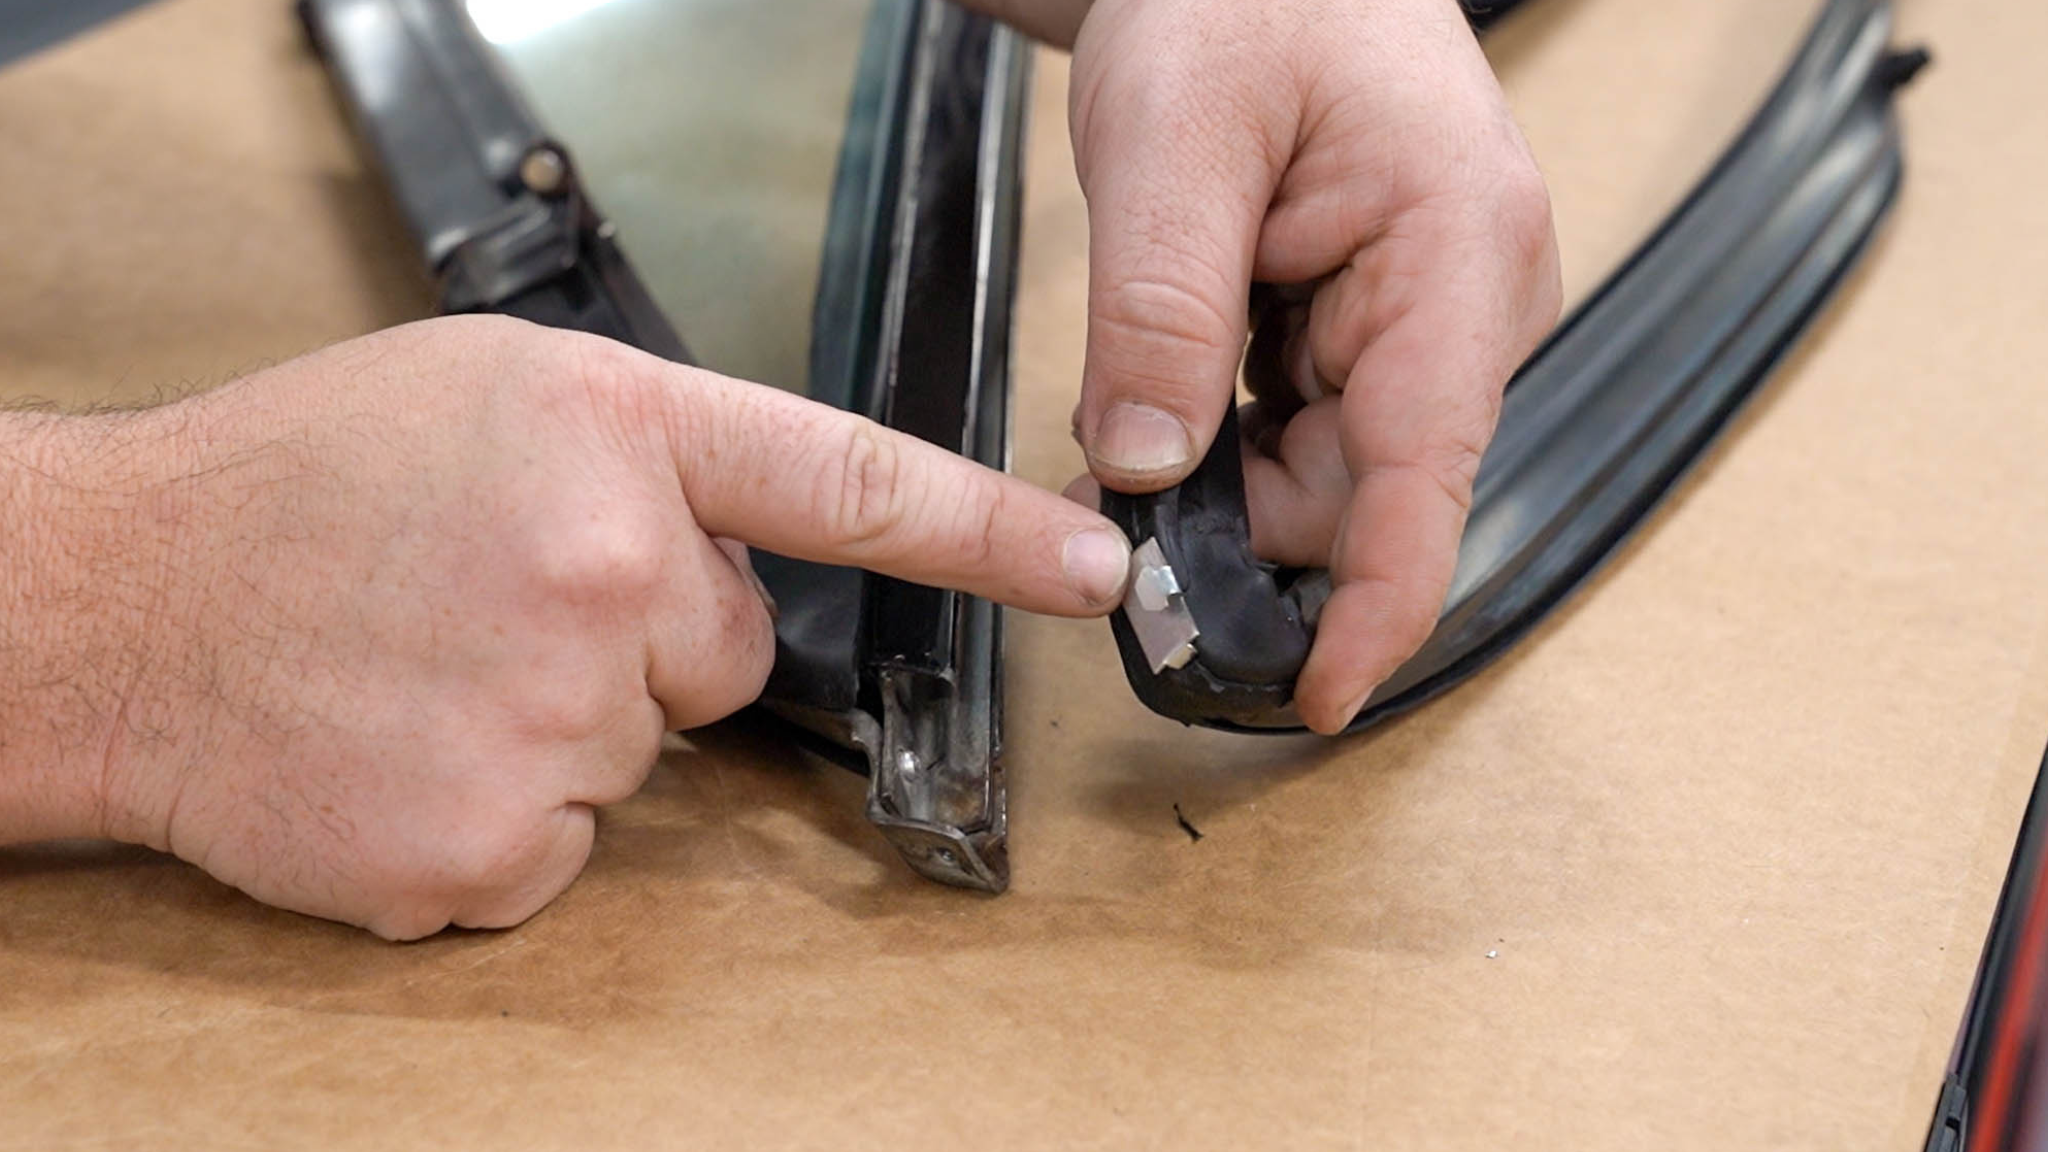
The metal tabs are designed to hold onto the vent frame and can attach by bending it over the outer lip of the frame or inserting it between the metal lip of the vertical channel and the vent frame. Once that is attached, the rest of the run channel is just pressed into place all the way down the metal channel. We like to use a tuck tool to make sure it’s fully seated.
Reinstalling the Vent Window
- Install the vent frame – The vent window will go back in exactly like it came out, so start by getting the J-shaped bracket in the door frame and carefully feed the post down into the door. Then, tilt the frame back to get it lined up correctly before pressing it forward into place. Check that both screw holes are lined up correctly, then reattach the screws and the bolt at the bottom.
- Install the new run channel (cont.) – Now that the vent frame is back in place, finish installing the remaining run channel. Just like behind the division post, you’ll just press it into the door channel. There is one clip that gets pressed up into the top of the door (we found it easiest to press it into place with our plastic tuck tool), then continue pressing it into place. Once you reach the end of the channel, manually feed the remainder of the run channel down into the door and work it into the channel inside the door as much as you can.
Lastly, you’ll use the window to get the run channel fully seated down inside the door frame. The truck we’re working on has power windows, so we temporarily reconnected the battery and the window controls to perform this. An additional step we recommend taking is removing the bolt from the bottom side of the rear channel, which relieves pressure off the back of the glass and gives you more working space down inside the door.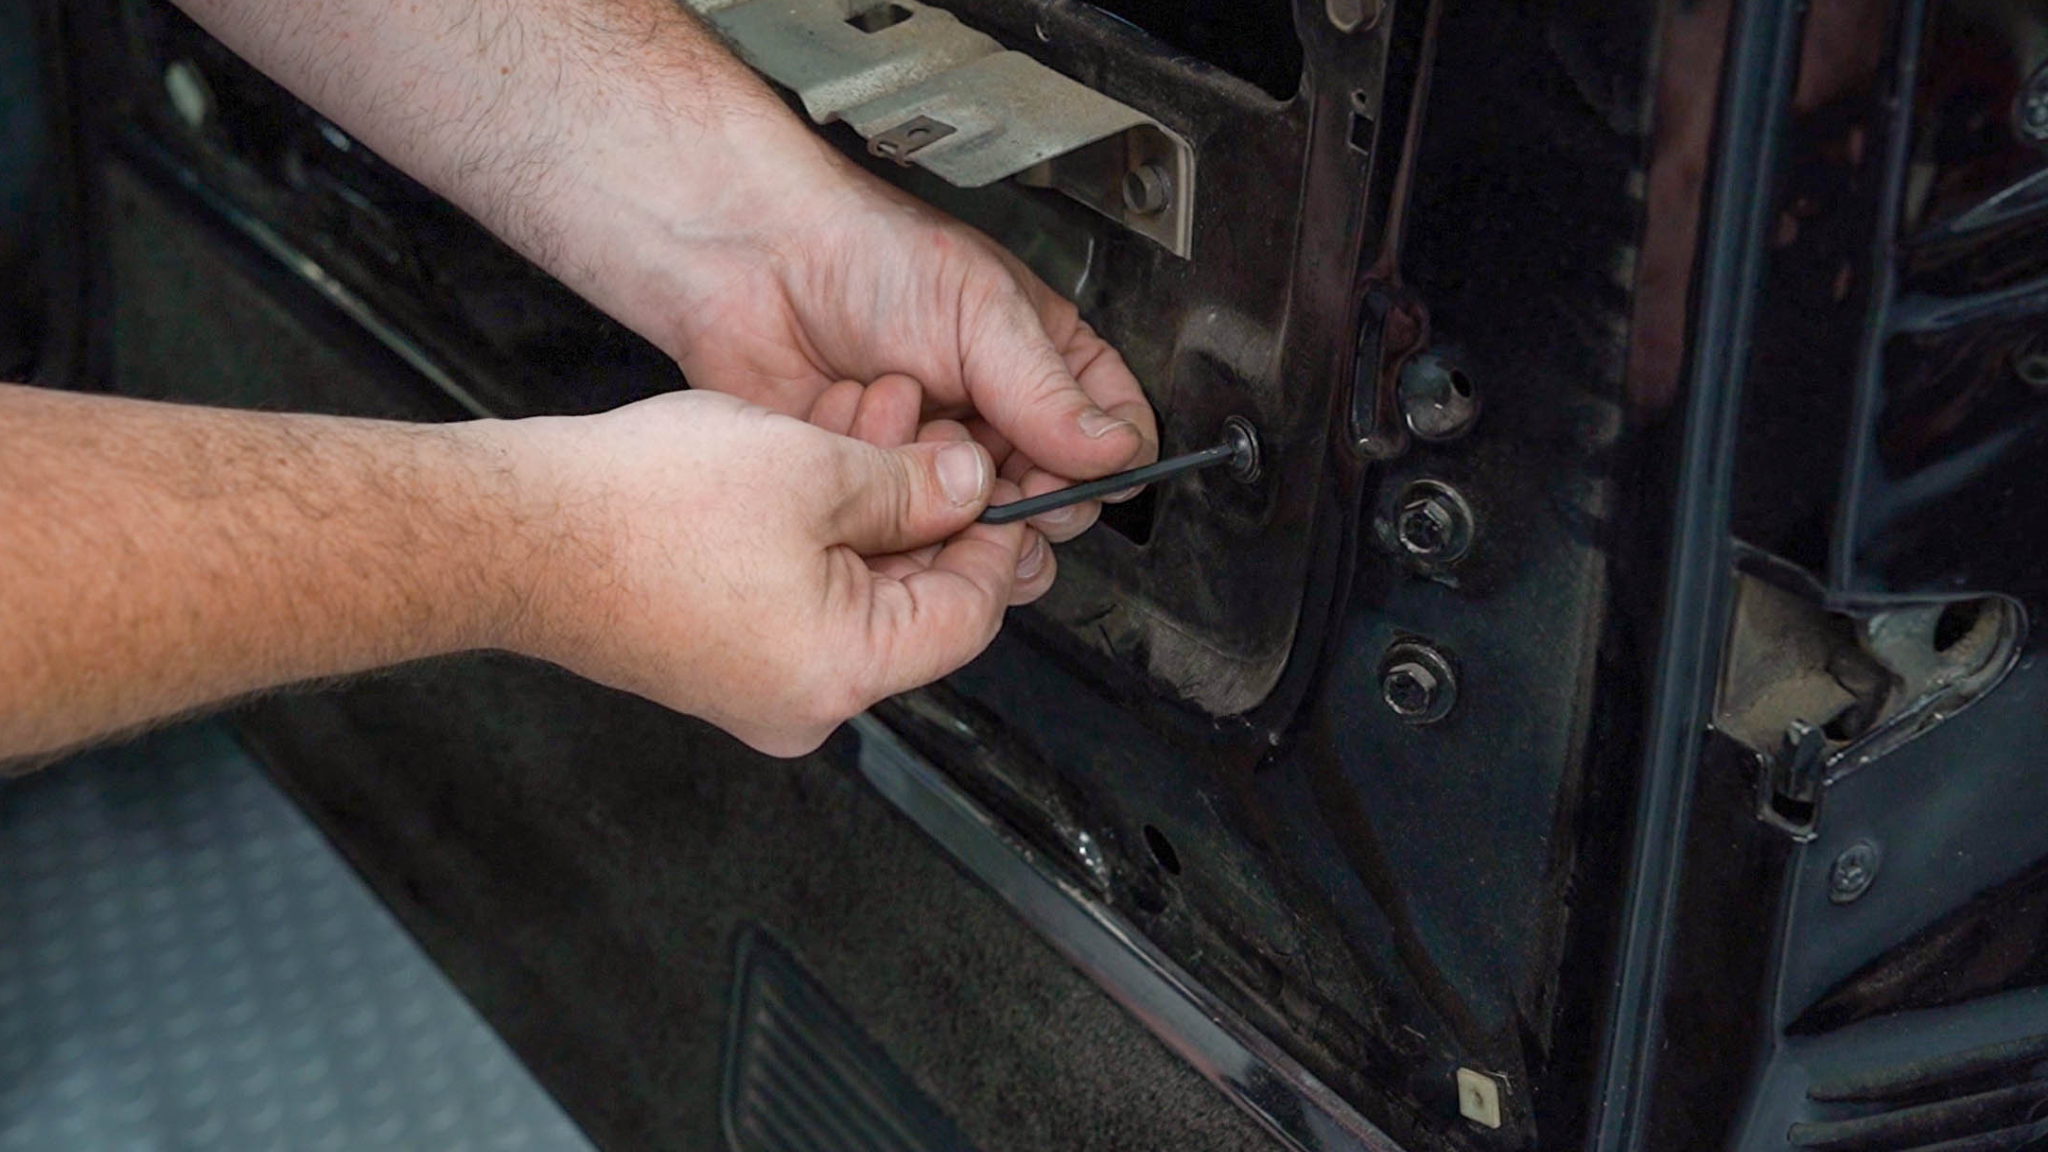
While guiding the window, slowly roll it all the way up to where it pushes against the top. As you roll the window back down, make sure the glass is fully seated in the front channel and sliding smoothly. Once the window is all the way back down, reinstall that rear channel to the back of the glass and bolt it back in place. Remember to disconnect the battery again before removing the window controls after this step. - Install the new window felts – The window felts are inner and outer specific, as well as Left and Right specific. To identify which is which, look at the shape of the window felt. Though both are a flocked material, the inner felts are shaped like a ‘J’, and the outer felts are shaped like an ‘r’. The one that looks like a wiper is the exterior.
Starting with the outer window felt, line up the clips on the back with the slots on the inside of the door skin and press down until each clip clicks in place.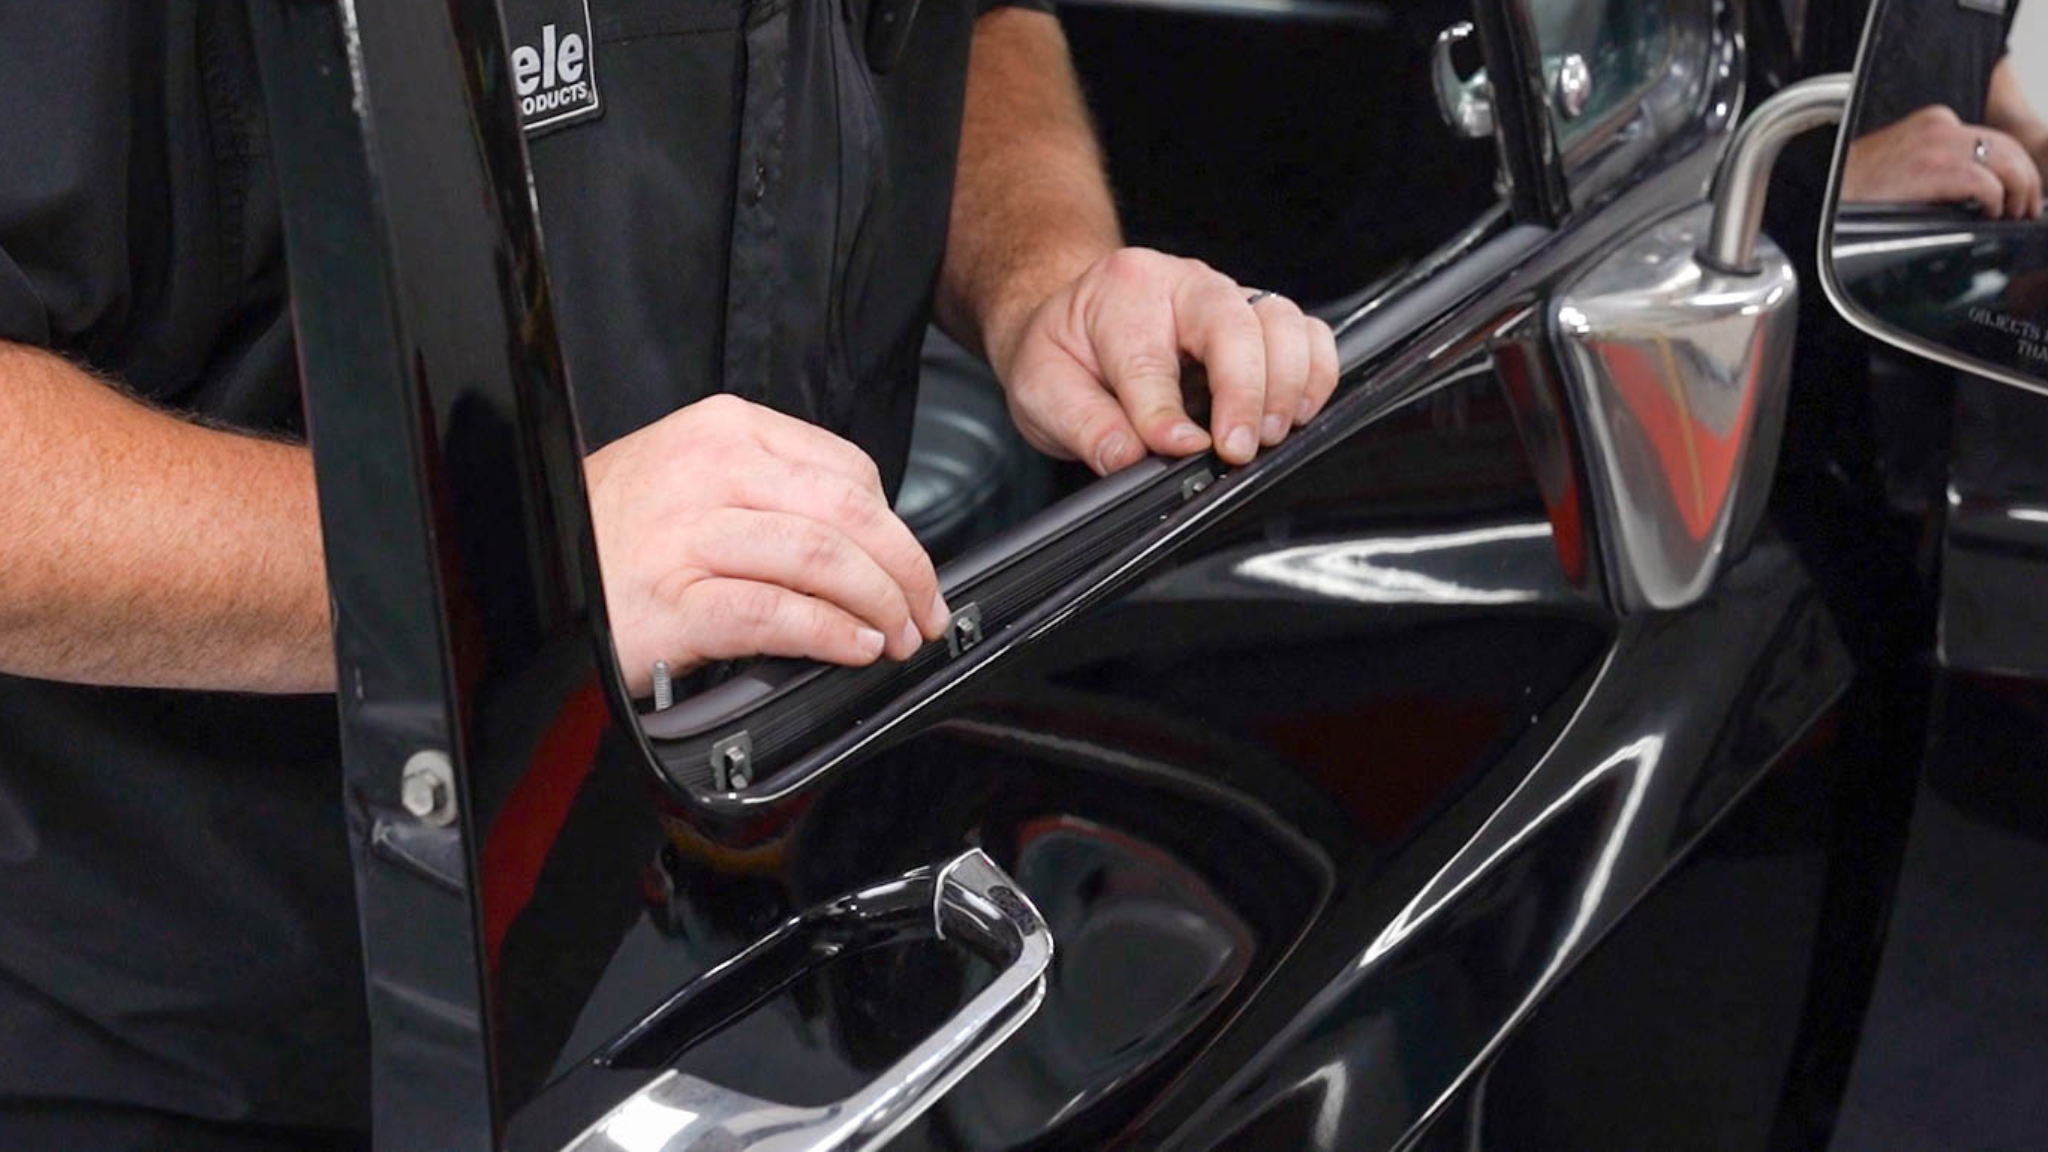
The inner window felts are installed onto the top of the door panel, and in this tutorial, we had not yet removed the old one, so we’ll do that now. The inner window felt is also held on by clips, so press down and out to remove it. Since this piece is attached to a plastic lip, just be careful with how much pressure you are applying.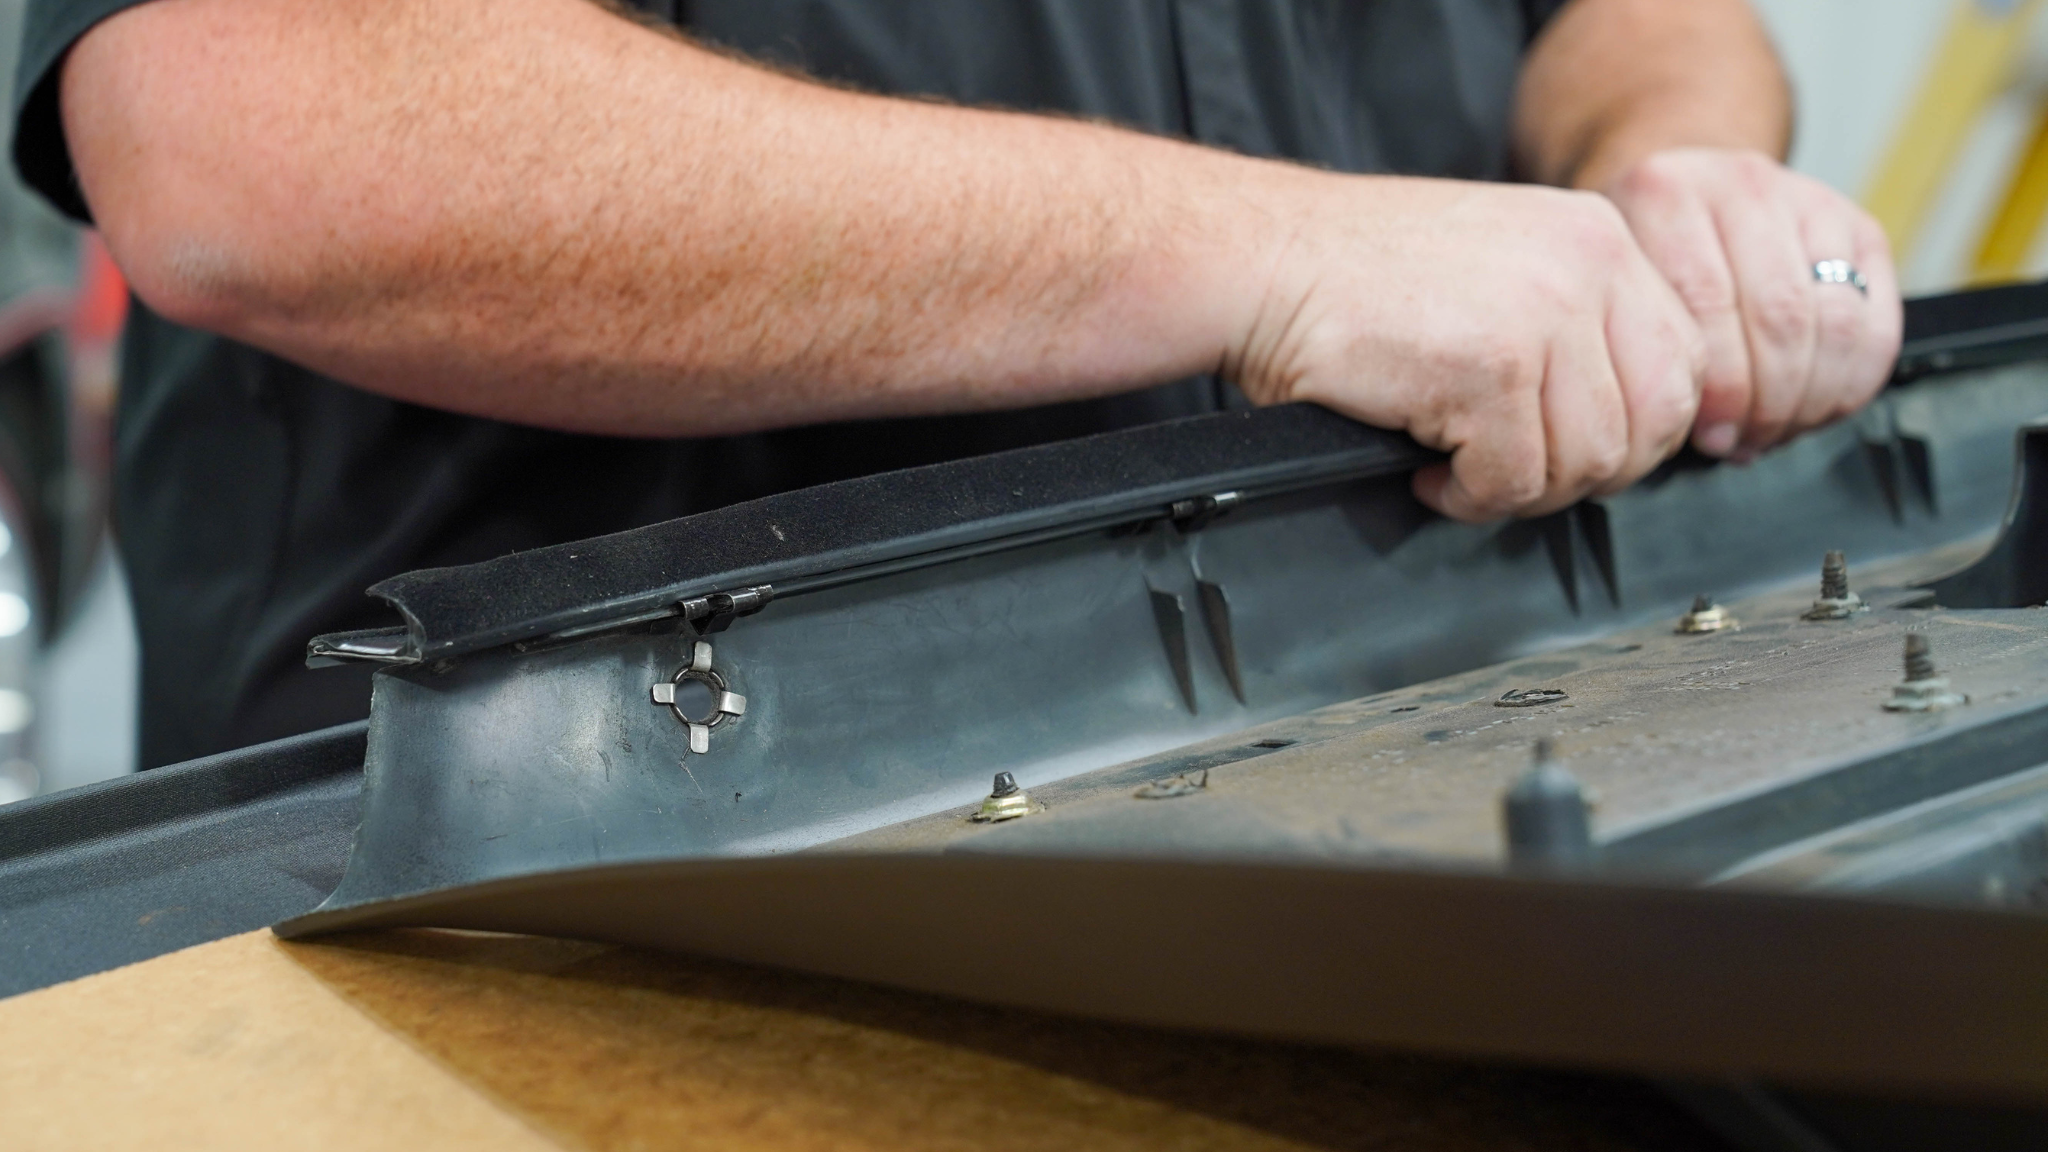
If you need to, use a flathead screwdriver to help pry the clips off. Then, align the new piece with the slots and press the window felt up onto the plastic lip until each clip clicks into place. - Reinstall the door panel – For the final step, we’ll be reinstalling the door panel. First, reconnect the window controls (double check that your battery is disconnected), then guide the door handle through the panel while lifting the panel up and over the metal lip of the door frame, making sure the lock knob comes through correctly before pressing it down into place. Reattach the top portion of the door lock knob, then replace the handle bezel. Lastly, replace all the door panel hardware – 2 screws in the handle bezel, 2 screws in the armrest, and 4 screws along the bottom of the panel.
Check out the full step-by-step installation video on our YouTube Channel here!
At Steele, we’re more than just high-quality products, we’re your trusted resource for completing your weatherstripping projects with confidence.
Whether you’re working on a classic car or truck, street rod, RV, or boat, our expert team is here to help. If you have questions about weatherstripping or need product guidance, we’re just a call or click away.
📞 Call us at 800-650-4482
📧 Send us an email
💬 Chat with us live on our website
Need installation help?
Check out our How-To video series on YouTube for step-by-step guidance and tips.
Stay connected!
Follow us on Facebook and Instagram for updates, inspiration, and more.

Did you find this article helpful? Tell us why!