If you’ve got a toy hauler, chances are you’re storing very important, and expensive, outdoor toys like four wheelers, dirt bikes, motorcycles, etc., so it’s critical that the ramp door seal is in tip top shape. Faulty weatherstripping can lead to water leaks, mildew, and pests inside your trailer.
It can be both confusing and challenging to find replacement weatherstripping at times. But, don’t worry, we’re here to help! In this post we’ll walk you through the steps of identifying a replacement seal and how to install it on your ramp door.
Where to Start
Start by looking at the profile and measurements of your current seal, this will help select the correct replacement. Then, take measurements of the entire existing seal along the perimeter of the ramp door to determine the length needed.
Important note: our ramp gate kits include a corner seal for optional use. If you currently have a corner seal and plan to keep that in place, don’t include those sections in your measurements to determine footage.
Once you have your measurements, it’s time to compare what you have with our parts. Head to our website to view our ramp gate kits here. Each product listing page will provide accurate measurements of the seal so you can easily find what you need.
Each ramp gate kit includes 35ft of the door seal, a corner seal, a tuck tool, Loctite Super Bonder 495 and an instruction sheet. The seals are made of high quality EPDM sponge rubber that feature strong UV and ozone resistance. This makes for excellent durability and weather-proofing.
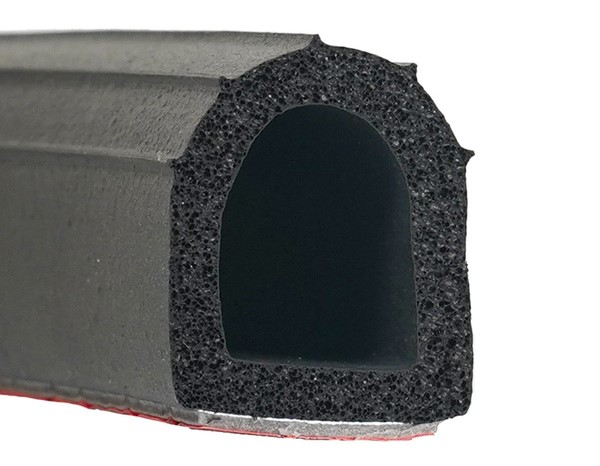


- The door seal will be a “D” shaped seal that is backed with 3M Peel-N-Stick tape, making it very easy to install.
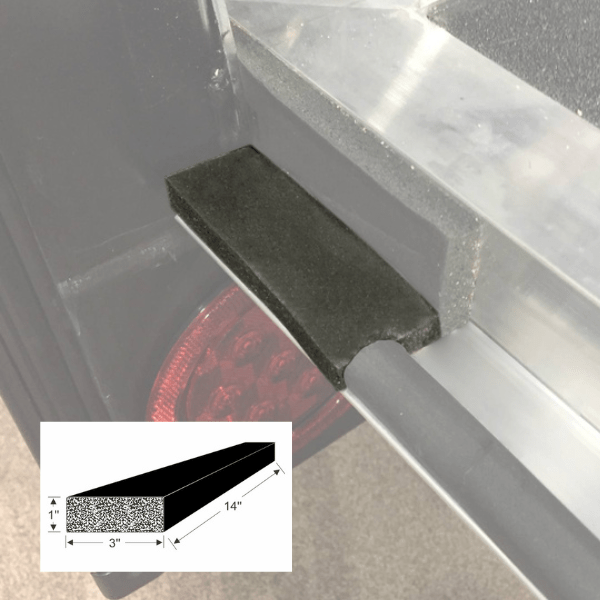
- The corner seal comes in a single block length of 14″ that can be trimmed to fit your gate, and it features a pressure-sensitive adhesive backing.
- The tuck tool will aid in removal of the old seal and scraping off any excess debris to prep the surface for the new seal.
- Loctite 495 is an instant adhesive provided for mitering the corners of the door seal. For mitering instructions, check out our post How to Miter the Perfect Corner!
What Tools do I Need?
Most of the tools you’ll need are probably already laying around your shop, and if you purchase a ramp gate kit from Steele, we include some of the other items you will need.
- Scraper/Tuck tool (included in our kits)
- Loctite Super Bonder 495 (included in our kits)
- Adhesive remover
- Cleaning rags
- Colored marker
- Eye and hand protection (see our notes on hand protection below)
How do I Replace the Seal?
- Start by using the scraper tool to remove the old seal entirely. If you run into some difficult spots, use the adhesive remover and rag to wipe it away
- Lay out the new edge seal along the edge of the ramp gate to visually ensure the fit
- If you are using the corner seal, you will need to measure how much will be needed at the bottom edges and trim accordingly
- Remove the protective lining from the adhesive back of the corner seals and press it firmly into place
- Align the edge seal to start from the side of the corner seal. You can use the Super Bonder to connect the ends of the edge seal with the corner seals. Note: small amounts go a long way
- To install the remainder of the seal, remove the protective lining over the adhesive on 2-3 feet at a time and press the seal firmly into place. Continue until the entire seal is applied
Loctite Super Bonder 495 is a no joke adhesive. Seriously. Everyone here has glued their fingers together and it’s not fun. Loctite sets quickly and can be an eye and skin irritant. Please use with caution and protection!
At Steele, we’re more than just high-quality products, we’re your trusted resource for completing your weatherstripping projects with confidence.
Whether you’re working on a classic car or truck, street rod, RV, or boat, our expert team is here to help. If you have questions about weatherstripping or need product guidance, we’re just a call or click away.
📞 Call us at 800-650-4482
📧 Send us an email
💬 Chat with us live on our website
Need installation help?
Check out our How-To video series on YouTube for step-by-step guidance and tips.
Stay connected!
Follow us on Facebook and Instagram for updates, inspiration, and more.

Leave a reply to Steele Rubber Products Cancel reply