For years, replacing your windshield or back window meant using the rope-in method. Many a windshield has been broken this way and most consider it a difficult and frustrating task.
In the 70’s locking strip type gaskets quickly became a popular choice. They have an easier installation but still great function and appearance. We offer a lot of different locking strip type gaskets for both direct fit replacements and universal. We also have the experience necessary to help you plan your project and guide you through the installation step by step.
Although this installation could be done alone, we strongly recommend having at least two people for the job.
Step 1
Once the old gasket and glass is removed, test fit the new gasket on the body of the vehicle. With locking strip type gaskets, the gasket is installed onto the body first, then the glass is installed into the gasket.
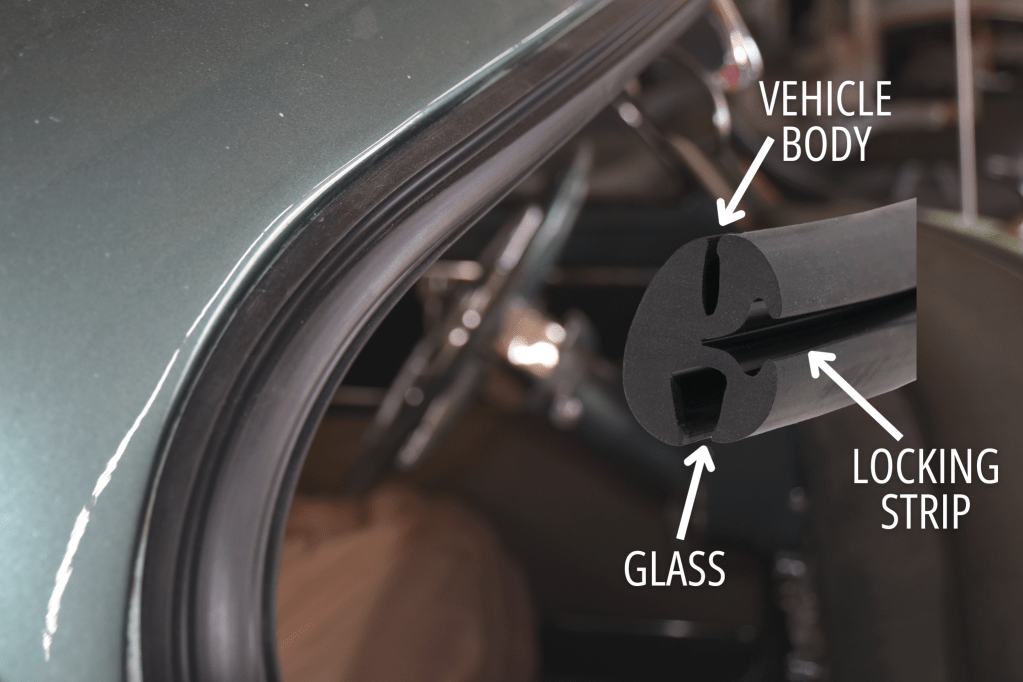
Important note: Locking strip type gaskets have 3 grooves: one for the vehicle body, one for the glass, and one for the locking strip. Since all locking strip gaskets are installed on the vehicle first, ensure you have the correct orientation with the locking strip groove facing outward.
During the test fit, make sure everything looks nice, even, and that the gasket is fully pushed into the corners. Although you may notice that the gasket is somewhat loose during the test fit, that is normal for this stage in the installation. After the glass and locking strip are installed in the final steps, the fit will be very tight and secure.
Step 2
After a successful test fit, remove the gasket and apply a bedding and glazing compound along the frame of the windshield (see instruction photo below). The bedding and glazing compound comes in a tube and can easily be installed with a caulking gun.
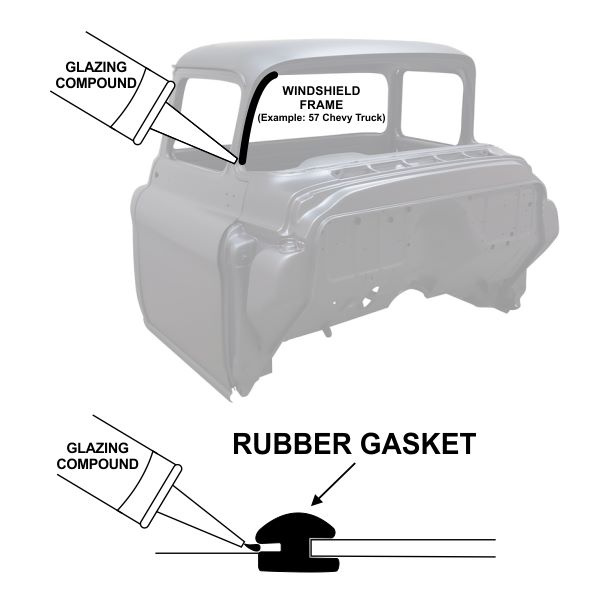
We recommend CRL Windshield and Body Sealant because it creates a watertight seal between the vehicle body and the gasket and it never hardens, allowing flexibility for the windshield. For more details on why a bedding & glazing compound is important for a windshield install, read our article The Secret to a Leak Free Windshield on Your Classic.
Step 3
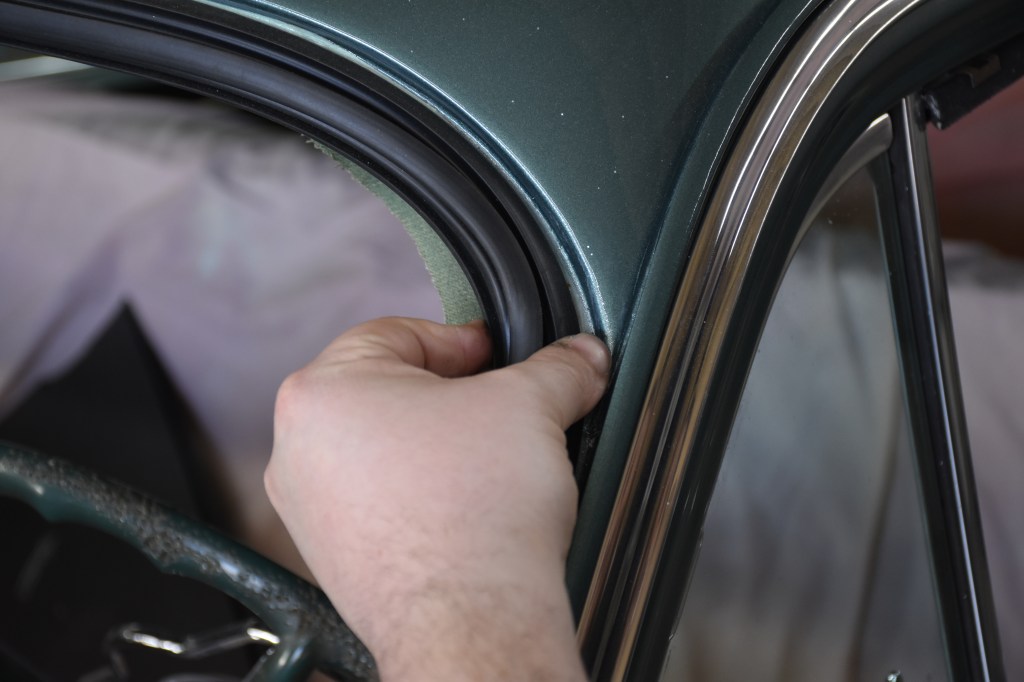
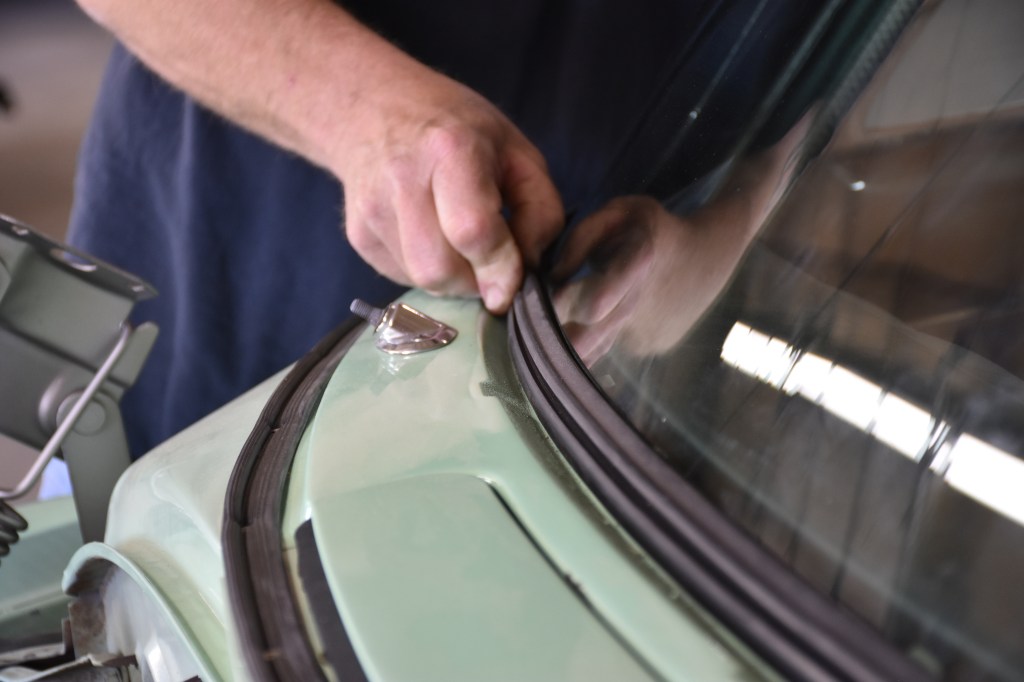
Now that your bedding compound has been applied to the body of the vehicle, it’s time to install the new gasket. Since you already performed a test fit, you know it fits and lines up correctly.
The easiest method is to start in one corner and work your way around until the gasket is fully seated onto the body of the vehicle.
Step 4
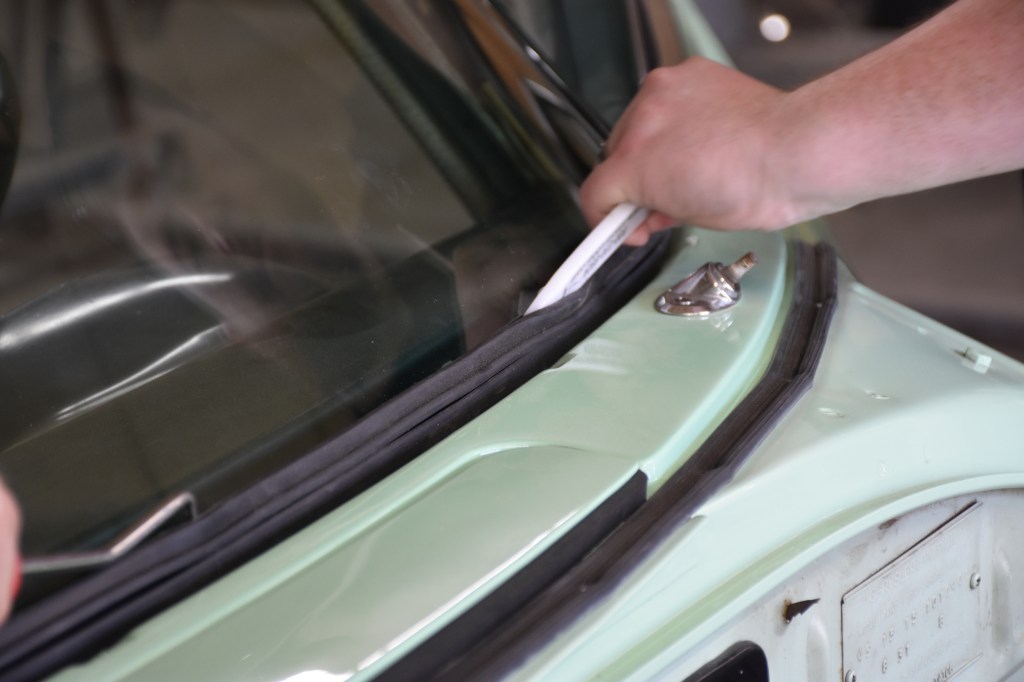
Once the new gasket is fully seated onto the body of the vehicle, the glass installation is next. We recommend starting with the bottom of the glass first, then working your way up from there. Place the glass inside the gasket groove along the entire lower section and apply downward pressure to get it fully seated.
Step 5
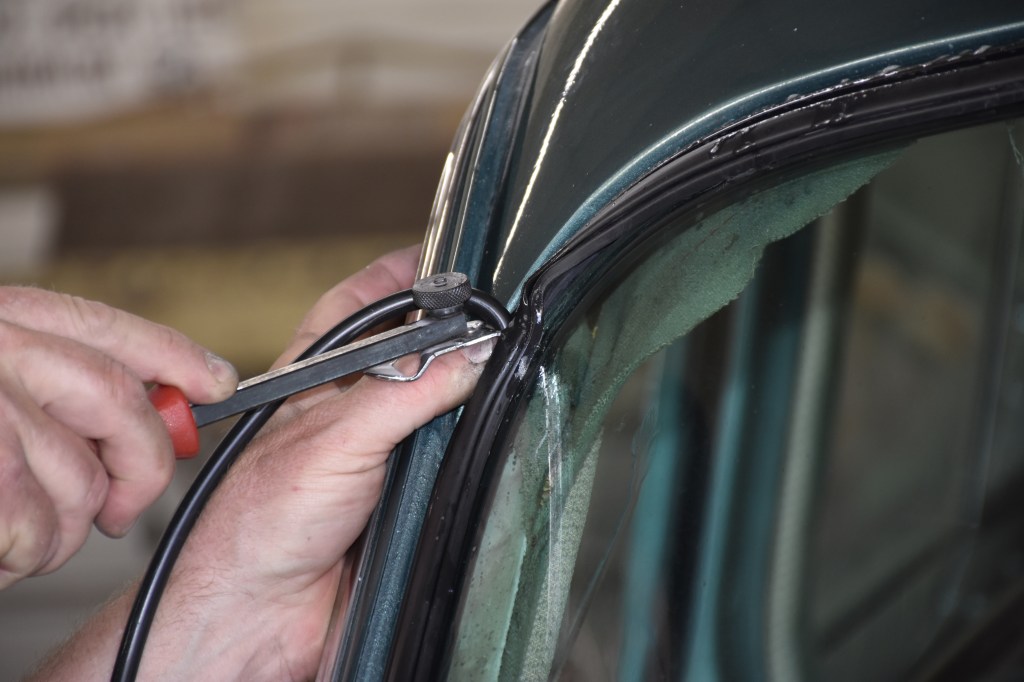
Starting at the bottom corners, pull the lip of the gasket out over the glass. This can be quite difficult without a lubricant and the right tools, so we recommend spraying a generous amount of soapy water for lubrication and using a tool that won’t damage the rubber or the glass, like a tuck tool, a ball end hook tool, or a metal hook tool. Work your way up both sides before moving to the top.
As we noted earlier, we strongly recommend having at least two people for this project, especially for this step. While one person is pulling the lip of the gasket over the glass, the other can gently apply pressure on the glass from the outside, or apply pressure to the gasket from the inside.
Once you reach the top portion, work your way in from the corners at the same time. As you near the center, it’s helpful to have one person pushing up on the gasket from the inside while the other flips the last few inches of the gasket over the glass.
Step 6
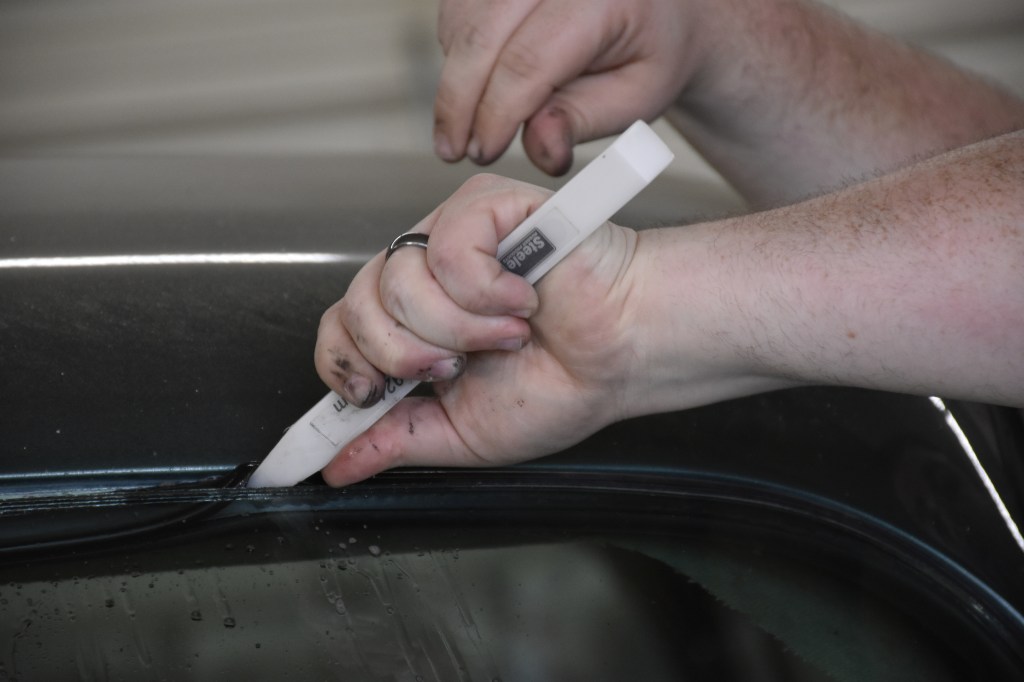
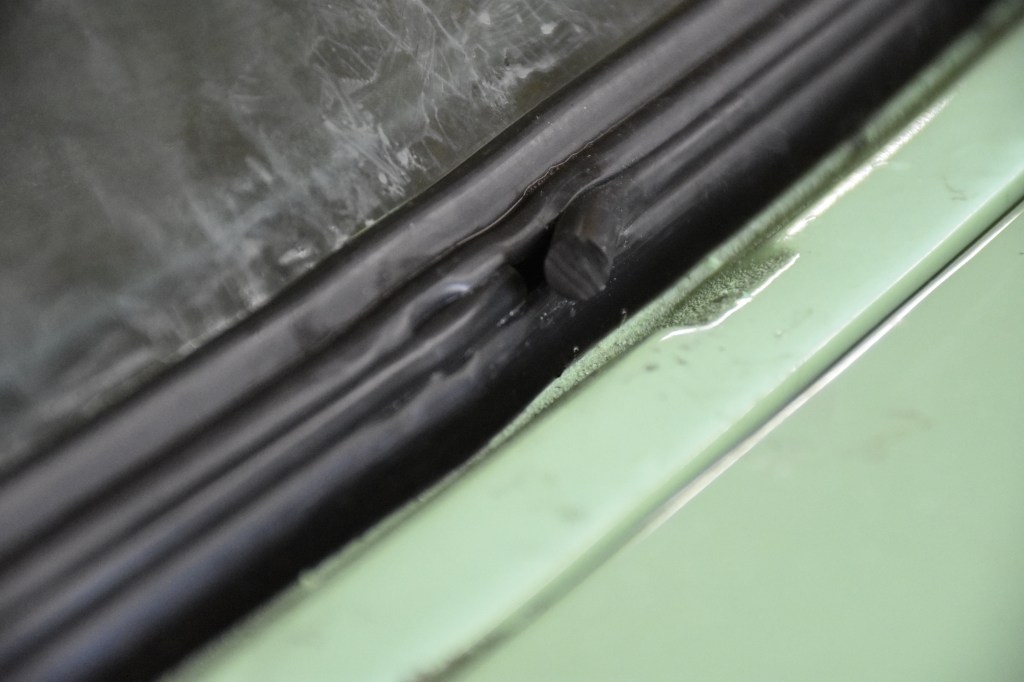
Lastly, it’s time to install the locking strip. The locking strip is installed by spreading the gap in the gasket and pushing the locking strip in at the same time, which can be quite difficult without the right tool. A locking strip tool will simultaneously spread the gap in the gasket while threading the locking strip into place. Don’t forget to use soapy water for lubrication!
Start in the center on the lower portion, using soapy water for lubrication and the locking strip tool, spread the gap to insert the locking strip. Take your time to ensure the locking strip is fully seated, and work your way around the entire gasket.
Once you’ve made your way back to the starting point, trim the locking strip about 1/2″ or so too long, insert the very end into the groove so both ends meet, then work the excess back into the gasket. That extra length will prevent the locking strip from separating and forming a gap in the future.
Prefer to watch the steps? Check out our How To video below!
At Steele, we’re more than just high-quality products, we’re your trusted resource for completing your weatherstripping projects with confidence.
Whether you’re working on a classic car or truck, street rod, RV, or boat, our expert team is here to help. If you have questions about weatherstripping or need product guidance, we’re just a call or click away.
📞 Call us at 800-650-4482
📧 Send us an email
💬 Chat with us live on our website
Need installation help?
Check out our How-To video series on YouTube for step-by-step guidance and tips.
Stay connected!
Follow us on Facebook and Instagram for updates, inspiration, and more.

Did you find this article helpful? Tell us why!