Restoring or customizing a classic car often requires working with parts that are not readily available off the shelf. When fitting a windshield, a custom gasket may be necessary to achieve a proper seal and a professional appearance. Fortunately, the process is straightforward with the right materials and techniques.
Choosing the Right Weatherstrip Profile
Windshield gaskets come in several styles, including rope-in, locking strip, garnish molding-compatible, and flush-mount glass trim.

- Rope-in gaskets use a nylon cord to seat the glass.
- Locking strip gaskets feature a separate strip that secures the glass.
- Garnish molding-compatible gaskets work with trim pieces to hold the glass.
- Flush-mount glass does not use a traditional gasket but relies on decorative trims for a finished look.
Choosing the correct profile ensures a secure fit and reduces leaks.
Measuring
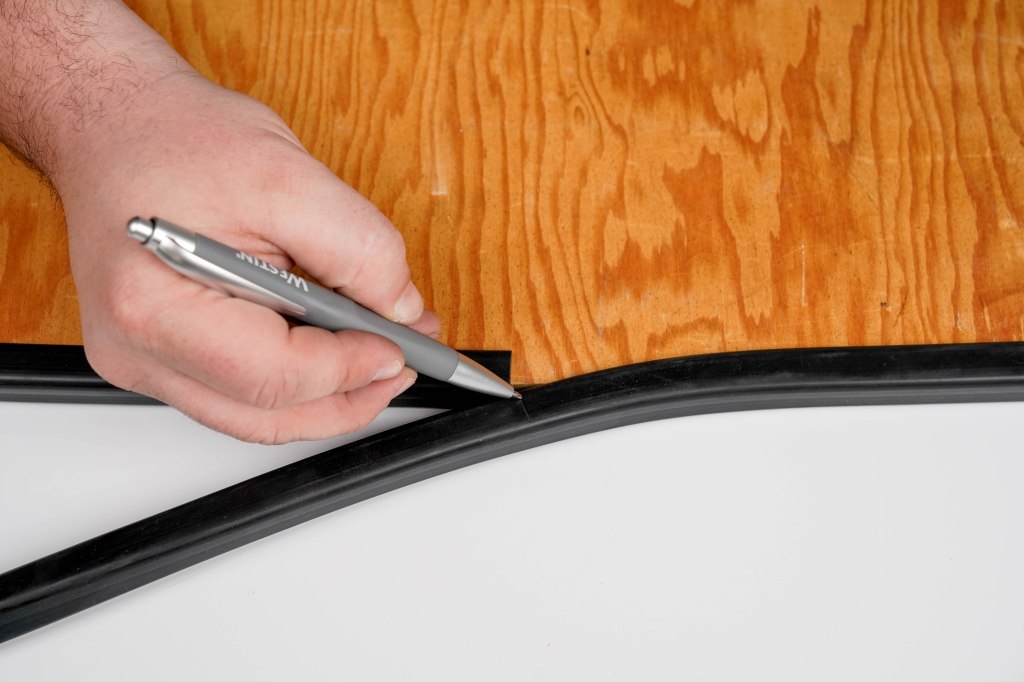
To determine what length you need, install the rubber around the entirety of the glass and mark on the rubber where you’ll need to make your cut. You want the gasket to fit tightly without having to stretch the rubber to make the ends meet.
*For a locking strip gasket, you’ll want around an inch of slack to give the rubber room to expand once the locking strip is pushed in.
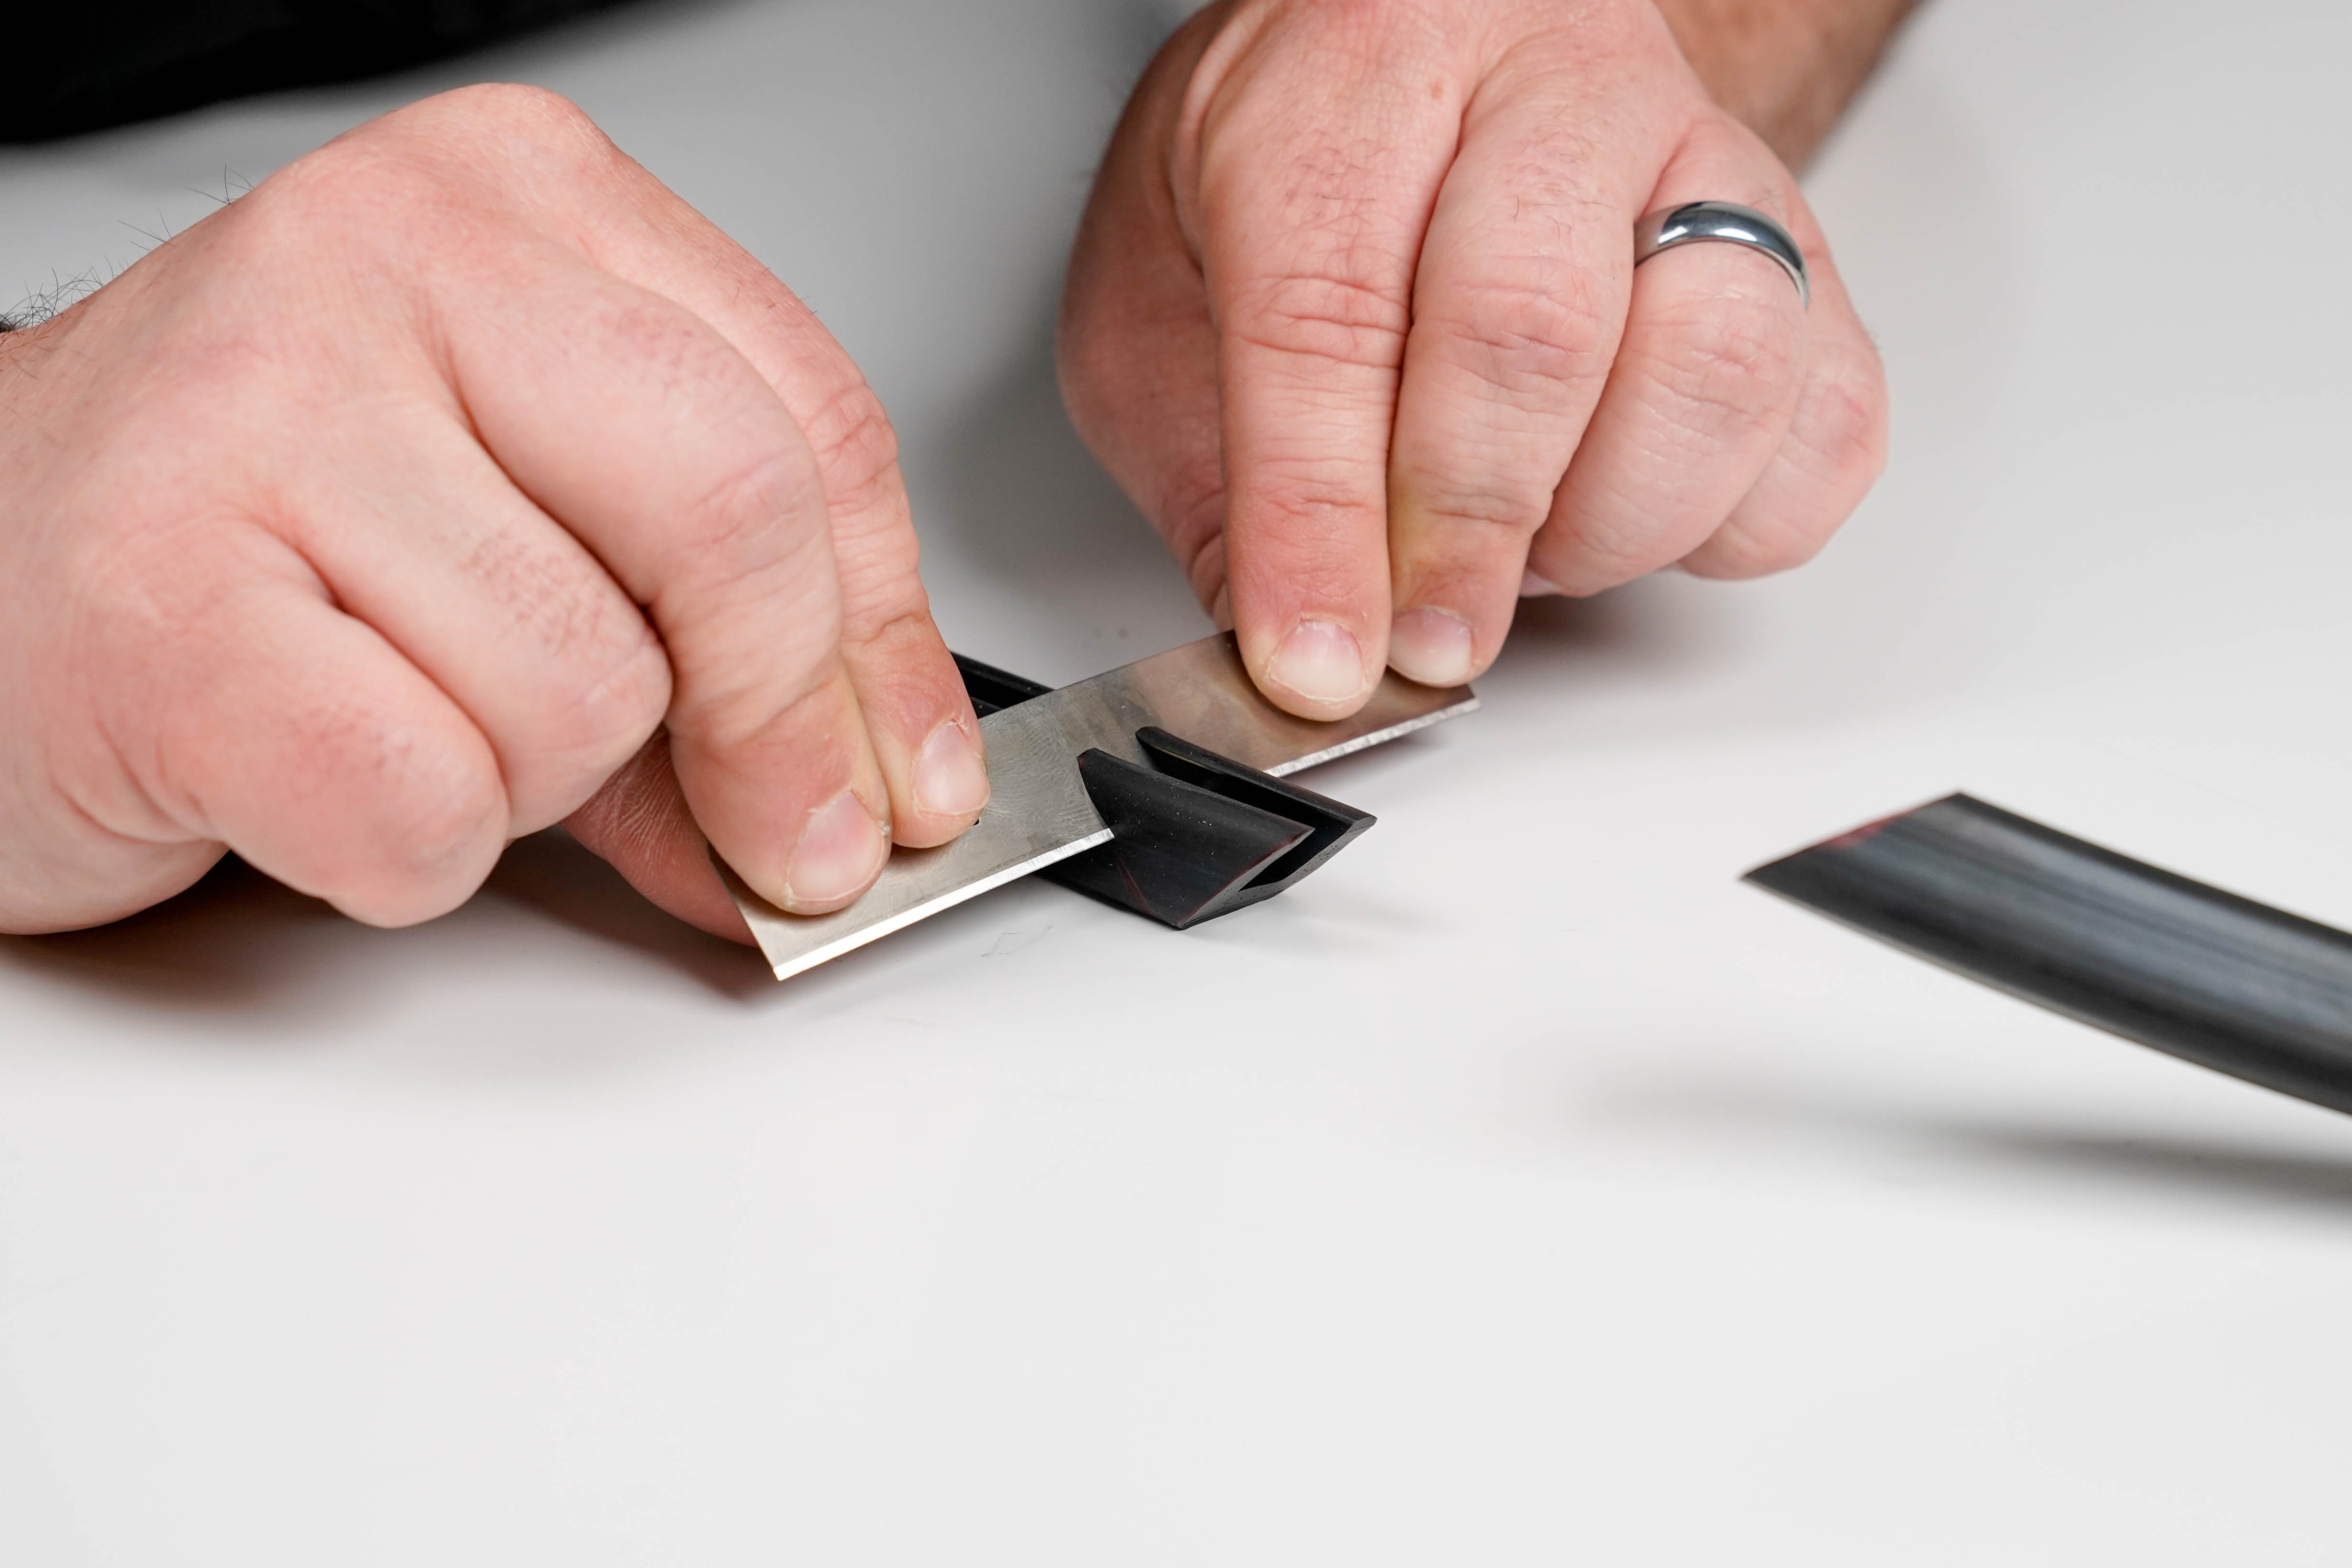
Cutting for a Perfect Edge
A sharp razor blade should be used with minimal pressure to prevent rubber deformation. This technique applies to both flat end-to-end butt joints and mitered corners. Properly aligning and securing the material before cutting helps maintain accuracy.


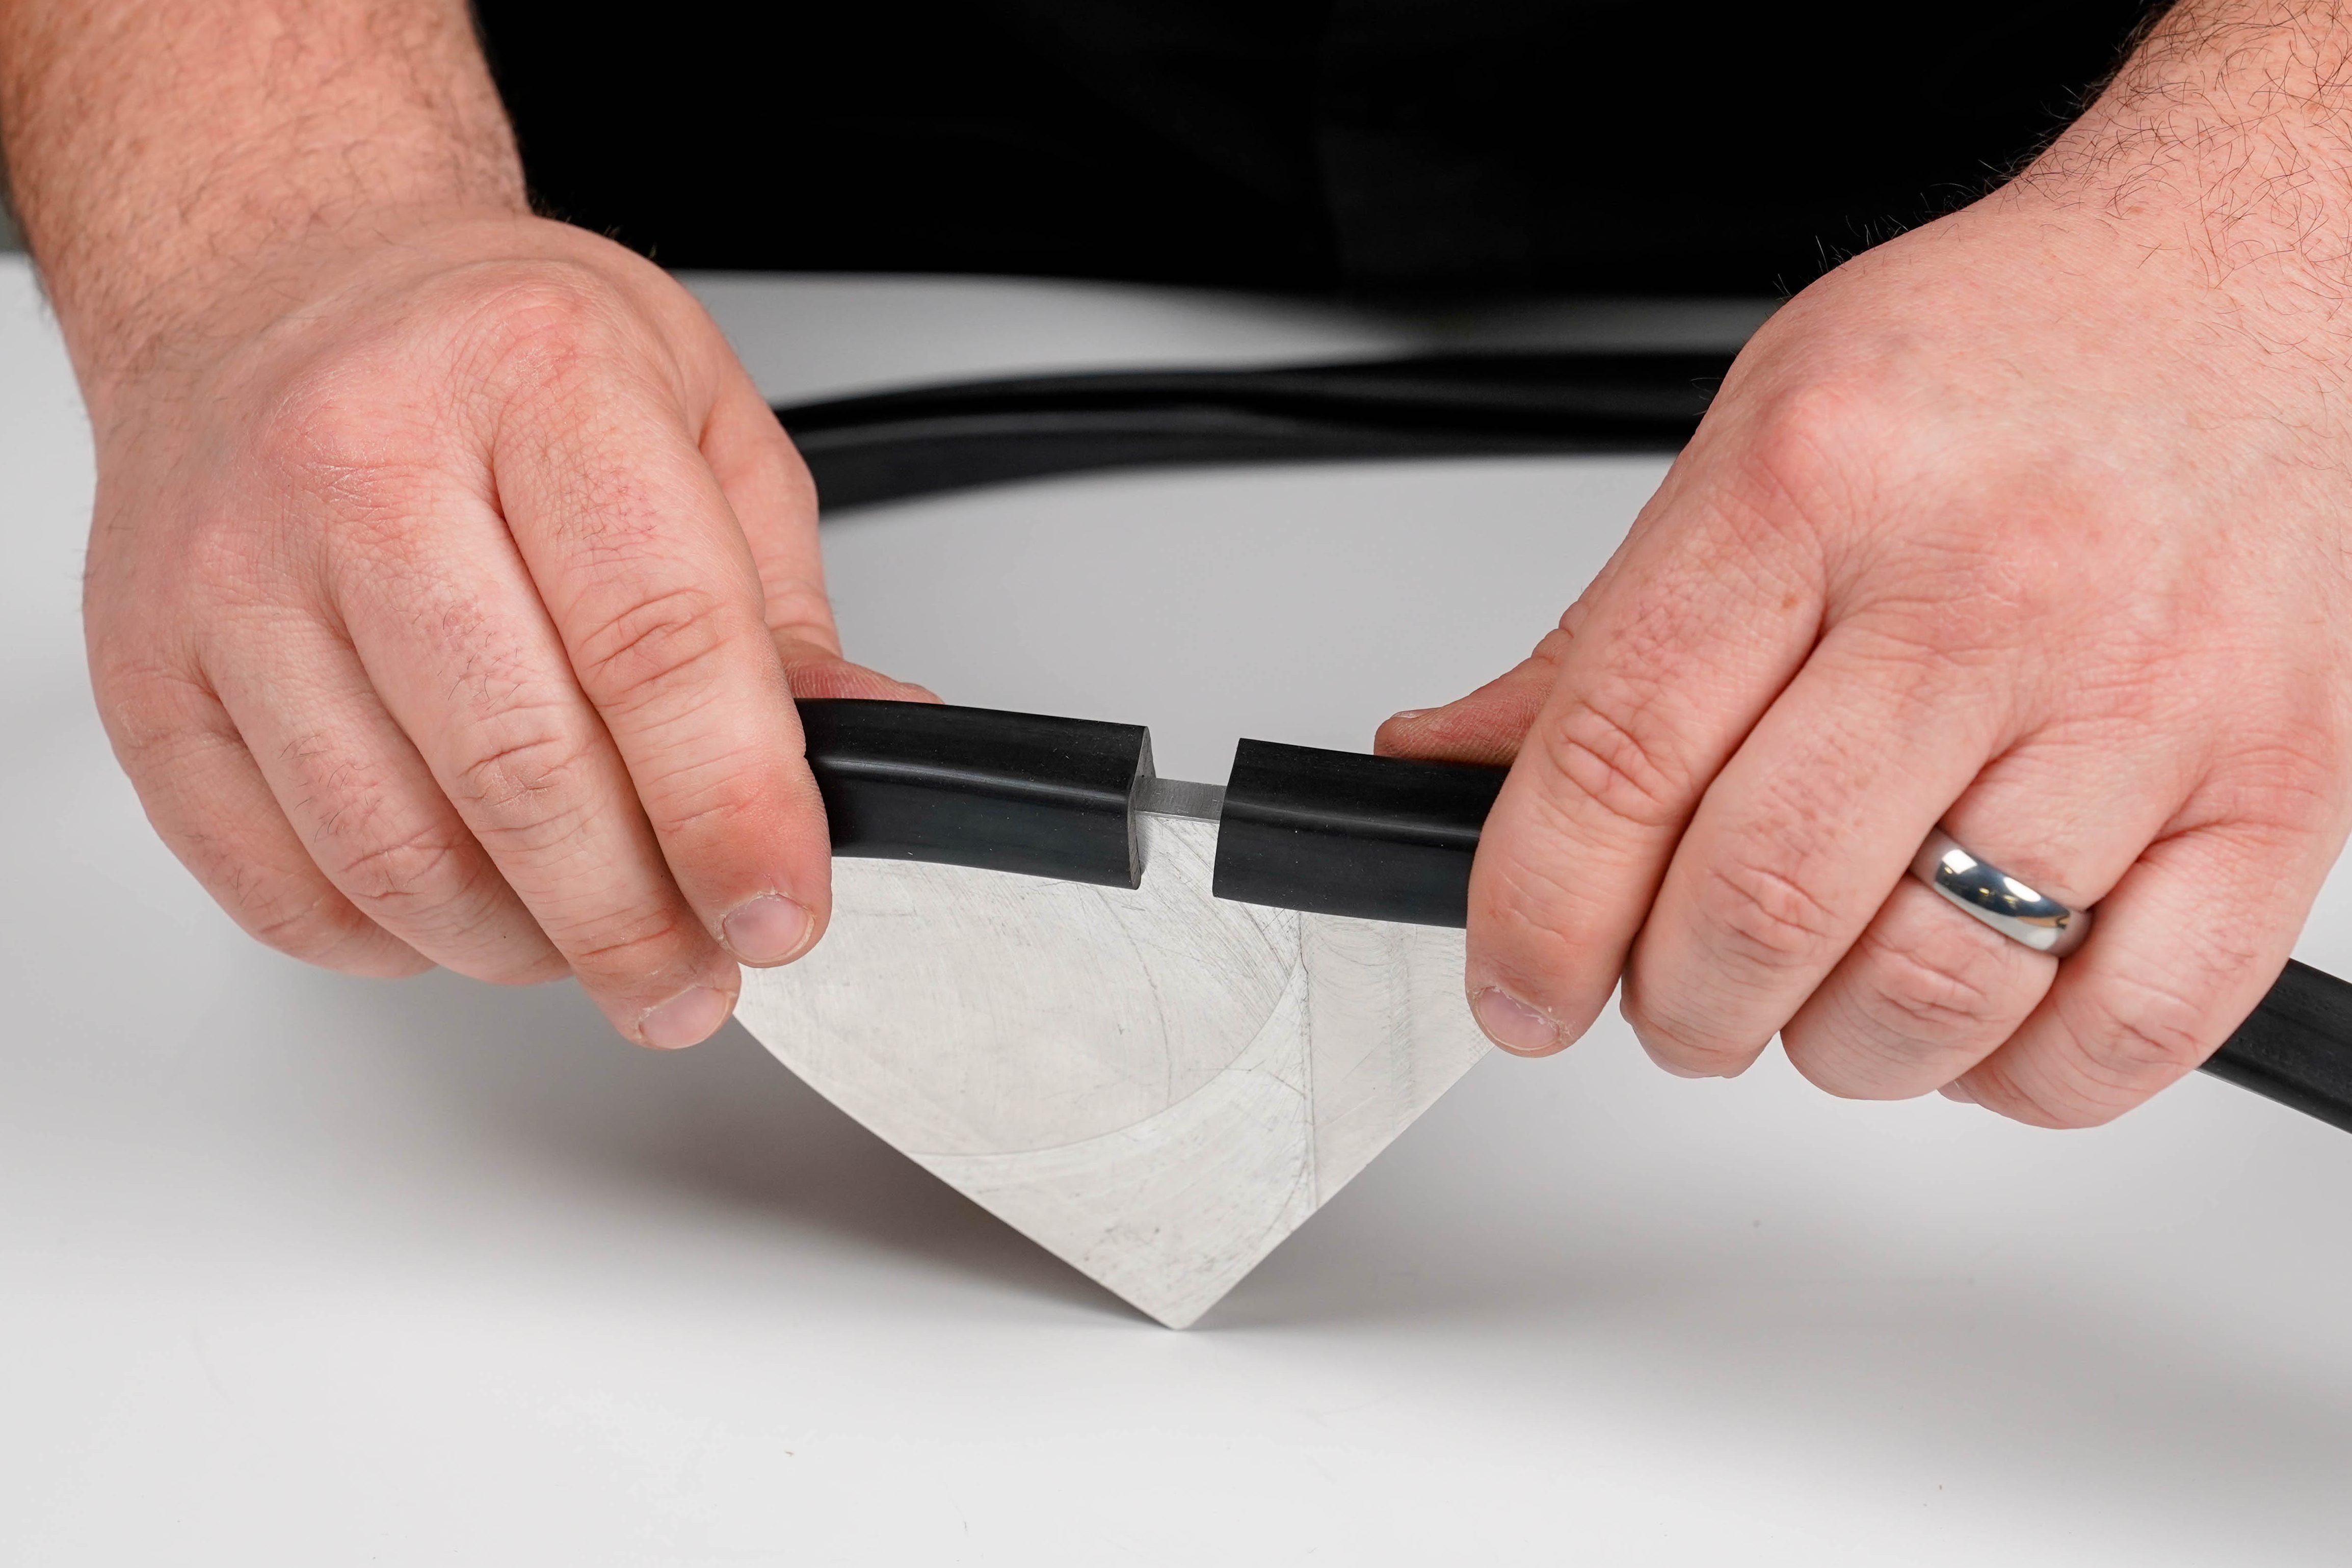
Mitering the Corners
To achieve a tight seal, corners should be mitered at the correct angle. The angle is determined by measuring the glass corner, subtracting that number from 180, and dividing by two. For example, a 90-degree glass corner requires 45-degree mitered cuts, while a 120-degree glass corner requires 30-degree cuts. Marking cut lines and using a straightedge improves precision.


Gluing and Sealing
To maintain a straight inner channel, a 1/4″ piece of metal, wood, or plastic can serve as a temporary guide, which should be removed quickly as the adhesive begins to cure.
For bonding the ends together, Loctite 495 Super Bonder is recommended. A small, even application prevents excess buildup. Use a paperclip for precise adhesive placement.

When joining the ends, use slow even movements to ensure the gasket stays aligned. Remember to quickly remove the template while also being careful not to disturb the gasket before the glue is fully cured.

Installation and Final Adjustments
Installation varies by gasket type:
- Rope-in gaskets require placing the glass in the gasket first before roping it into the frame. See how to install a rope-in gasket here.
- Locking strip gaskets are installed onto the body of the vehicle first, followed by the glass and then the locking strip. See how to install a locking strip gasket here.
A lubricant, such as soapy water, helps ease installation. Ensuring the gasket is properly seated results in a secure, weatherproof fit.
A properly fitted windshield gasket enhances both the appearance and functionality of a classic car. Selecting the right profile, making clean cuts, and using proper adhesives ensures a professional result that maintains the vehicle’s integrity.
Are you working on a project where direct replacement parts won’t work? Check out our Street Rod line! You can also request a free Street Rod Catalog or view our digital version here. Not sure what will fit your project? We offer sample packs so you can test fit to find the perfect sealing solution. Contact us today to order your free samples!
At Steele, we’re more than just high-quality products, we’re your trusted resource for completing your weatherstripping projects with confidence.
Whether you’re working on a classic car or truck, street rod, RV, or boat, our expert team is here to help. If you have questions about weatherstripping or need product guidance, we’re just a call or click away.
📞 Call us at 800-650-4482
📧 Send us an email
💬 Chat with us live on our website
Need installation help?
Check out our How-To video series on YouTube for step-by-step guidance and tips.
Stay connected!
Follow us on Facebook and Instagram for updates, inspiration, and more.

Did you find this article helpful? Tell us why!