
In the RV manufacturing process, screws are used to join individual sections of the exterior wall paneling together. If these screws were exposed it would not only be unattractive but would also leave the screws vulnerable to outdoor elements. To prevent this, manufacturers use a screw track accompanied by a cover to protect those exposed screws and provide a finished look to the exterior of the RV.
The Insert Trim, also referred to as Screw Track Cover, has one important job of protecting the hardware and screw track from damage caused by outdoor elements. However, manufacturers opt for the quick and cheap option of vinyl insert trim, which results in failing seals within a short time.
In this guide, we’ll provide you with the knowledge of how to find the right insert trim replacement and how to install it.
Finding a Replacement
The vast majority of RVs on the market will have a plastic or vinyl insert trim and as we stated previously, low quality materials like vinyl or thermoplastic cannot stand up to the elements. Sun exposure will crack and shrink the material, causing it to become loose in the track which is why these pieces are notorious for detaching while driving.

That’s where Steele comes in! Our Insert Trim and Screw Track Covers are manufactured from 100% EPDM rubber providing exceptional UV and weather resistance. This means it will not fade, shrink, or crack, but that’s not the only thing that sets our Insert Trim apart!
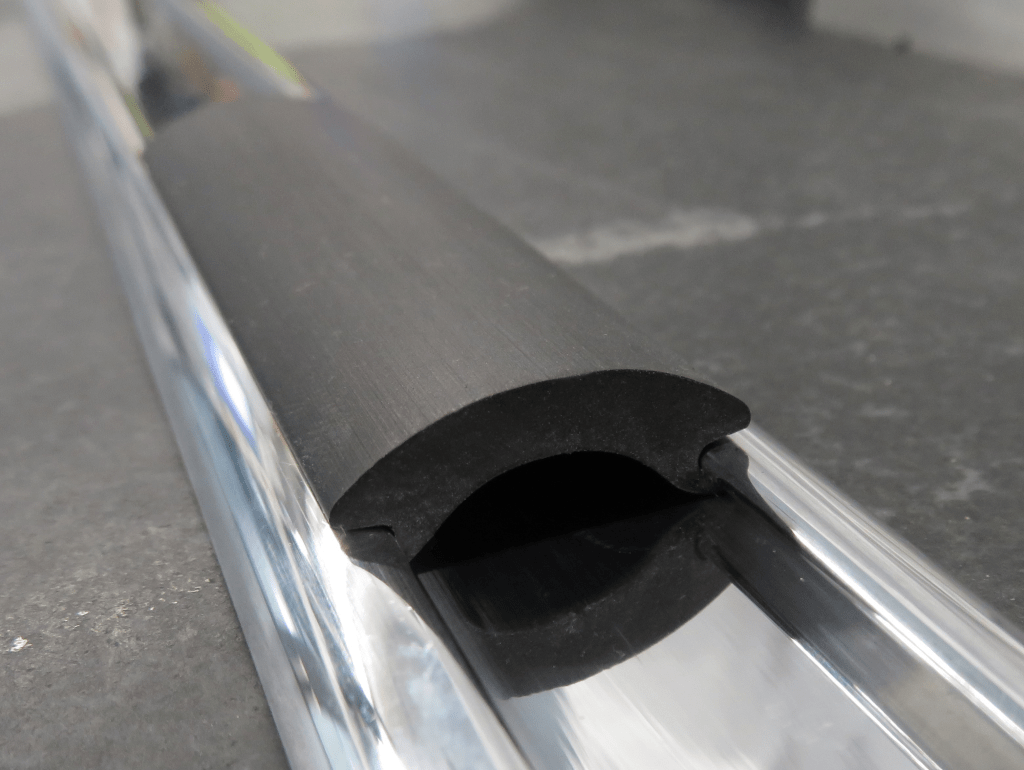
Most factory insert trim sits in the track under the top and bottom lip. Our innovative product is designed to sit on top of the top and bottom lip to cover the entire track. This prevents water and dirt from getting into the track and damaging the hardware. It also provides a nice, finished look when installed.
Usually we recommend going off your existing seal, but due to many insert trim pieces shrinking, that may not be the best option. Instead, measure your screw track to get an idea of the size you need. Then, compare those measurements to the products in our RV Catalog to find your replacement. We also offer a free sample pack of our insert trim so you can test fit before purchasing anything! Contact us today to request your free sample pack.
Installation
Materials needed:
- New Insert Trim
- Plastic scraper/tuck tool
- Mitering scissors (or other type of sharp utility scissors)
For this installation, we used our 5/8″ Insert Trim, part #70-3782-240.
Step 1
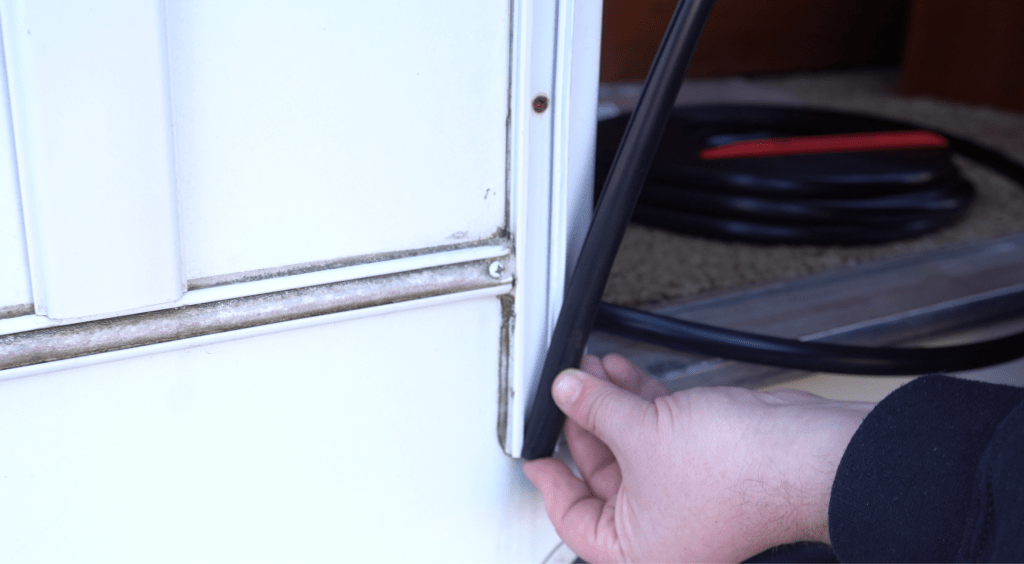
Since our insert trim tucks in and also sits on top of the track, we’ll be applying one side at a time. Start with either side of your seal, align the groove on the seal to the side of the track, and gently push that into place.
Step 2

Next, taking your plastic tuck tool, you will gently apply pressure to push the remaining side of the seal into place. During this step, you don’t want to use something sharp. Tools like a screwdriver may scratch or damage your new seal. Use Step 1 and Step 2 along the entire length of the screw track you’re working on.
Step 3

Once your track has the new seal installed, trim off the excess and press the last little piece into place to complete your installation. If your new seal is EPDM rubber, you don’t need to worry about shrinkage, so you can cut the piece to fit your track exactly.
Check out the How To video below!
At Steele, we’re more than just high-quality products, we’re your trusted resource for completing your weatherstripping projects with confidence.
Whether you’re working on a classic car or truck, street rod, RV, or boat, our expert team is here to help. If you have questions about weatherstripping or need product guidance, we’re just a call or click away.
📞 Call us at 800-650-4482
📧 Send us an email
💬 Chat with us live on our website
Need installation help?
Check out our How-To video series on YouTube for step-by-step guidance and tips.
Stay connected!
Follow us on Facebook and Instagram for updates, inspiration, and more.

Did you find this article helpful? Tell us why!