Slide out seals play a crucial role in protecting your RV from many outdoor elements. When these seals become worn out, cracked, or deteriorated, they can leave your RV vulnerable to costly and extensive damage.
How to Find Replacement Seals
The first step to find replacement weatherstripping is to identify what’s currently on your RV. RV manufacturers used a wide variety of seals during the manufacturing process, making the weatherstripping on one RV inconsistent from the next. So, all of our RV seals are considered universal rather than being specific to the year, make, or model like a classic car.
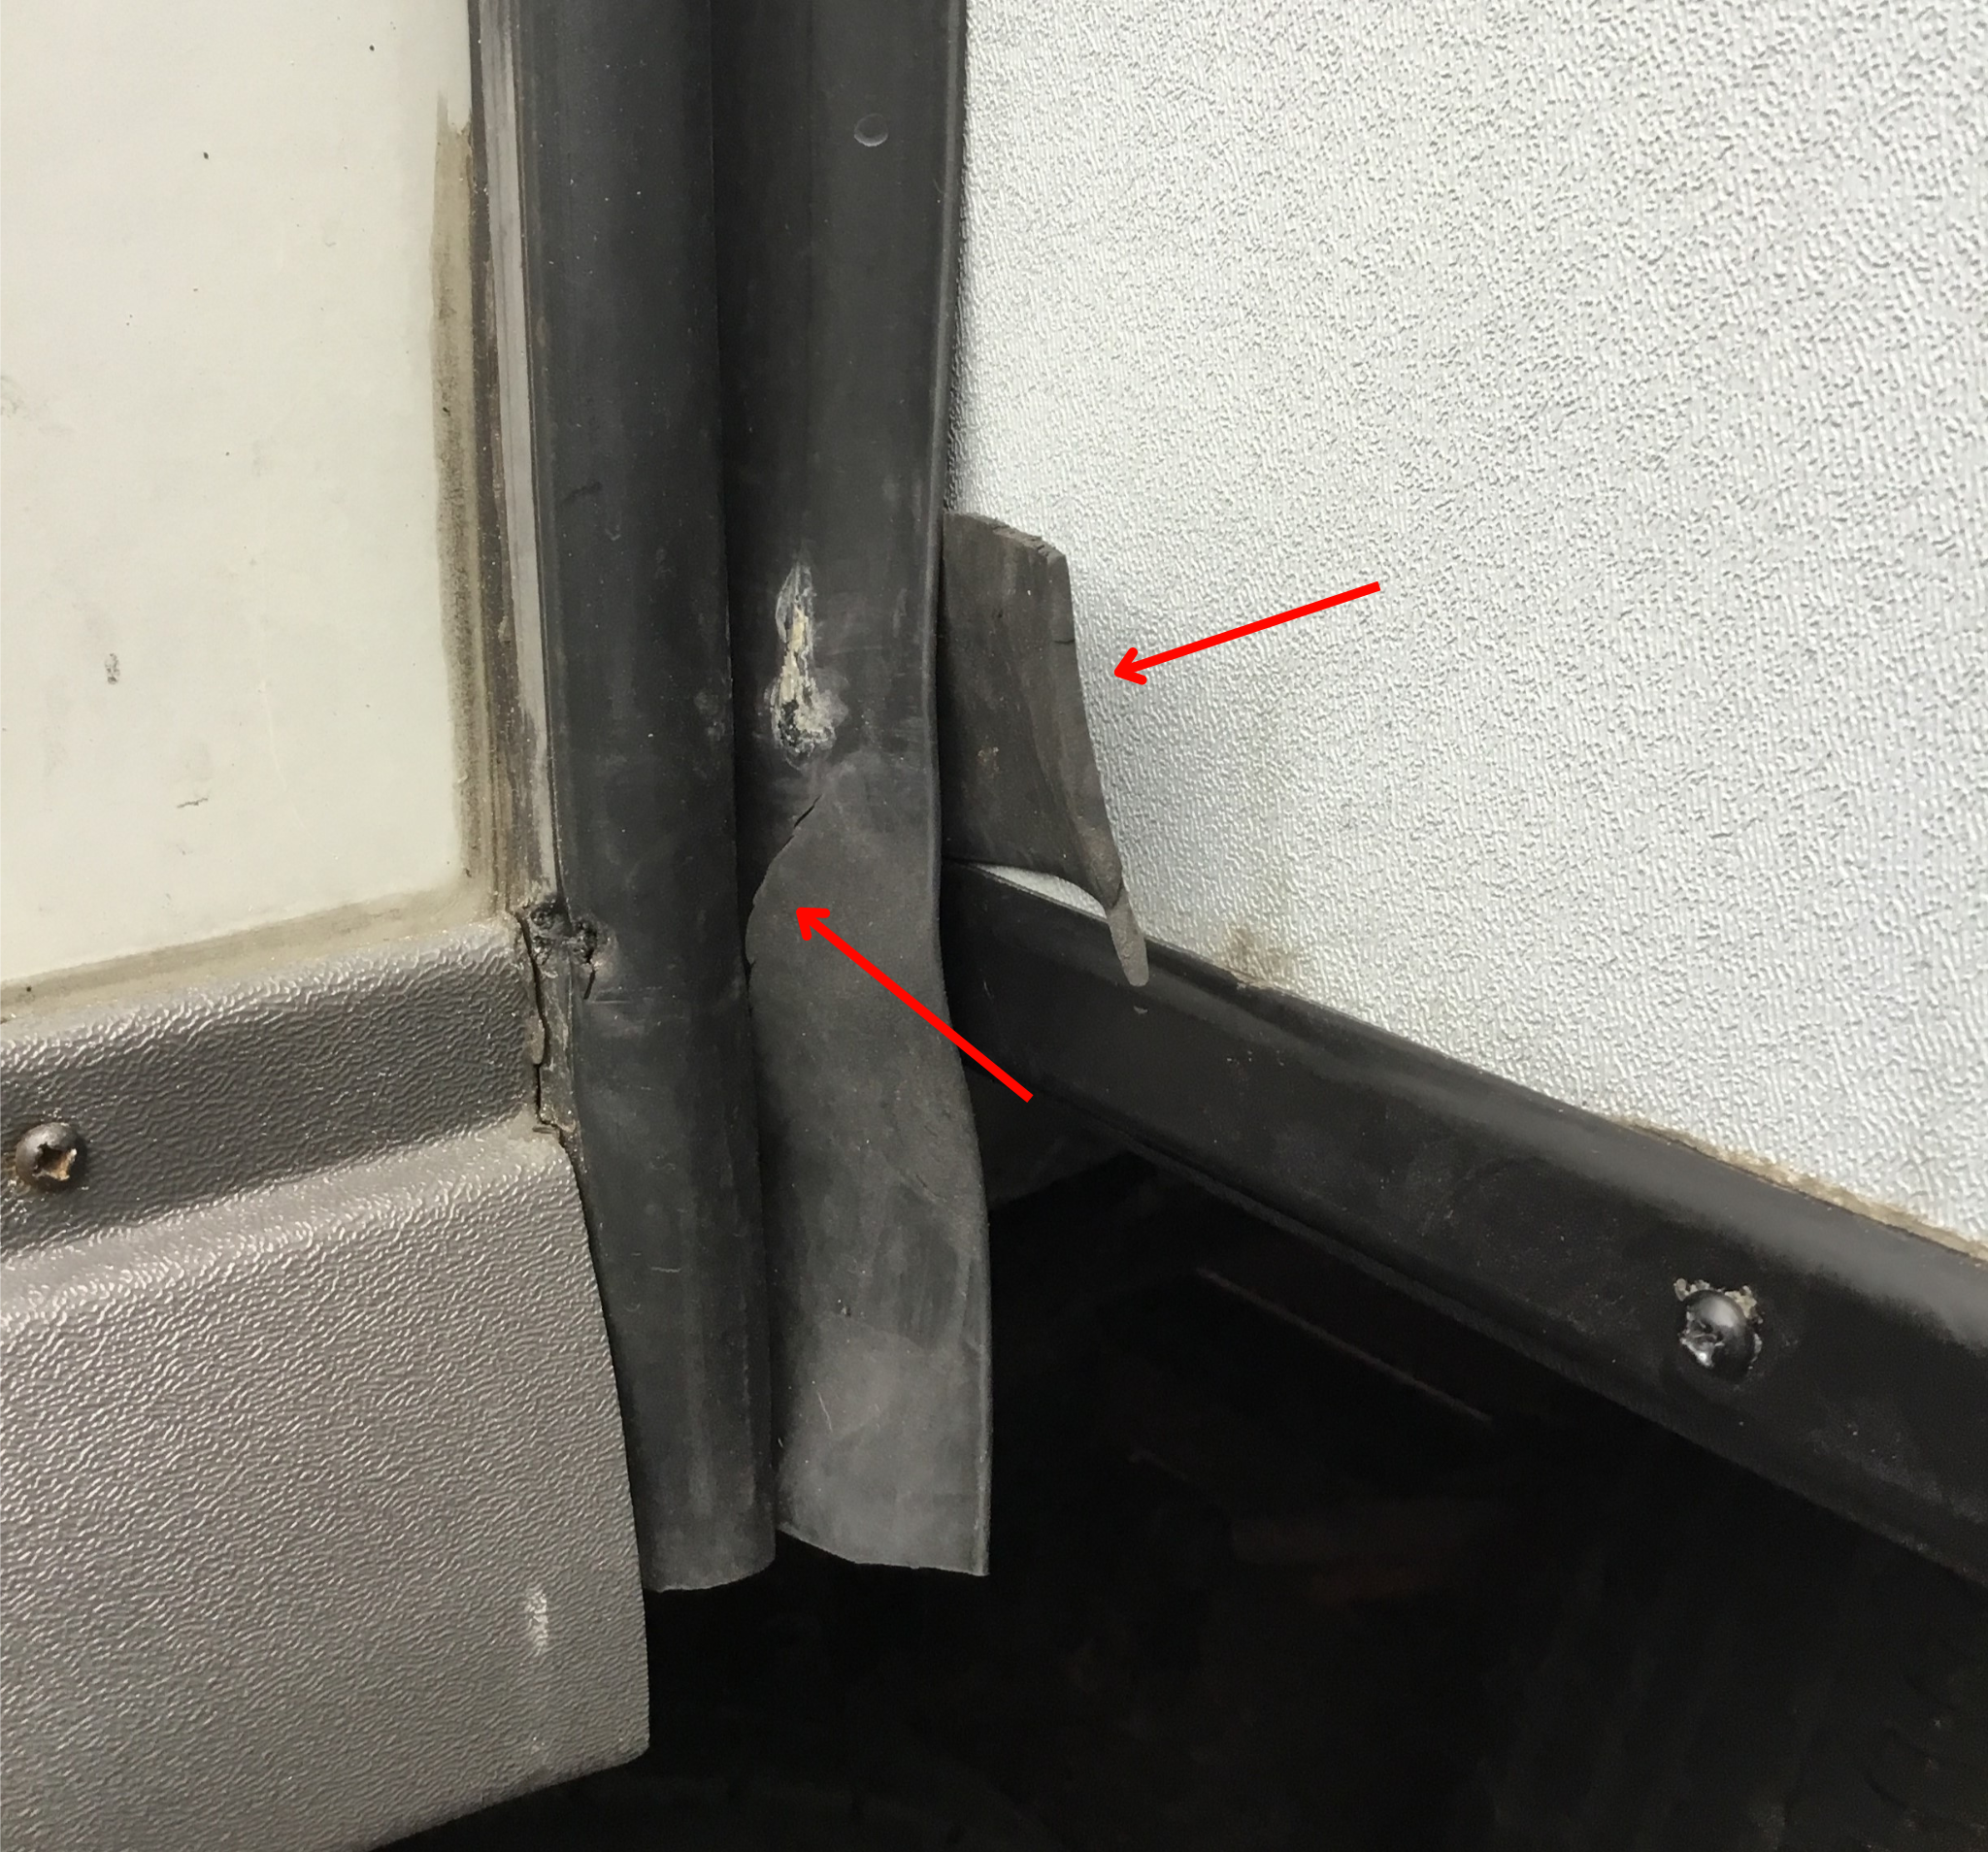
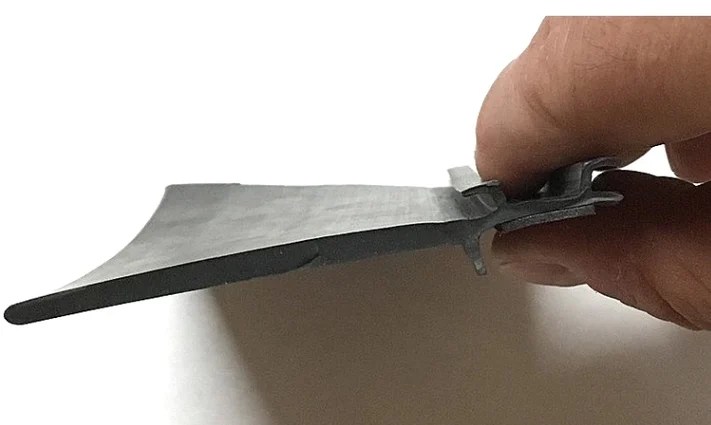
What you want to see is a cross section view of the bulb and wiper profile. A cross section view is a straight on look at the seal, allowing you to see the layer structure – see example photo below.
To achieve this you can get underneath the slide box and look up at the profile, or if you have a press-in/push-on seal, you may pull it out of place a few feet starting from the bottom. Measurements will be key! Measure the bulb size as well as the wiper. The wiper sweeps against the side of the slide box to remove dust, debris, and water when the box opens or closes. So it’s very important to choose the right length for your RV.
Once you know your profile type and measurements, you can cross reference and confidently choose the right replacement seal. We offer a FREE RV Catalog that includes cross sectional photos and measurements of all of our parts. You can request your free mailed catalog here, or instantly view our digital version here. We also offer free sample packs so you can try before you buy! To request our slide out seal sample packs, contact our customer service team at 800-650-4482 or by email.
Installing Your Seals
Tools we need:
- Adhesive
- Adhesive Remover
- Alcohol Wipes
- Masking Tape
- Scissors
- Rubber Gloves
- Scraper Tool
- Popsicle Stick
1. Removing the Old Seals
This is where masking tape will come in handy. Laying down a layer of masking tape around the entire perimeter of the old slide out seal will ensure that you keep your new seal straight. The tape will also act as a barrier to protect your RV from scratches and excess glue. Once you’ve laid applied the tape, completely remove your old seals. If the seals were glued on, there will be adhesive residue and leftover pieces of the old seal. Don’t focus on that just yet, after the seal is completely removed we’ll come back to clean and prep the surface.
We offer a variety of application types for our slide out seals: glue-on, Peel-N-Stick, press-in, and push-on. You can take note of how your original seal was installed, although your new seal does not have to be installed the same way.
2. Cleaning and Prepping the Surface
First, sweep off the top of your slide out box to remove any extra leaves, sticks or debris up there. Next, wipe of the dirt and debris that the old seal has trapped over the years. You can do this with a shop rag or old t-shirt. After cleaning off the dirt and debris, you will want to spray the old adhesive or glue with an adhesive remover. This breaks down the glue and makes it easier for you to come back and scrape off. Use your scraper tool to remove the residue of the old seal. Doing this will give your new seal a clean and smooth surface to cling to.
Finally, wipe the perimeter with an alcohol pad. This will remove oils or residue that might be left behind. Again, this makes sure your new seal has a clean surface to adhere to. You can also take an alcohol pad and use it to wipe down the new seal where you will be gluing. This removes any residue that might still be on the seal from the manufacturer.
3. Installing and Trimming the New Seal
*For this slide out seal installation, we are going to walk you through the steps of installing one single piece along the bottom of the slide out box and one continuous piece along the sides and top.
When installing glue-on seals – less is more! It’s vital to use the proper gluing technique to ensure a strong, durable bond between your new seal and the metal surface. Starting at the bottom of your slide out, run a thin bead of adhesive along the RV surface where the seal will be applied and spread it with a popsicle stick. Spreading the glue makes for a quicker drying time and creates a larger surface area for the glue. After you’ve applied glue to the RV, do the same thing along the gluing side of your new seal. Let the glue sit for a few minutes to become tacky so the rubber will have an instant adhesion. Once the glue becomes tacky, add one final thin bead of adhesive to either surface (you don’t need to spread this one) and begin pressing the seal into place.
Note: For projects with a larger surface area like a slide out, using this method, install only 2-3 feet at a time. This prevents your adhesive from drying too quickly and allows you to take your time.
Once you reach the end of the bottom side, cut off the excess rubber. But, leave a little extra for a final trimming. Since the top and sides will be one continuous piece, the bulb will curve around the corner and the wiper on the top will overlap the sides. To start this section, place one long piece of the weatherstripping over the top of your slide out box and let it hang off the sides. Make sure there is enough to reach the bottom on both sides.
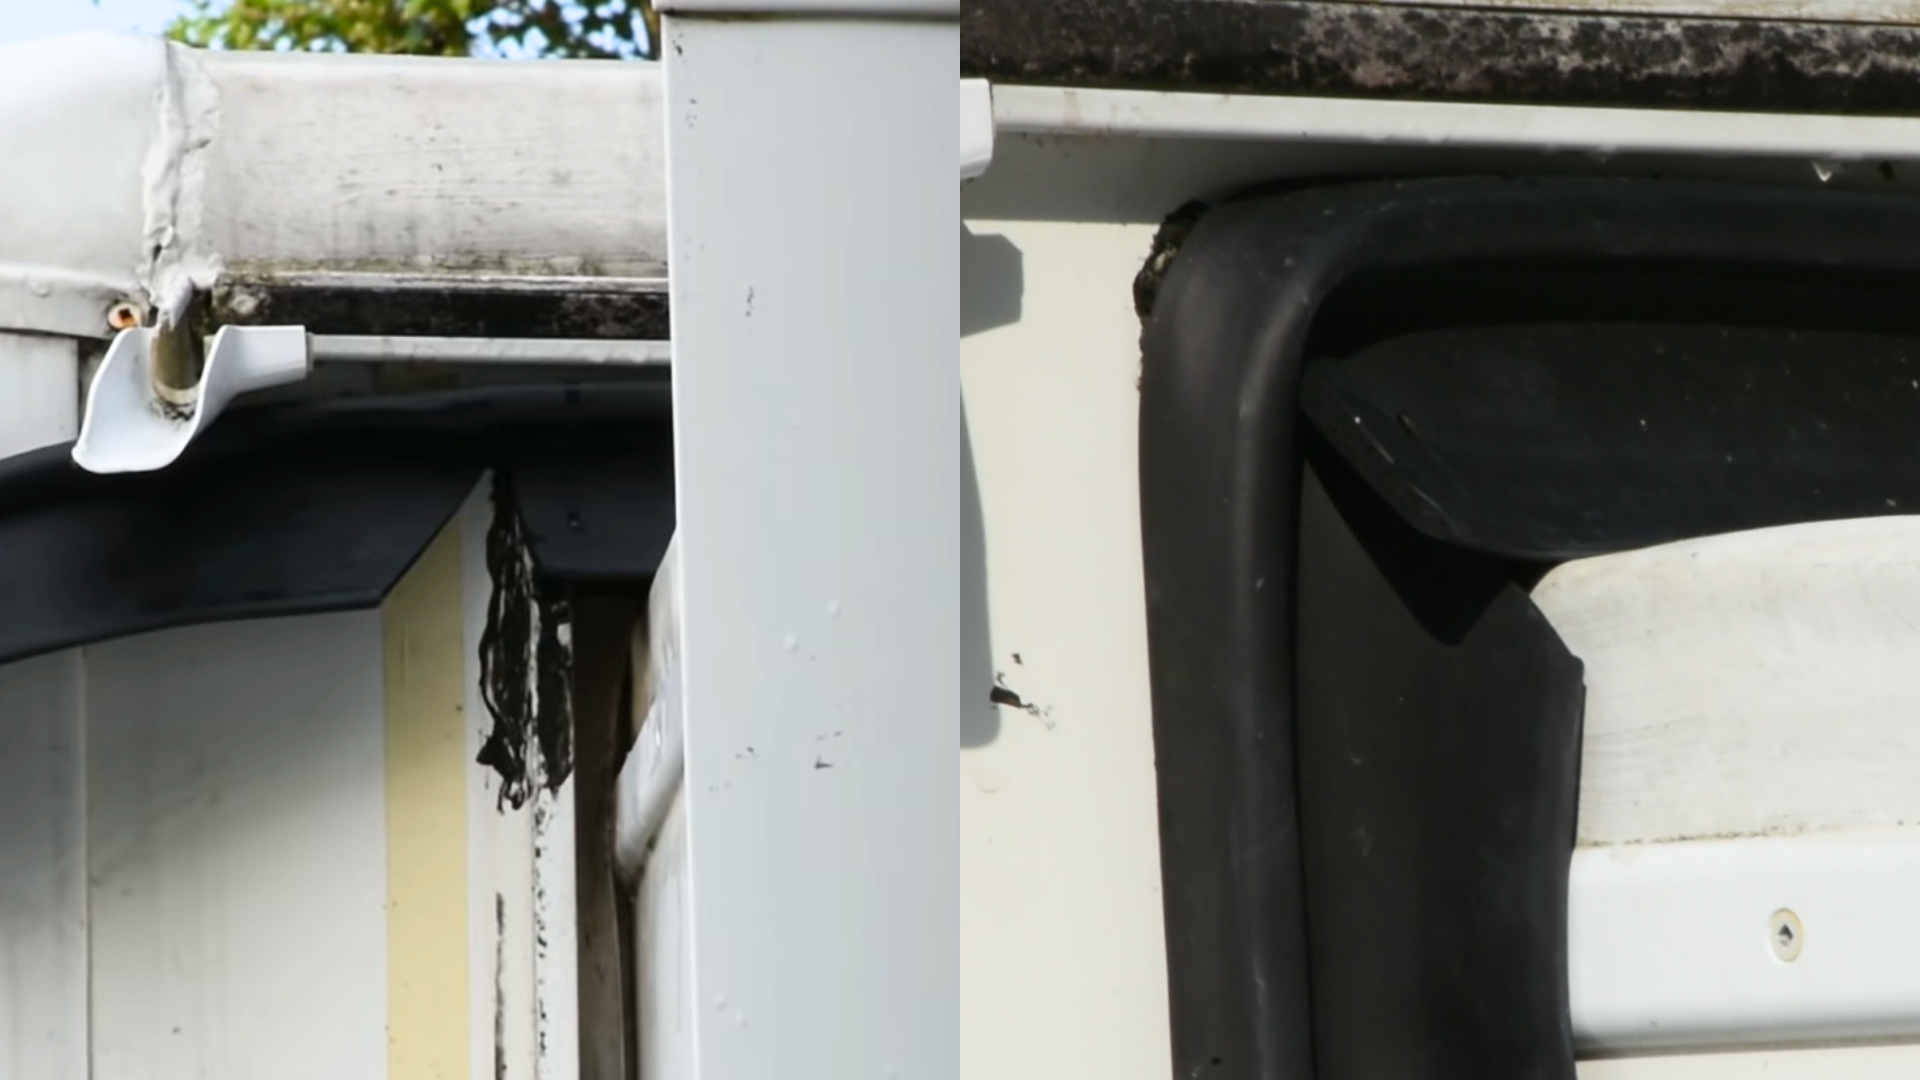
Glue the center of the seal on first, using the same technique as you did on the bottom, then finish gluing the rest of the top portion. For the corners, cut the wiper seal at an angle and then fold downward, guiding the side wiper underneath the top wiper. See example photo below.
Continue the gluing method for every 2-3 feet until you have installed the entire slide out seal. Once you reach the bottom of the sides, it’s time to do the final trimming.
You will want the side wiper seal to overlap the bottom, which can be trick, so it’s important to take your time on this step. Cut the bottom piece so the length is sitting just inside the bulb from the side seal. Then, cut the side seal flush with your masking tape line that you placed earlier. Next, trim a bulb width slit out of the side wiper to allow the bottom bulb to sit flush against the side bulb. See example below.
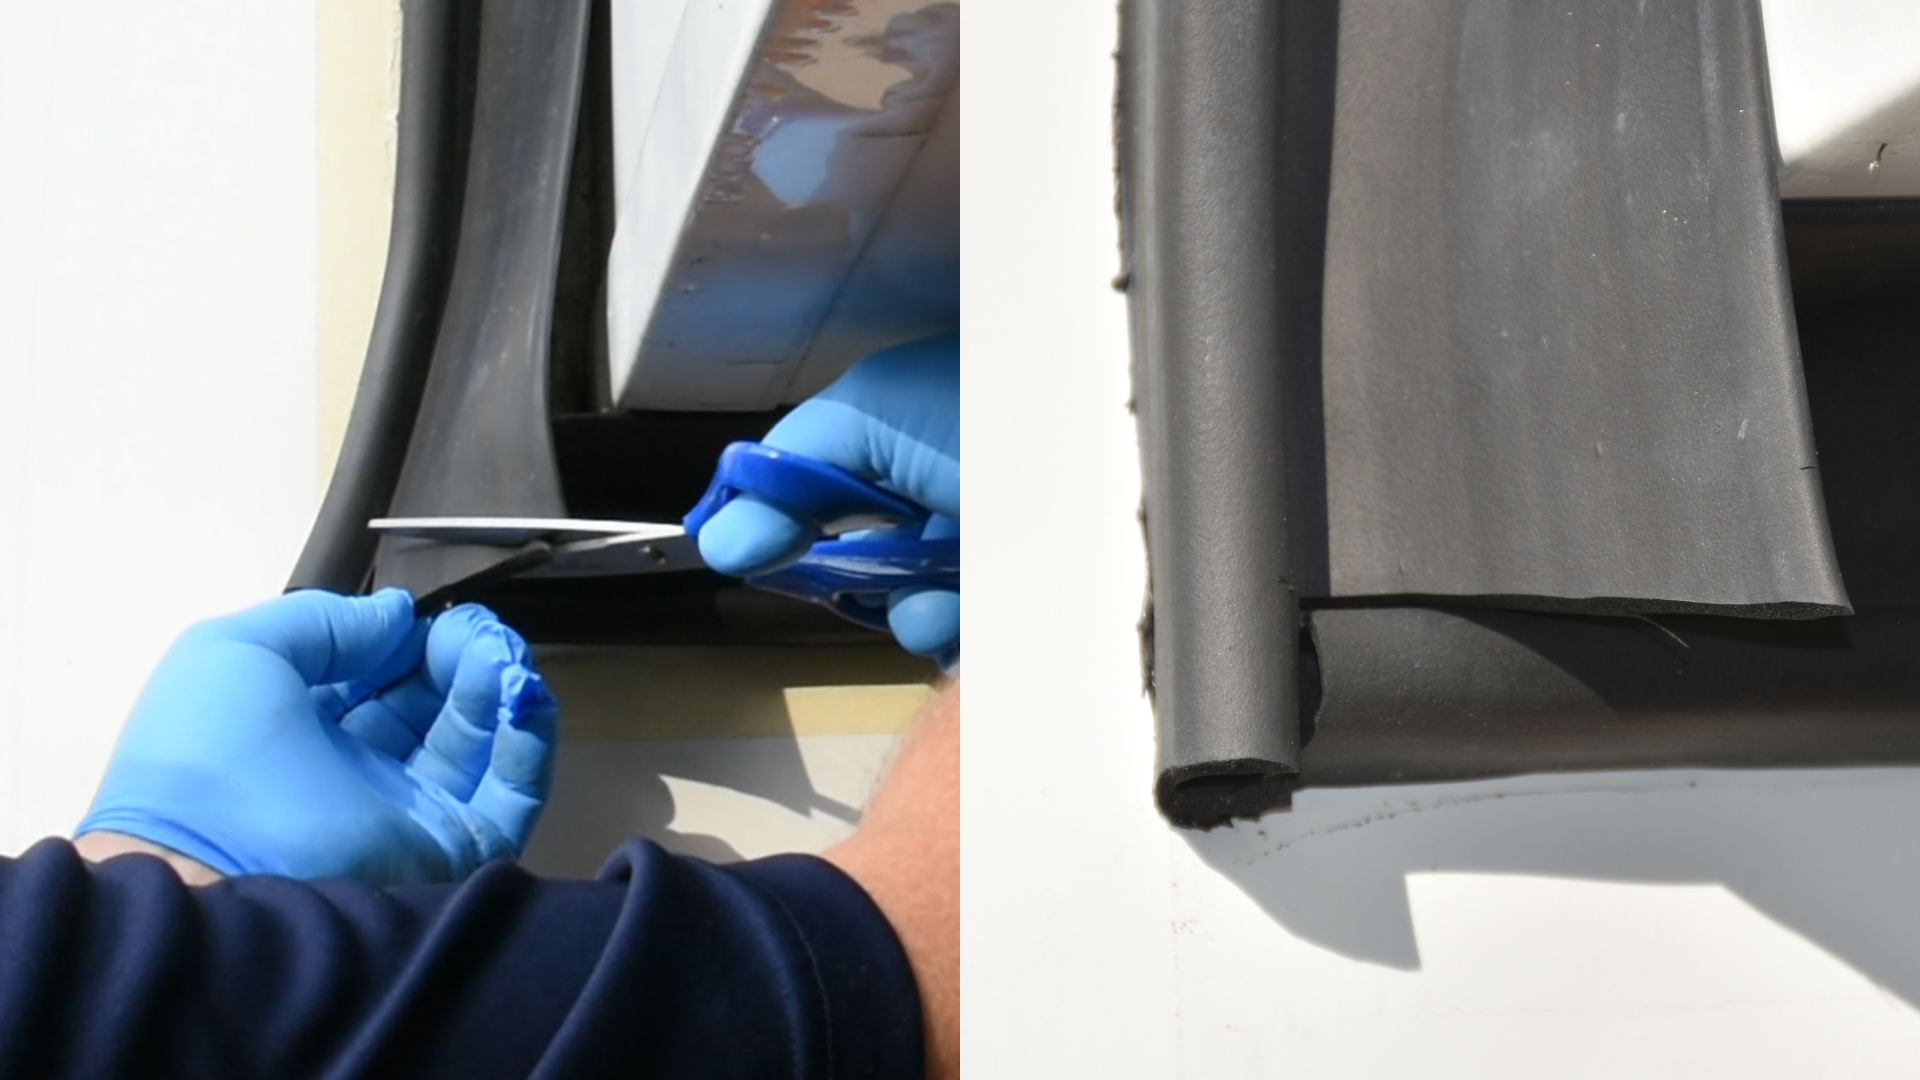
Doing this diverts rain away from the RV and allows the hollow section of the bottom bulb to be sheltered. Repeat this process with the opposite side.
Lastly, you can remove the masking tape. If you have any excess glue seeping out, go ahead and clean that off before it sets too long. Weatherstripping adhesive takes 24 hours to fully cure, so don’t close your slide box until after the curing period. Closing the slide box before the glue is fully dry can cause your seal to slide around, possibly leading to leaks.
Steele not only offers high-quality products, but also the knowledge to help you complete your projects. If you have questions regarding weatherstripping for your classic vehicle, street rod, RV, or boat, don’t hesitate to contact us! Call us at 800-447-0849, send us an email, or chat with us on our website.
*For more help check out our How To series on YouTube!
Look for us on all your favorite social media platforms:

Did you find this article helpful? Tell us why!