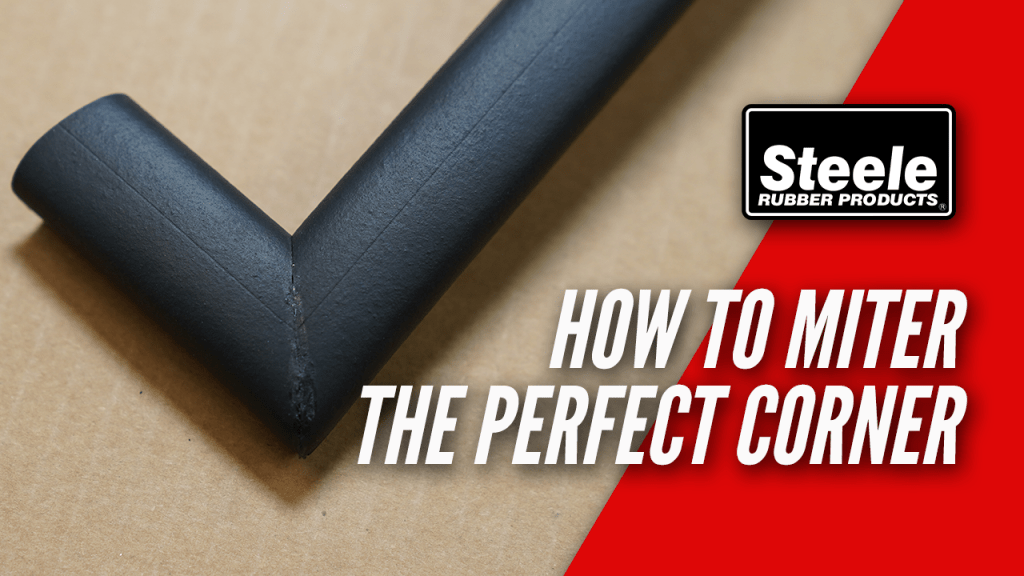
What is Mitering?
Mitering is a technique used to create a seamless joint between two pieces of material. In the case of RV or boat seals, mitering involves cutting the end of the seal at a 45-degree angle. When these cut pieces of rubber are joined together, they form a perfect 90-degree corner.
Is Mitering the Only Option for Corners?
There are three ways you can tackle corners:
- Formed (mitered)
- Continuous
- Butted (press-fitted)
Mitering is a technique known as the “formed” method. It is particularly useful when dealing with tight 90-degree corners, as it provides a polished and seamless finish.
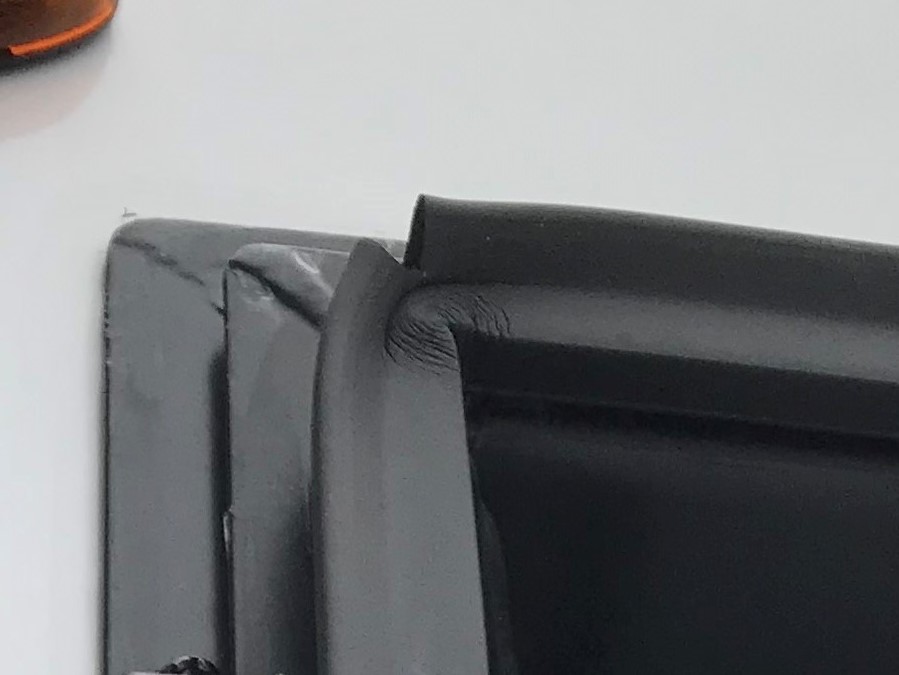

Continuous method involves rounding the corner with a seal, without any cuts to the rubber. Achieving a seamless appearance can be challenging, as you need to ensure that the rubber doesn’t kink or pucker. A continuous section of rubber that is kinked or puckered can create openings for pests and lead to water leaks.
It’s important to note that if you’re using this method for your slide out seal, kinks in the seal could allow air to escape and cause fluctuations in the cabin temperature.

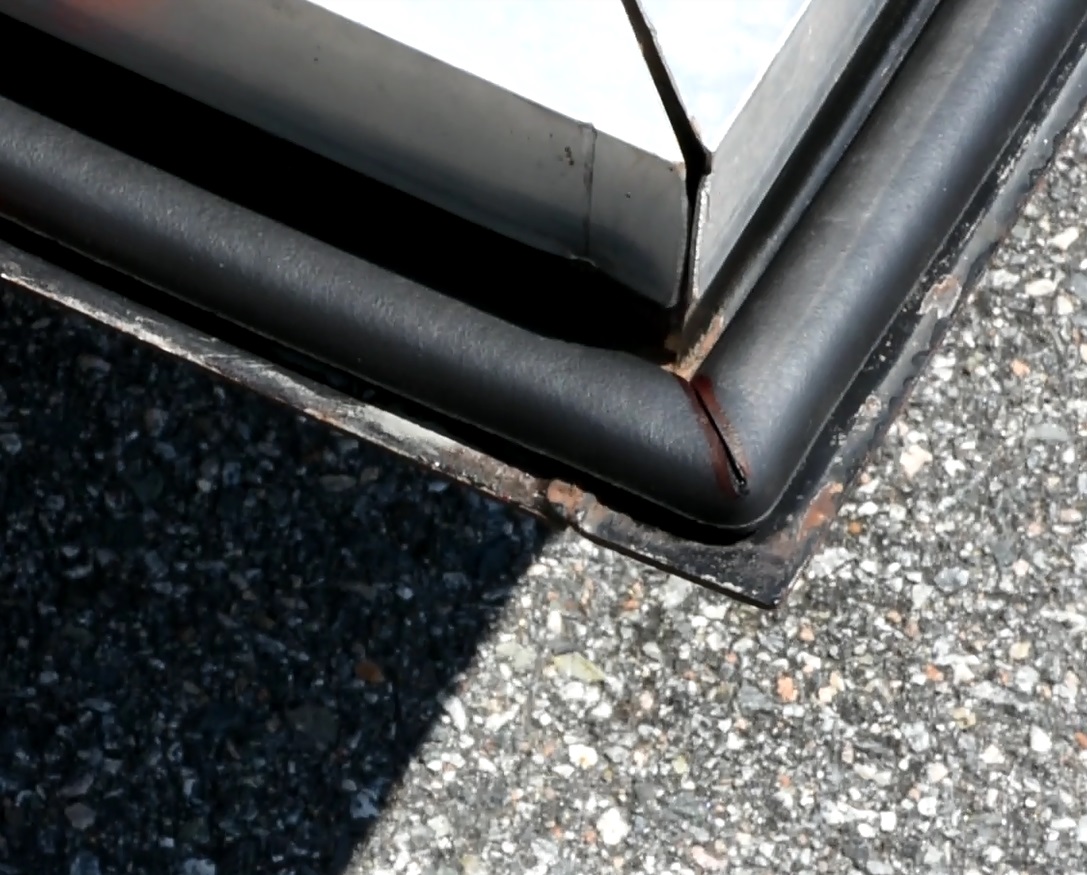
Press-fitted, also known as ‘butted’, is a method similar to mitering. The seal is cut to the desired length, but in the corners, the ends are simply pressed against each other without the use of adhesive. As a result, one seal end will rest on top of the other, creating a slightly unfinished appearance. It is important to note that this method is not recommended for 90-degree angles as it can lead to leaks due to the open seam.
How to Miter Your Rubber Seal
The following steps are for mitering the corners of a ramp gate seal, but they can also be used for compartment, slide out, and door seals, too. The tools needed are:
- Your new piece of weatherstripping
- A marker that will show up on rubber
- Loctite 495 Super Bonder (or similar super glue)
- A straight razor blade or mitering scissors
- A small 90-degree triangle template (see the image below for example)
Remember, the surface must be clean and dry to ensure the best adhesion of your seal!
With the pencil, make a 45-degree line in the corners of the surface that you are sealing, marking from the outside to the inside edge. If the seal will sit in a channel or in the middle of a ledge, make sure the line is longer than the seal is wide.
Lay the seal along the edge of the surface that it will be applied to, overlapping the corner, and mark the outside and inside edge of the seal where it meets the line.
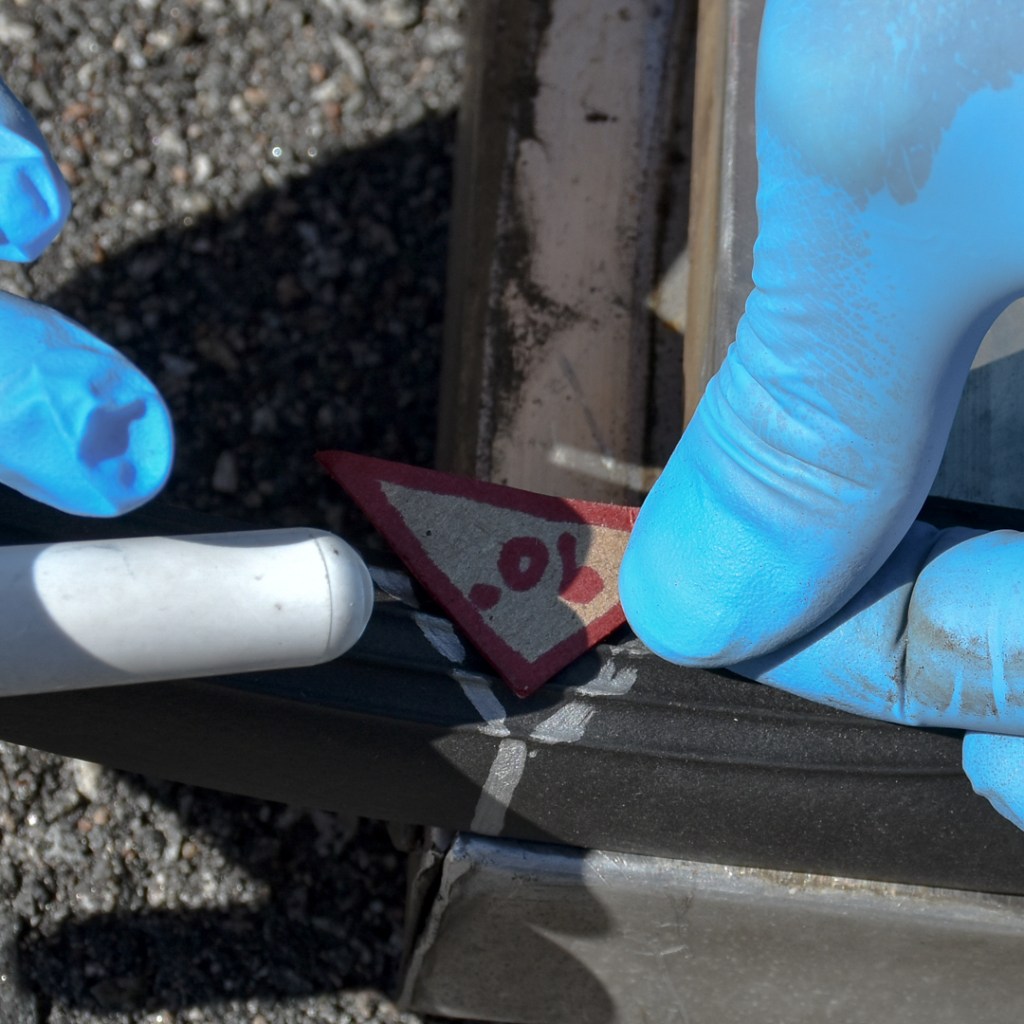
Using a triangle template, place the 90-degree tip of the triangle on the outside edge mark and line up the edge of the triangle with the inside edge mark.
Carefully mark a line across the seal on both sides of the triangle.
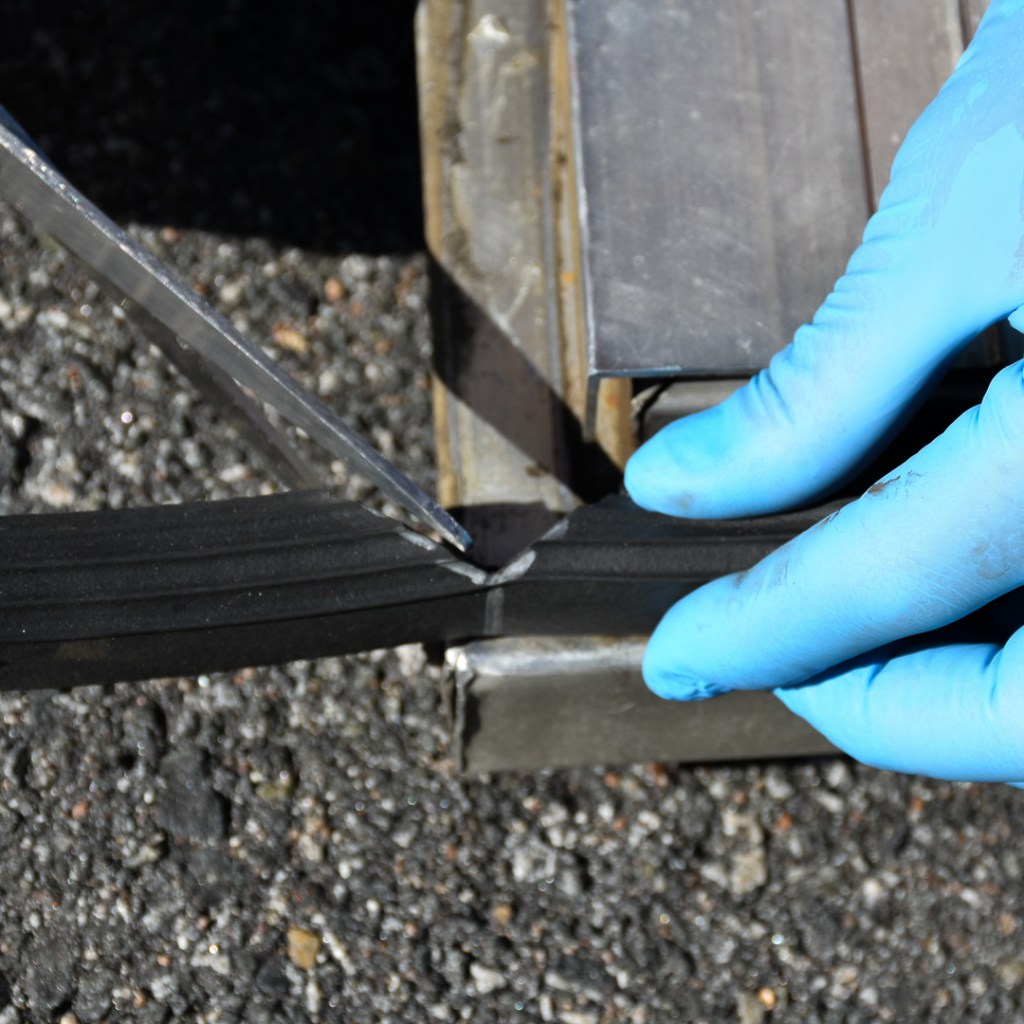
Using a knife or sharp scissors, trim the seal along the marked lines from the inside edge towards the outside. Don’t cut all the way through to the outside edge of the seal. You want to leave the outside edge holding the seal together. This makes the mitered corner look seamless and further ensures a leak-proof corner!

Carefully apply Loctite 495 to the cut edges and fold the seal together to form a 90-degree corner. TIP: Loctite 495 does not quickly dry when exposed to air, so you have some ‘work’ time to align the edges correctly- but once the edges touch, the bond sets immediately.
For compartment doors: After the four corners have been mitered, you may glue the two edges together similarly. Trim the seal to the correct length and glue together with Loctite 495.
Steele not only offers top-quality products, but top-quality knowledge to help you complete your projects, too. If you have questions regarding weatherstripping for your classic vehicle, street rod, RV, or boat, don’t hesitate to contact us! Call us at 800-447-0849, send us an email, or chat with us on our website.
*For more help check out our How To series on YouTube!
Look for us on all your favorite social media platforms:

Did you find this article helpful? Tell us why!